Objava je na voljo tudi v slovenščini — klikni tukaj.
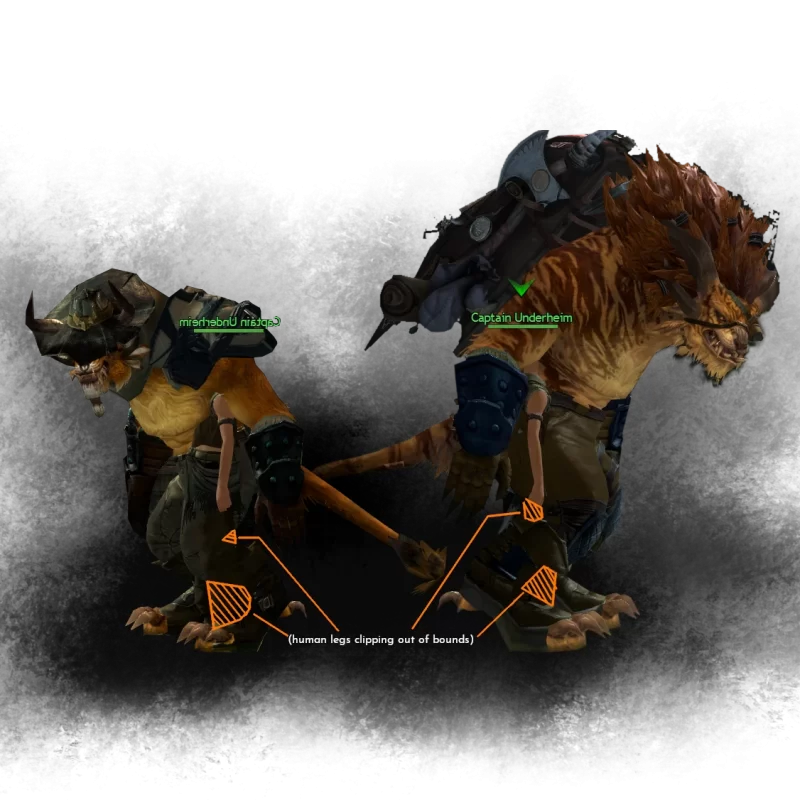
Previous post about this project can be found here.
I’m not sure how out-of-order the blog posts will be, since these blogs are ordered per costume part, but I’m doing multiple things in parallel. However, since the “let’s print the leg wire frame out of TPU” experiment didn’t really go over well, I first moved over to doing the head.
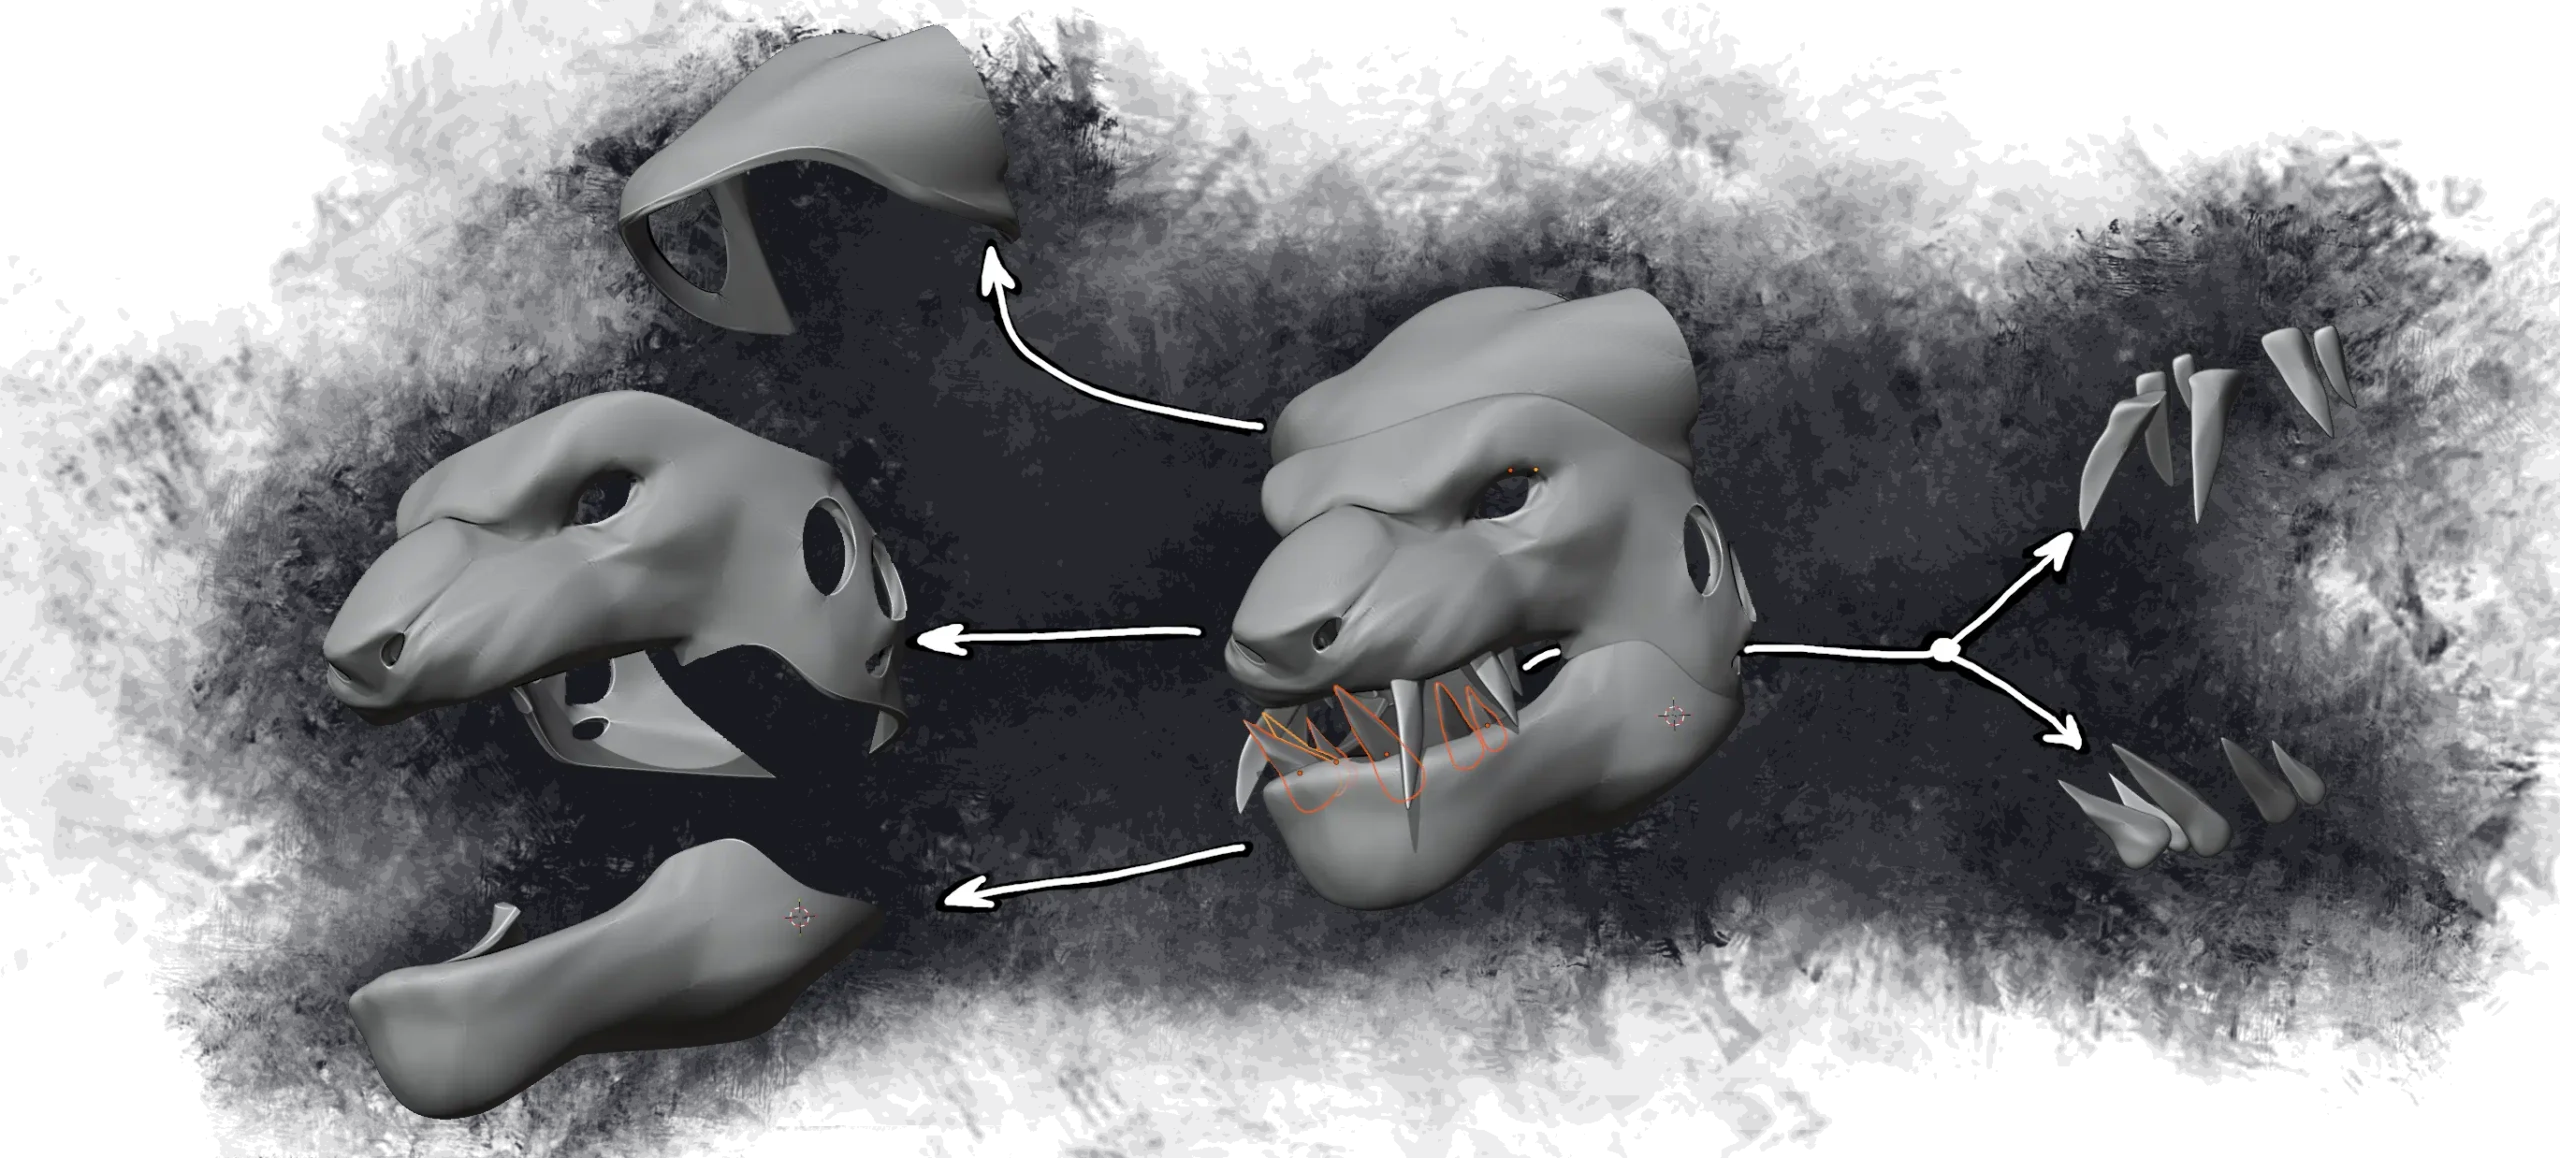
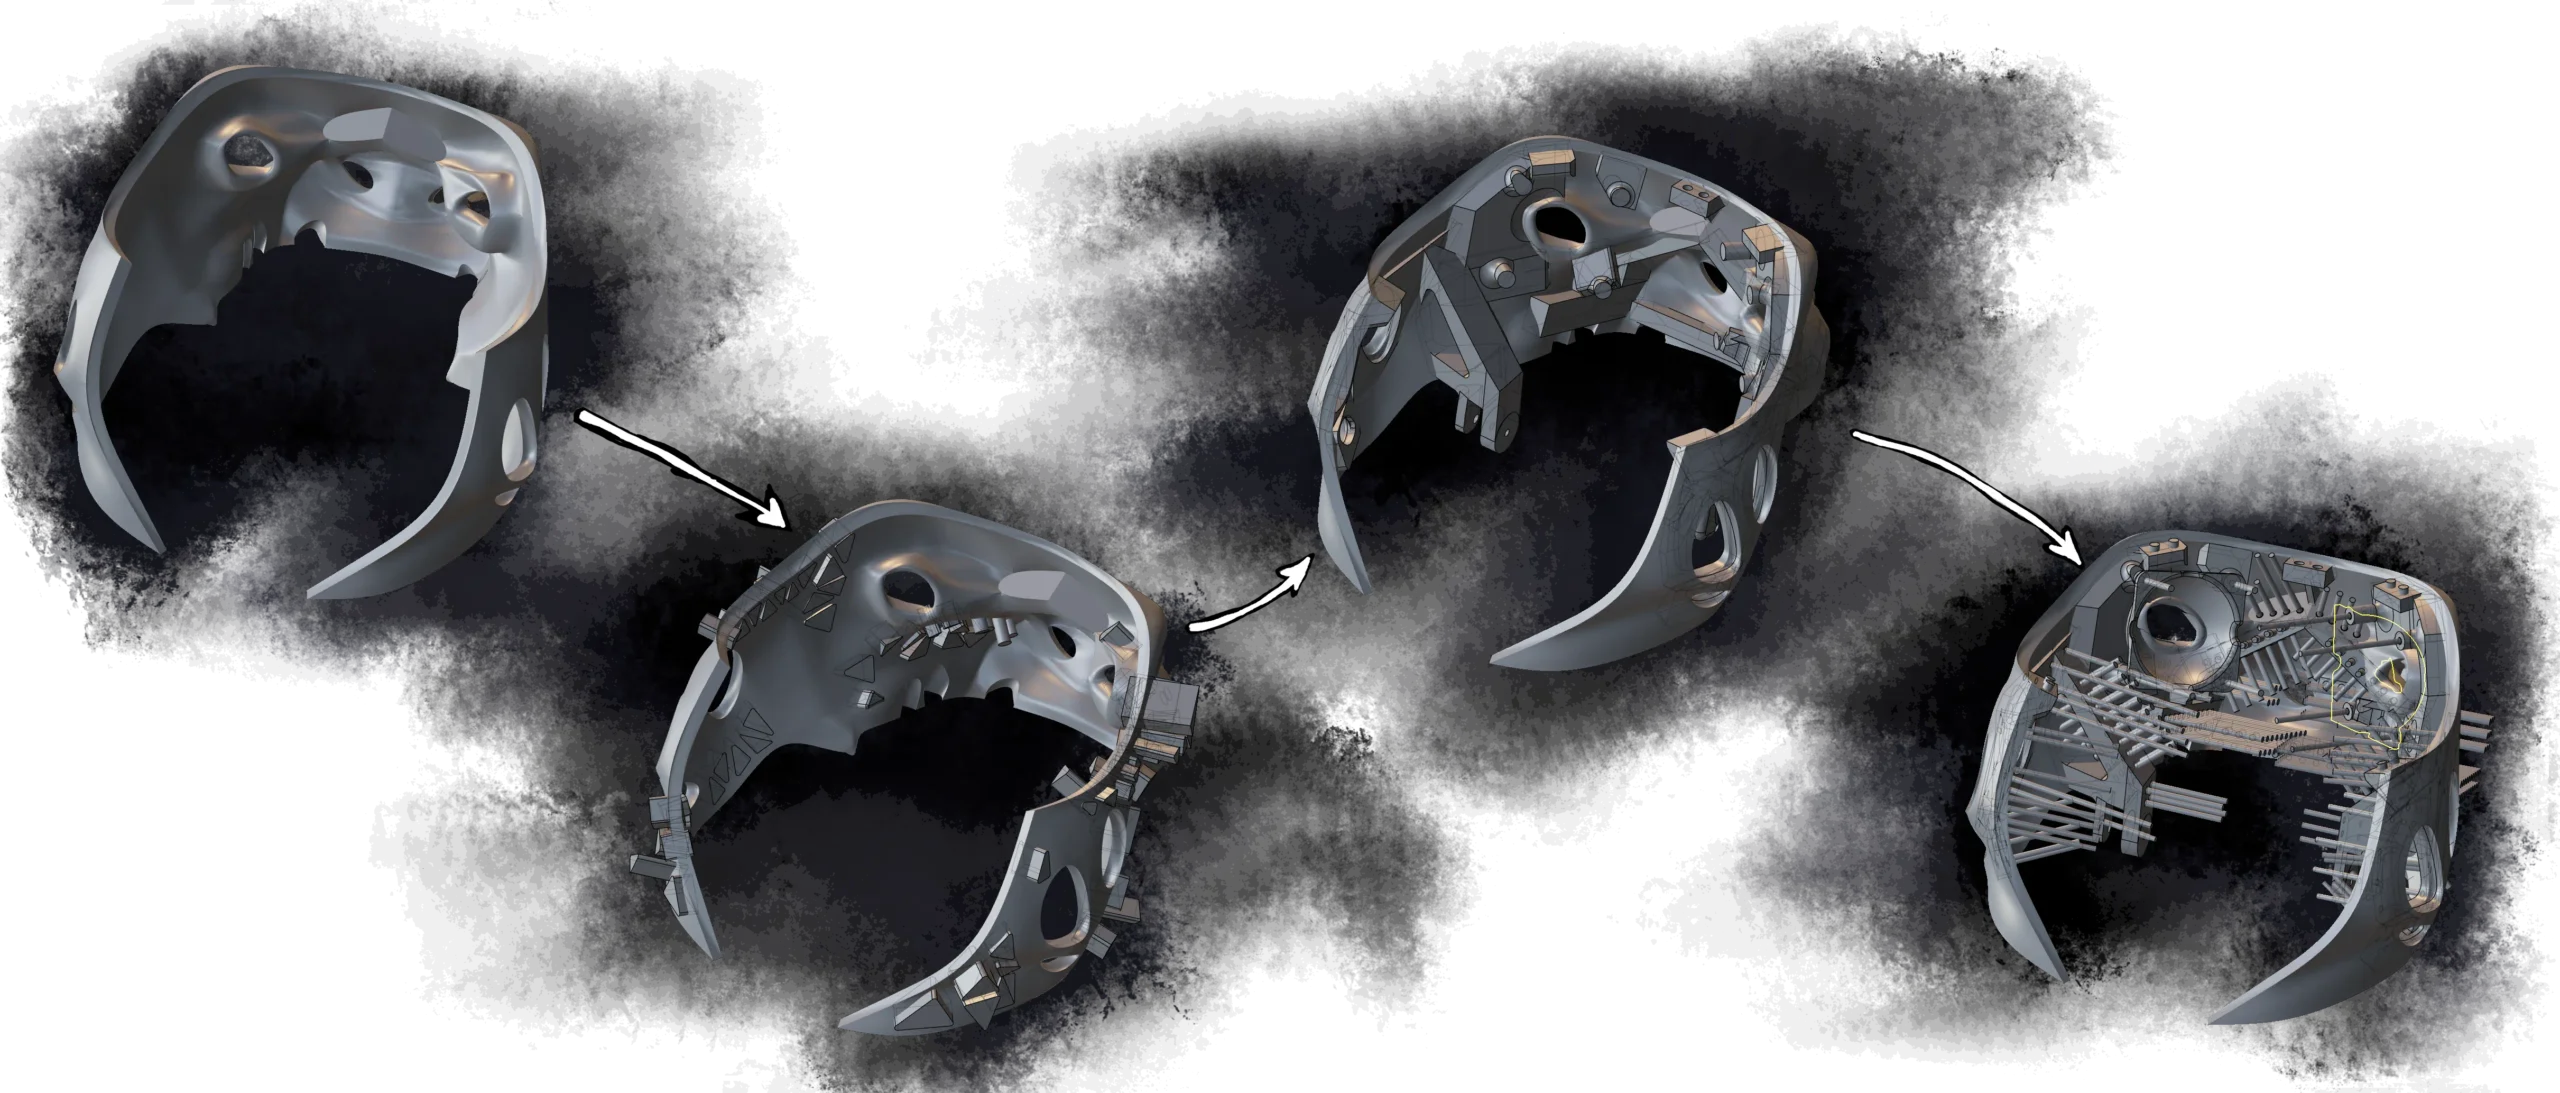
Much like the feet, the head is also too big to be printed in one go. Fortunately, it can be nicely split apart into three parts (plus teeth):
But we can’t just hit “print” right away, because our head will need to have quite some tech. Some parts are a bit more critical than the others.
Non-negotiable parts are:
- camera, because we need to see outside
And then, there’s nice-to-have animatronics:
- animated eyes
- animated ears
- mouth that moves when I speak
- idle animation for the nose
All these parts require quite some space, and spots onto which we can mount them. So we need to make quite a few adjustments before we can hand things over to the 3D printer. At the same time, at this time (mid-april as of time of writing this section), we are also severely running out of time. We want to start printing ASAP, so we’ll start by working on easiest parts first.
Top of the head
Top of the head isn’t very important or complex. There’s two things that need to happen in the top part of the head:
- attachment points for the primary horns
- attachment points for the spine of the costume body
This means there’s not much that we need to do. We need to add screw anchor points, which will allow us to assemble parts of the head into a single object later down the line. We will also add some holes for m4 threaded inserts on the very top, which will allow us to send the head to the printer now and worry about designing the spine attachment later.
This can now get thrown into the slicer, and sent to the printer. Unfortunately, the first print wasn’t quite successful:
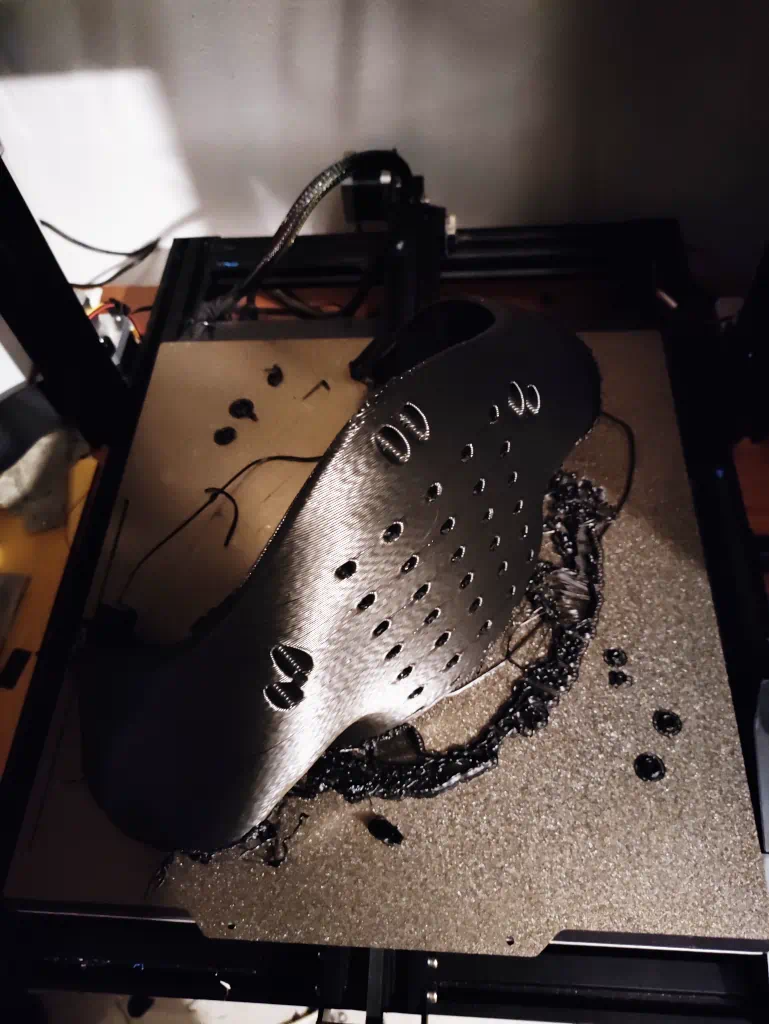
… but it was enough to indicate that it’s too heavy. Therefore, I sat down in an attempt to get the weight down. I dropped walls from 2 to 1, and added additional holes into the model. At the end, I managed to get the weight down from over 500g to just under 300.
Mission accomplished.
Unfortunately, the reason for the layer shift is also very well known: turns out that the cooling duct on the printer hit something and got torn away. The torn duct then, still attached to the print head, blocked the print head from moving all the way to the right of the print bed when it needed to, bla bla, you get the point (and if you don’t, that’s fine). The moral of the story is: I don’t have any cooling on print head 1. Let’s hope this won’t cause any major problems down the line.
Anyway, time to move on.
The camera
I need something that can capture video and stream it to a display. There were a few options that I initially considered:
- DJI osmo action cam or Insta360 equivalent (they can function as a webcam)
- Cheapo webcam
- Raspberry PI camera
The problem with Raspberry Pi camera is that it requires a raspberry pi. The problem with raspberry pi is that it comes with HDMI out (and not only is it HDMI, it’s mini-HDMI), which is too limiting on the display side of things. There’s three options that I had for FPV:
- Steam Index, which I already have. Has: DisplayPort
- (not so) cheapo VR display kit from aliexpress, which more often than not come with DisplayPort
- AR glasses, which come with USB-C
- Cardboard VR with an old android was considered but immediately rejected, because I don’t want to rely on wifi network to see
This rules out RPi as a valid option. Granted, there are options to make RPi camera work, but the options involve networking. I’d like to avoid having to rely on network for critical things. Which leaves with two options, but these two options have additional problems.
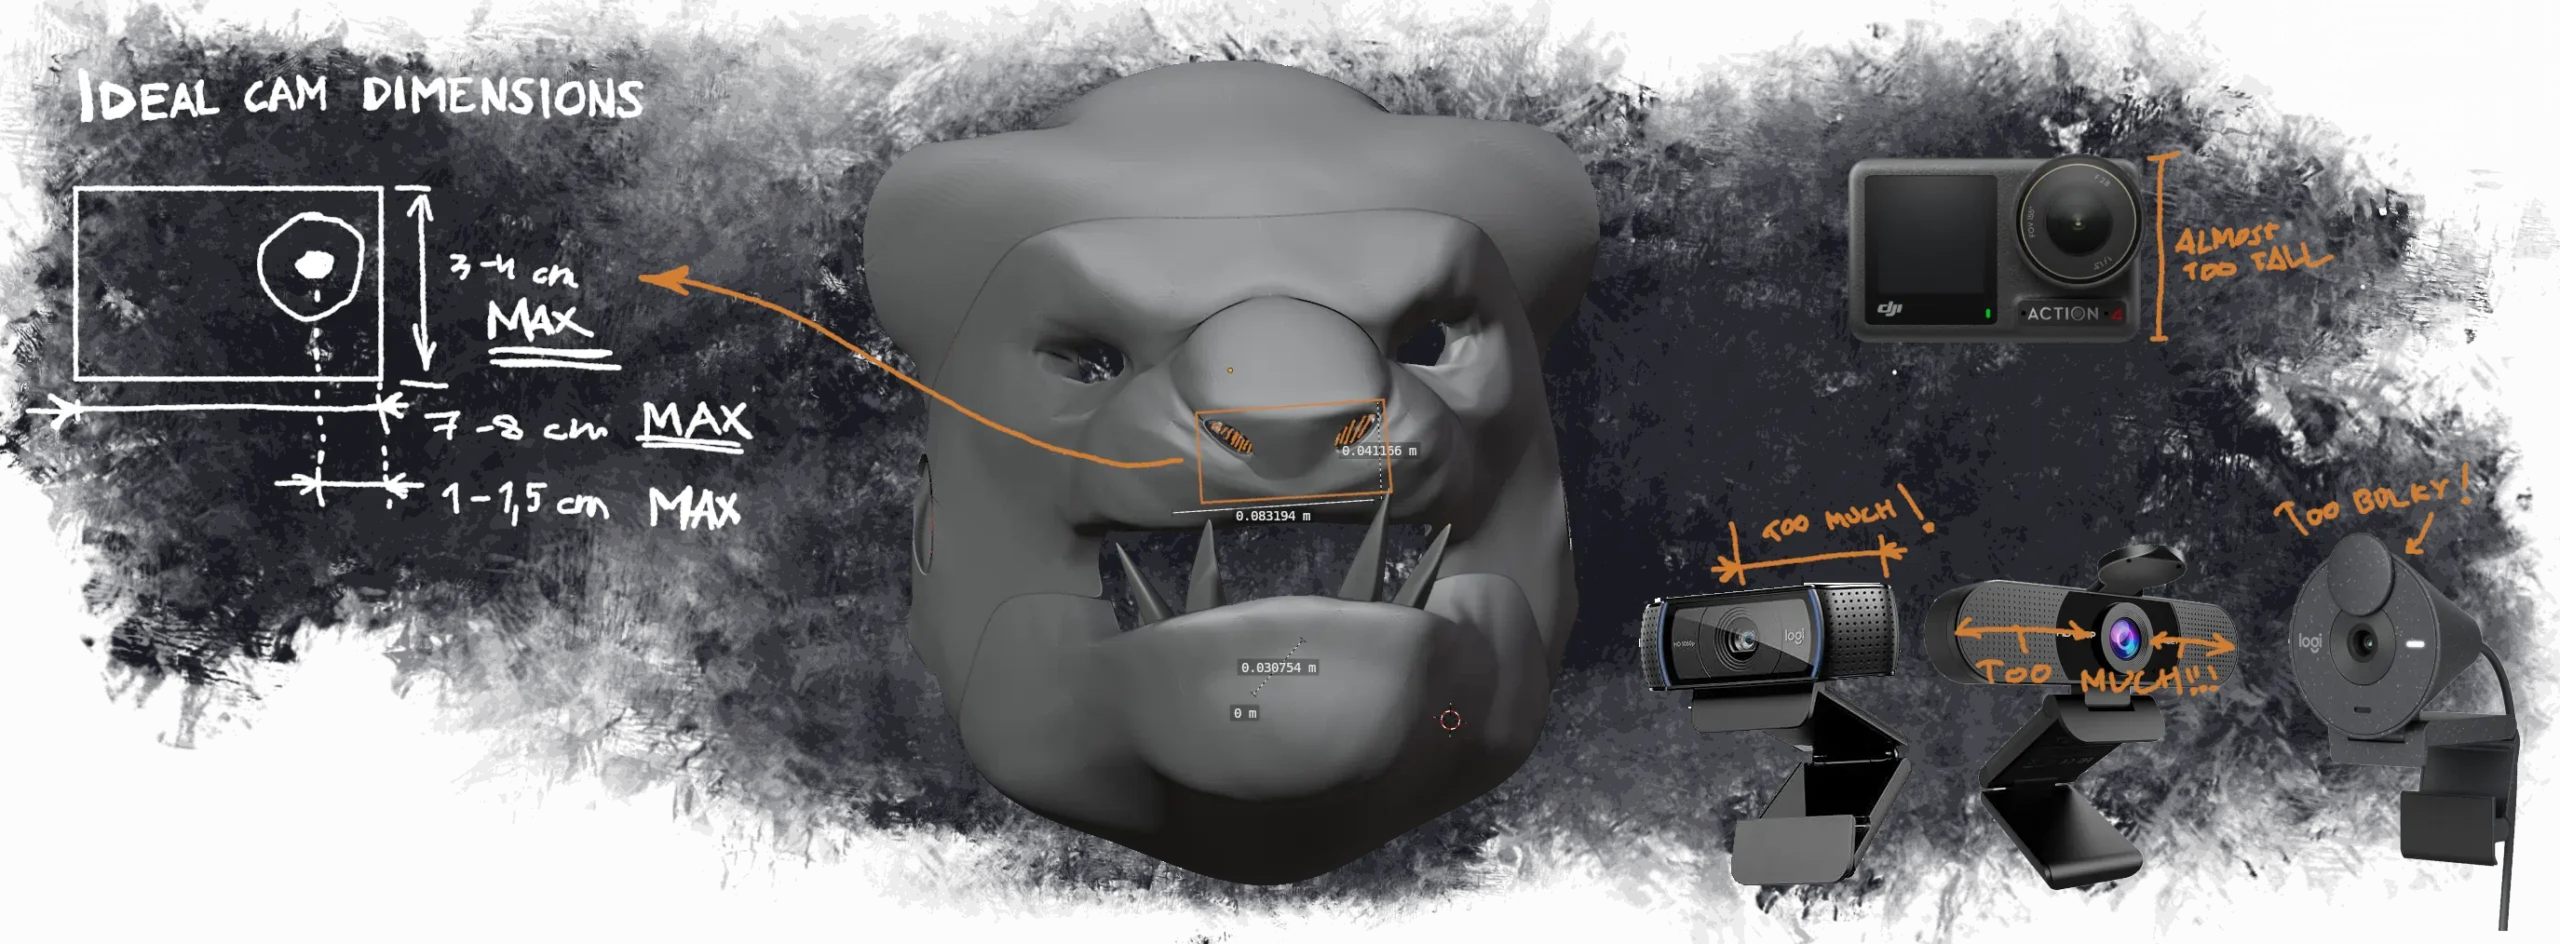
See, the camera needs to be hidden. There’s two easy options: the nose, and the eye socket. If eyes will have animation to them, that immediately precludes putting camera in there. Which means that we’ll have to put our camera inside the nose. The problem with the nose option is that we are very space-constrained. The space between the tip is ~4 cm x 7-8 cm if we strongly push things. This immediately rules out vast majority of USB webcams because they’re too bulky. Even Osmo is getting too close to our limits for comfort.
Fortunately, there is a fourth option.
Raspberry Pi camera is not the only camera specifically intended to be used for computer vision. Heading over to aliexpress, you can find plenty of USB camera modules that are already pre-disassembled for our convenience. If we want fancy features, things can get a bit expensive, but for FPV vision, high framerates are almost necessary. We don’t want to get motion sickness within 5 minutes of donning the costume.
We’ll also need secondary cameras for “seeing directly below” and “looking behind”, but those cameras can be <720p30. Fortunately, once your requirements get into sub-HD territory, the prices also drop substantially.
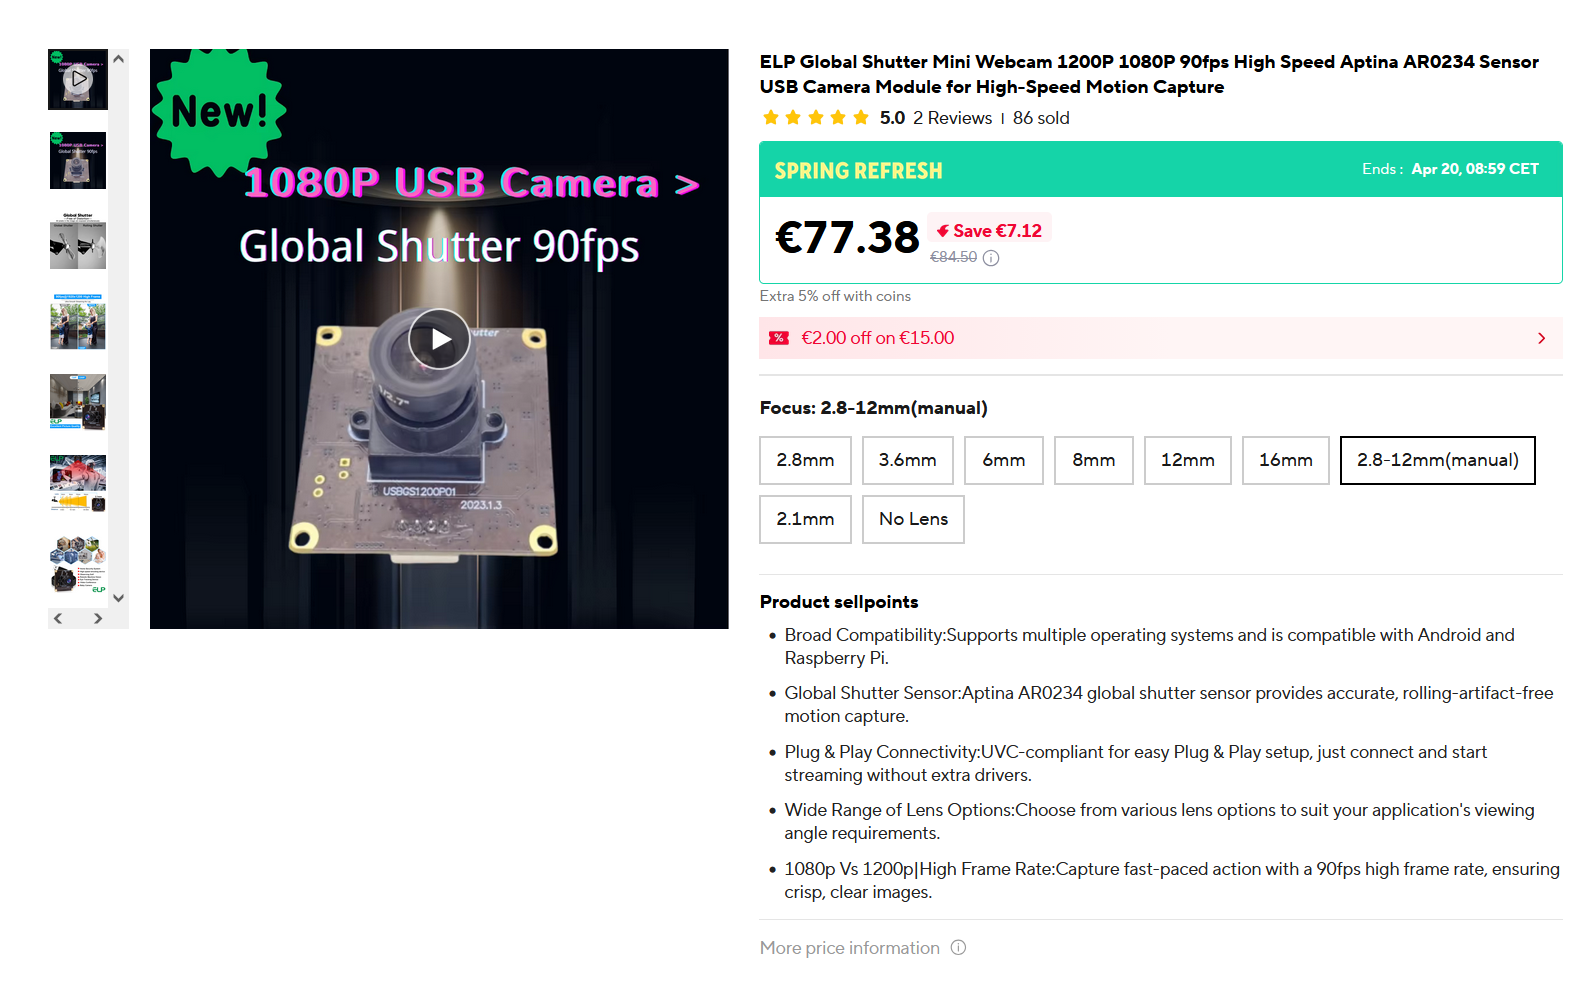
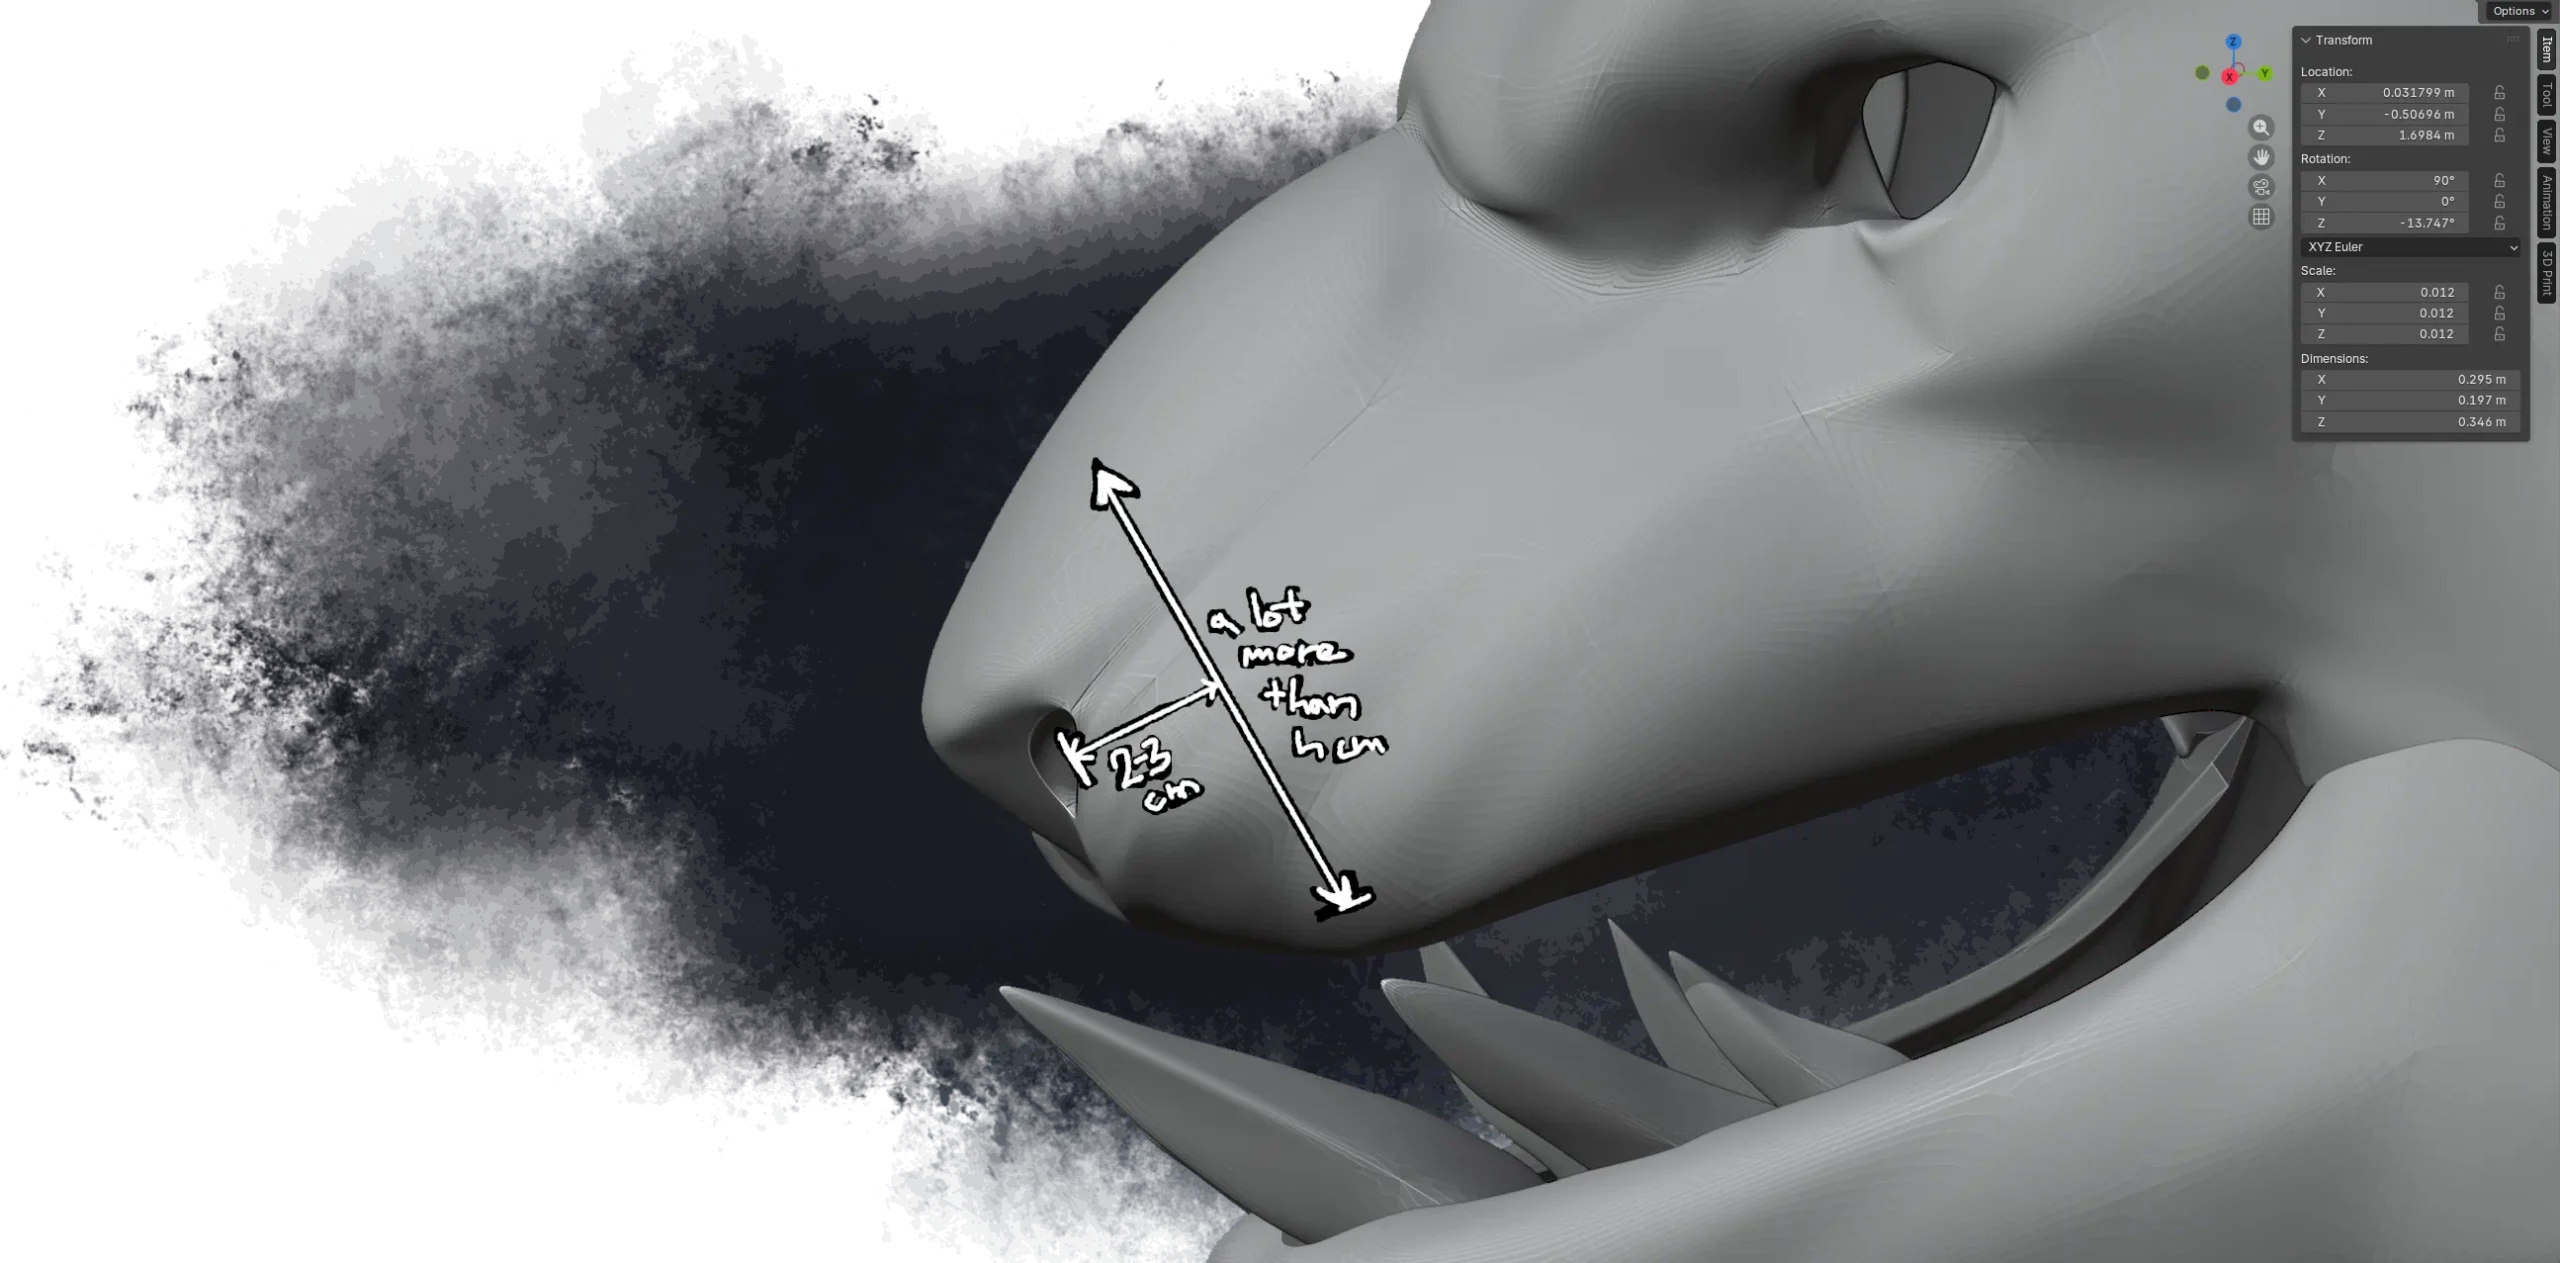
But now let’s go back to considering the dimensions of this module. If this image is to be trusted, the front end of the lens is ~2-3 cm away from the PCB. This is actually beneficial to us, because we can move PCB further into the snout. And the further we go from the tip of the snout, the more space we get to work with:
These modules look better and better the more I look into them. I think we can consider this problem mostly settled.
Lower jaw & teeth/fangs
The problem with the teeth is that they intersect with the jaws. We have two options:
- teeth can be printed as a part of the jaw
- teeth can be printed separately
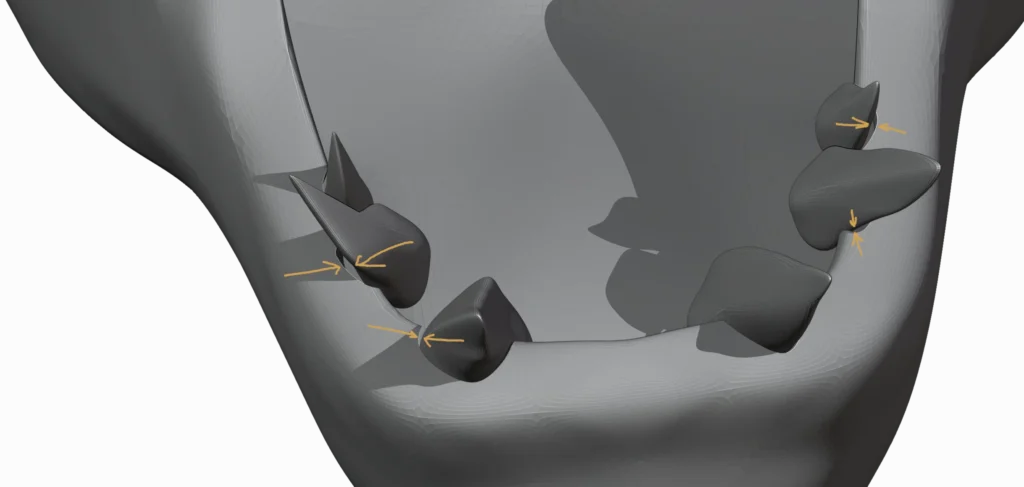
I want to print teeth separately, so I have some additional work to do. First, we need to add a gap between the teeth and the jaw, which isn’t too hard:
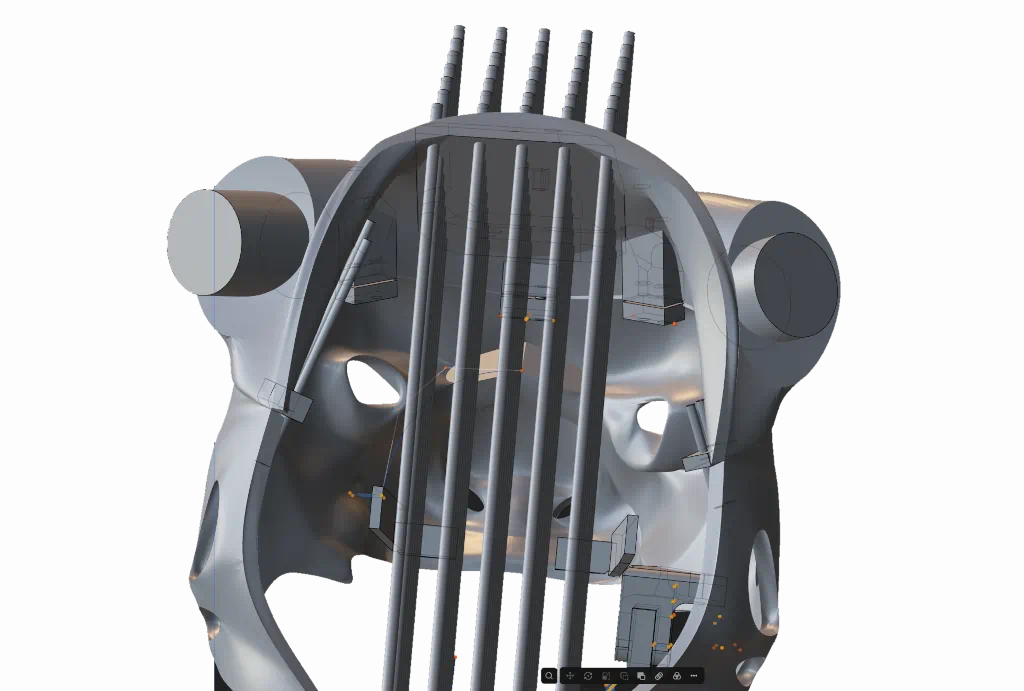
Then it’s time to head over to plasticity, where I added a mounting bracket with holes for m3 threaded inserts. While I was at it, I also added extra “mounting points” (for m3 threaded inserts) all over the place for later hardware, as well as a hinge that will allow the jaw to move:
With that, we can actually start printing the lower jaw. Except that we also want to lose as much of the weight as possible, so we also spam a bunch of negative parts all over the place. End result:

Hopefully TPU will cooperate this time, though if it’s not gonna … as long as PLA part (orange) prints fine, things will be manageable.
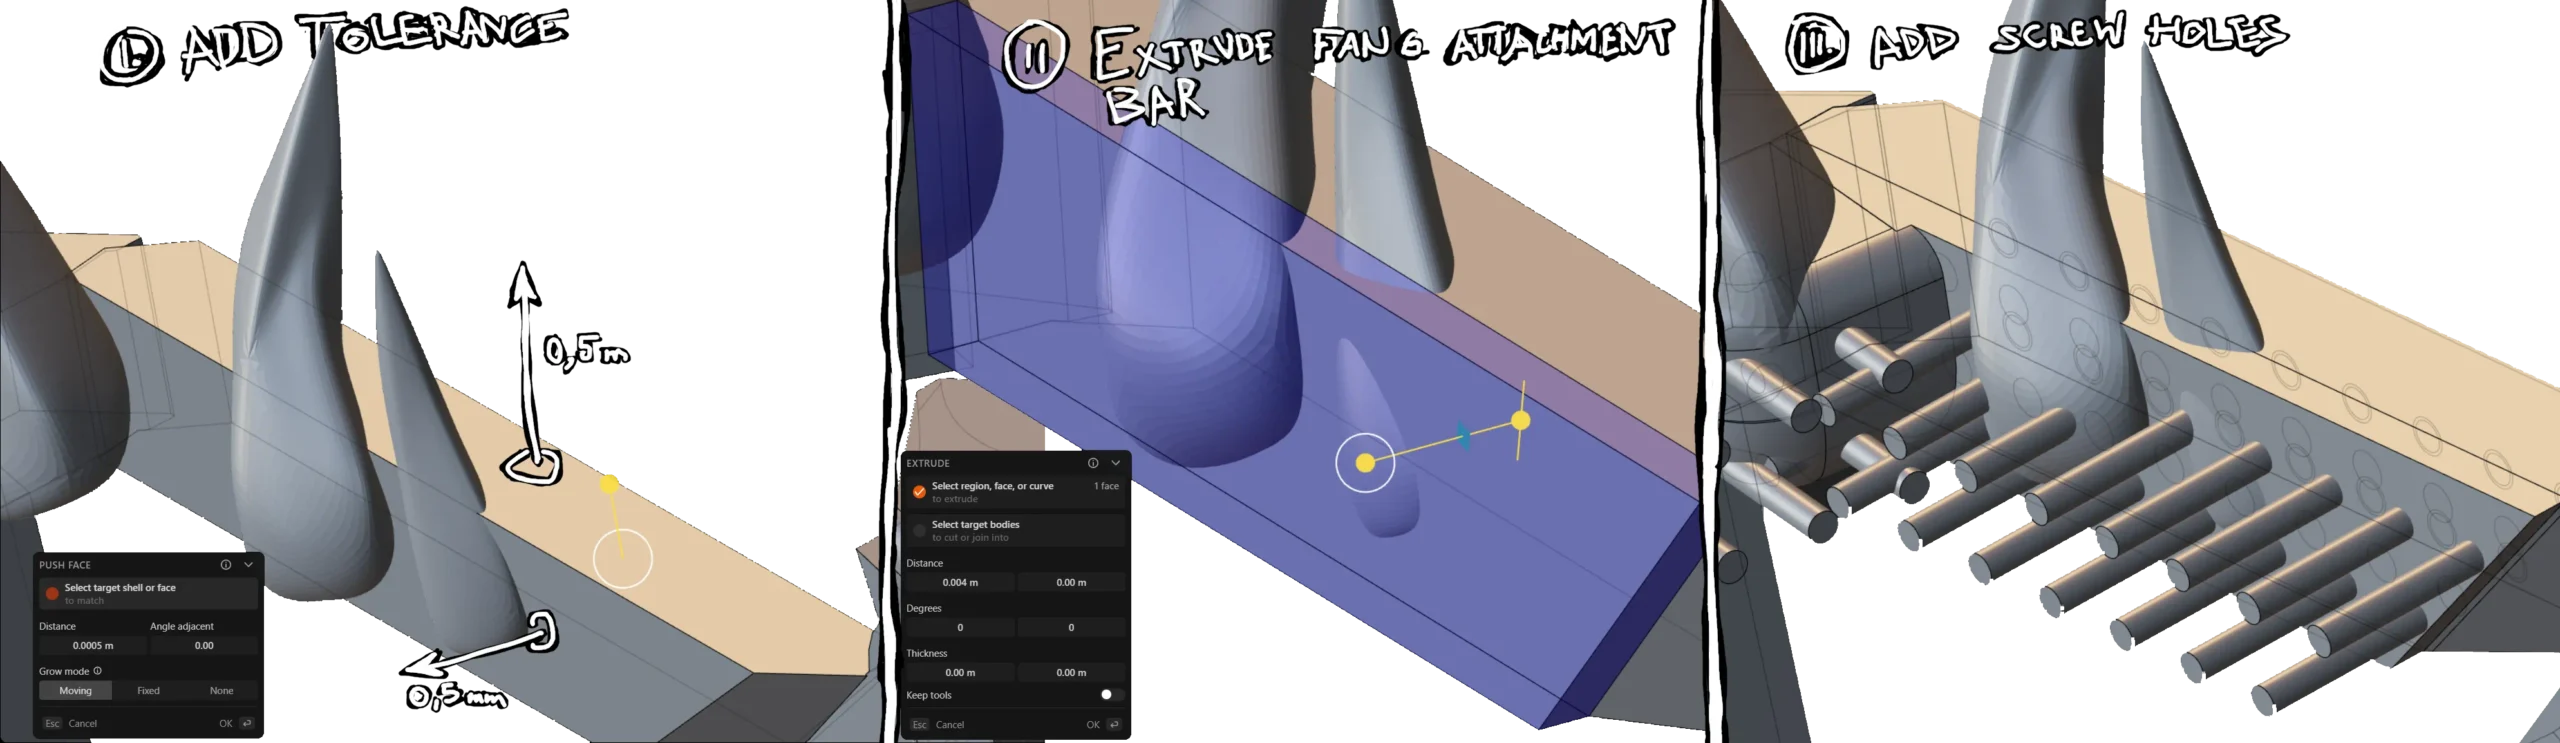
While the 3D printer is busy going brrr, we can continue with the teeth/fangs. This wasn’t too hard: I added some extra tolerance to a copy of the jaw frame (we will use it as a negative part later). Then, I extruded a 4mm bar to which the fangs will be attached and split it off into a separate part. Then, finally, screw holes are added, and the fangs are already ready to print.
I hop over to the printer, and 6 hours later the results are in:
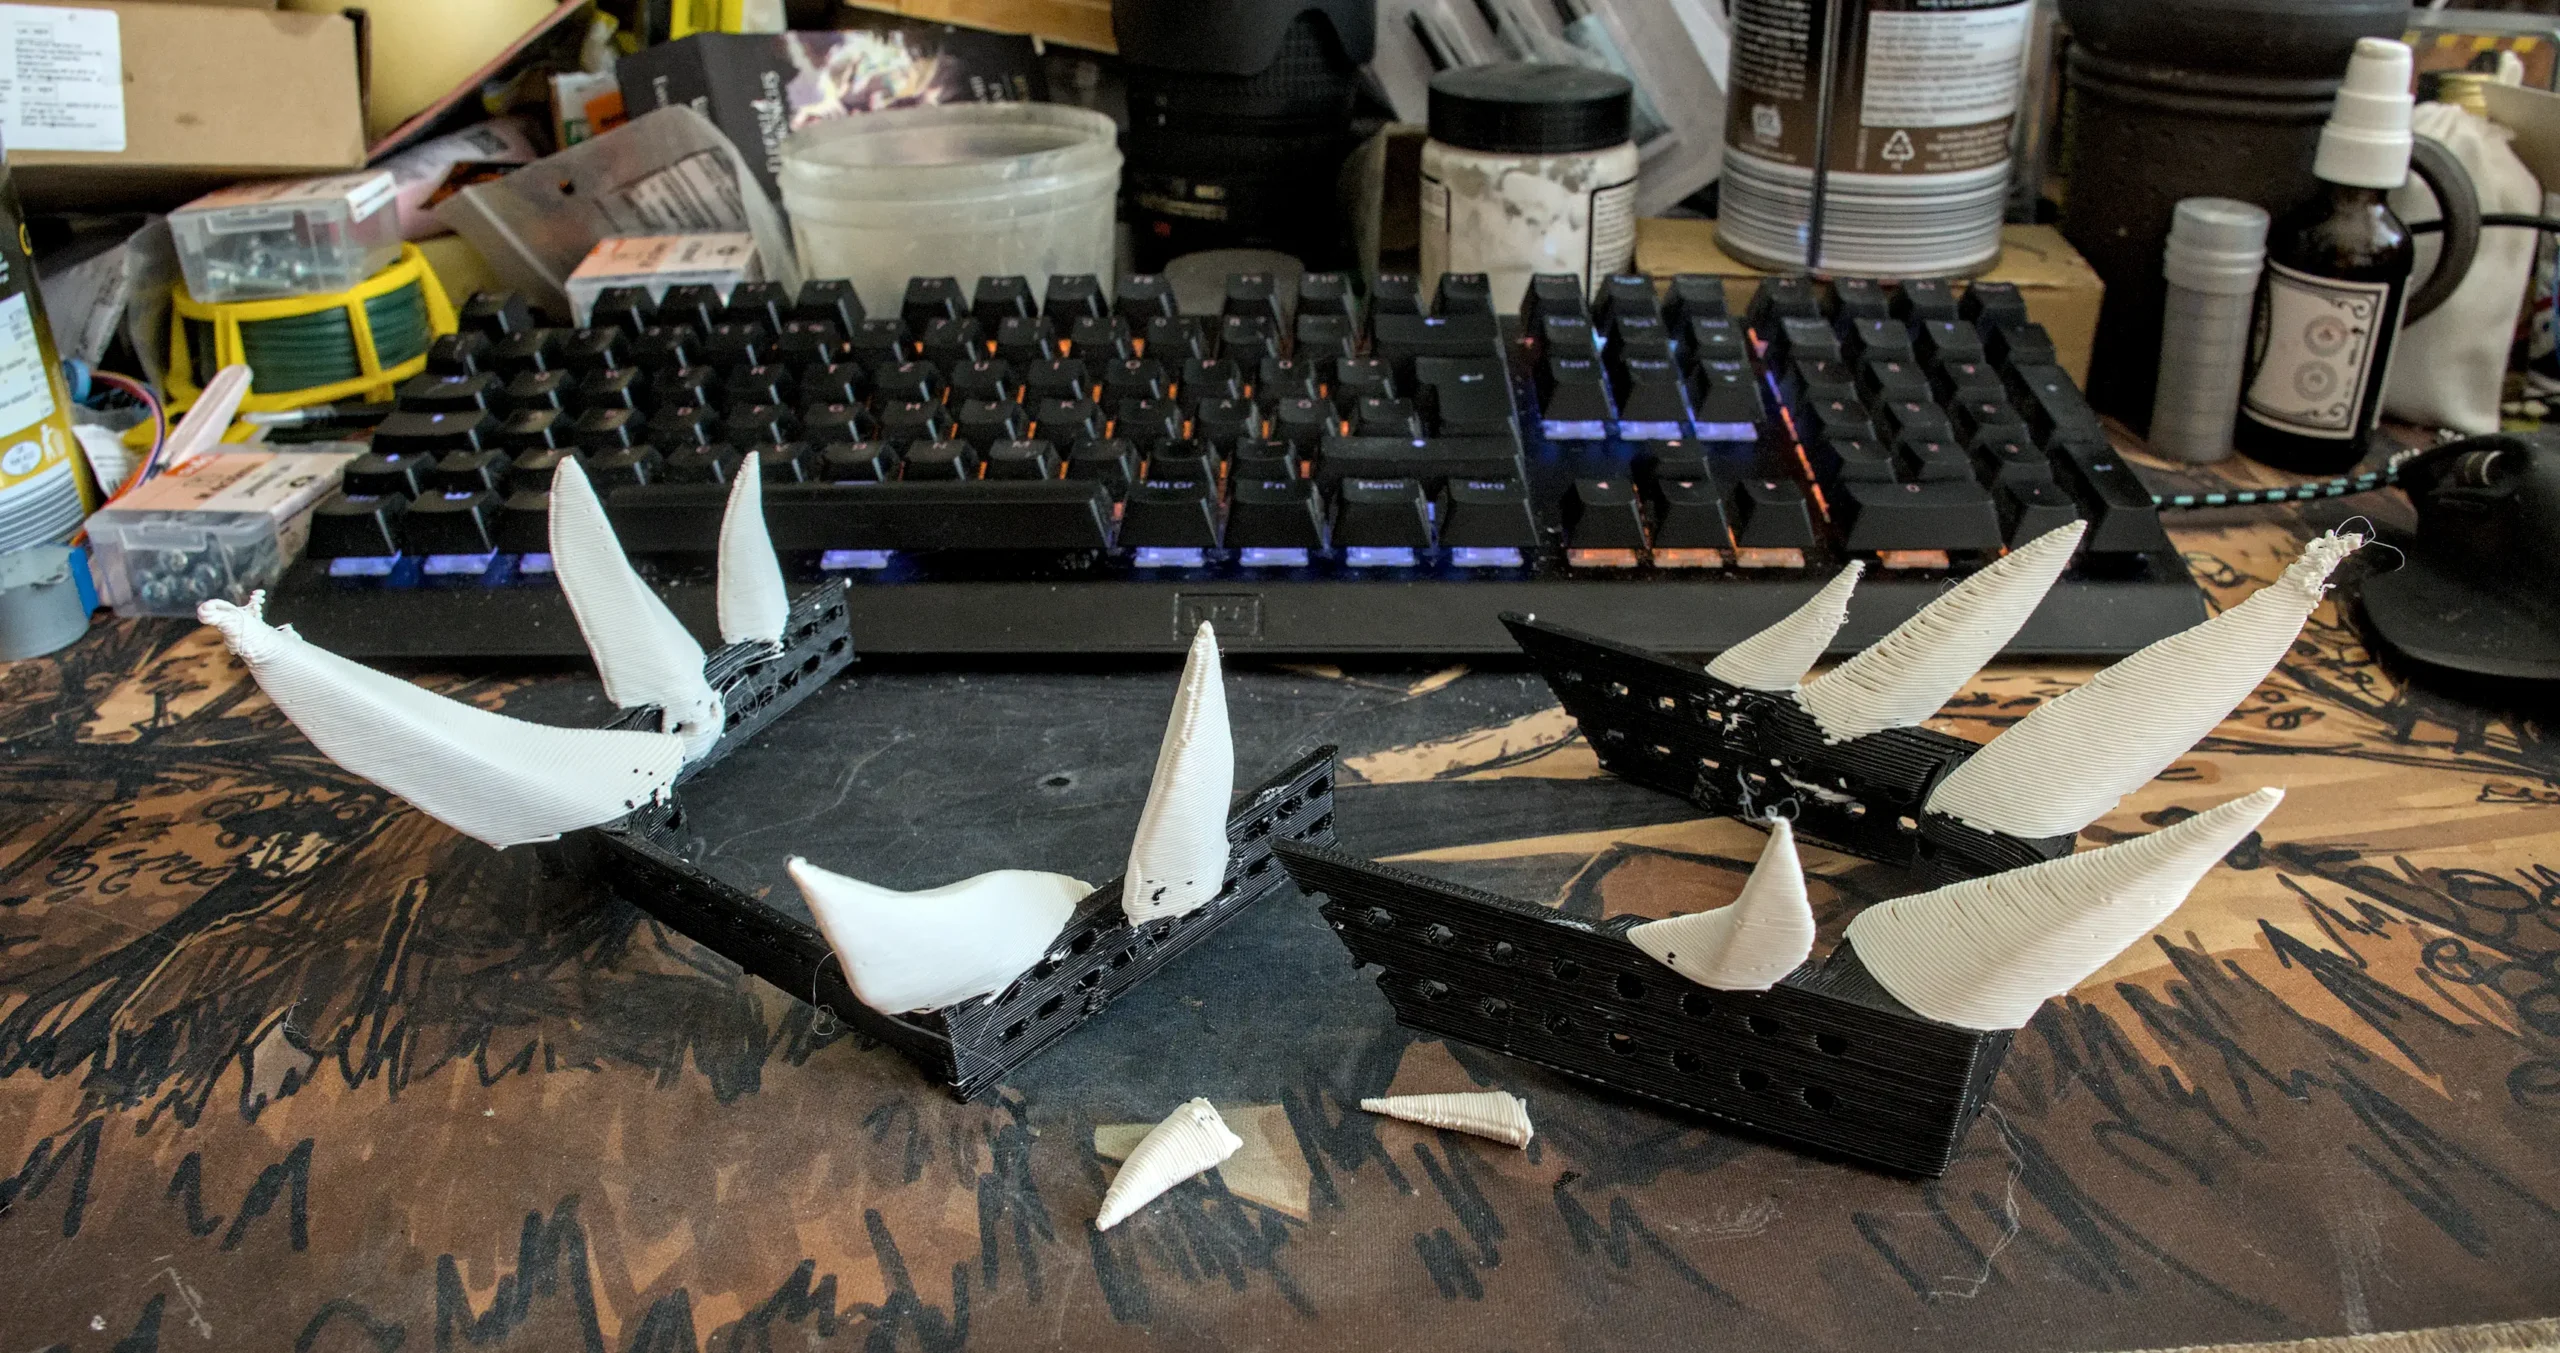
I really don’t like it how the smaller fangs stuck to the supports more strongly than they did to the thing they were supposed to. But if you paid more attention to the pictures in this post than I did, you might notice a second problem.
That’s right, the fang inserts are awfully square there in the front, but the front jaw doesn’t have a square cutout there. I forgot to subtract the upper/lower jaws from the teeth. I initially intended to deal with this using something that can sing Slovenski Superboy to me (and if you get the joke, you’re reading this blog post in the wrong language. For everyone else: I know it’s spelled ‘dremel’, without the ‘j’), but I later decided to re-print with lower layer heights and more walls in order to give myself more safety margin while sanding.
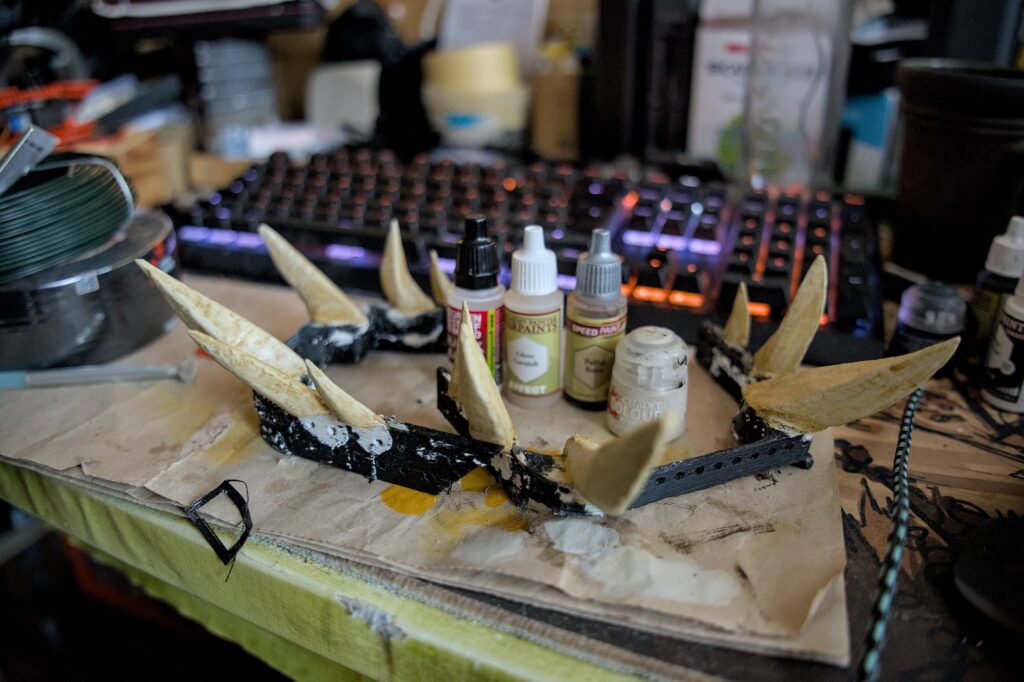
Last but not least, the fangs were painted because you need to do that if you don’t want plastic to look like plastic. I think things turned out reasonably well:
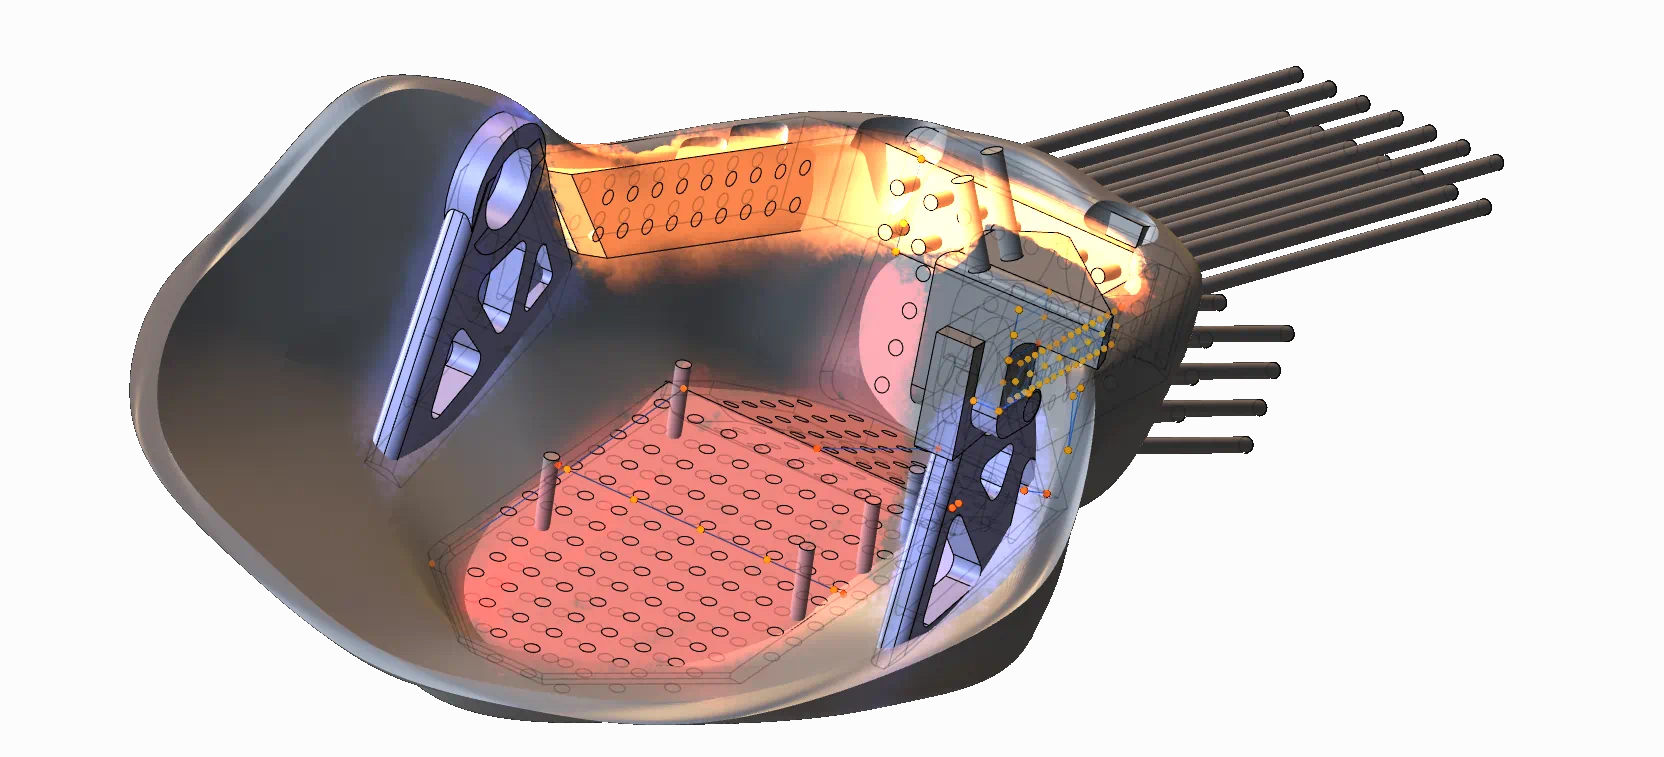
Main head
That’s where things started to get really complicated. (Well, not really, but there’s a lot going on). In the main part of the head, we need to leave ourselves options for:
- camera mount
- eye socket (optionally: animatronics)
- optional nose animatronics
- optional ear animatronics
We also need to place hinge for the optionally moving mouth.
To keep a long story short: I started with the base shell of the main part. Then, I spent way too much time drawing weight reduction polygons all over the place. Then, I added structural parts and places for attaching addons. Finally, I spammed M3-shaped cylinders all over the place. Weight reduction shapes were subtracted from the main shell first, structural parts were boolean’d onto the shell after that, and lastly screw cylinders (and other important subtracts) were subtracted from the head.
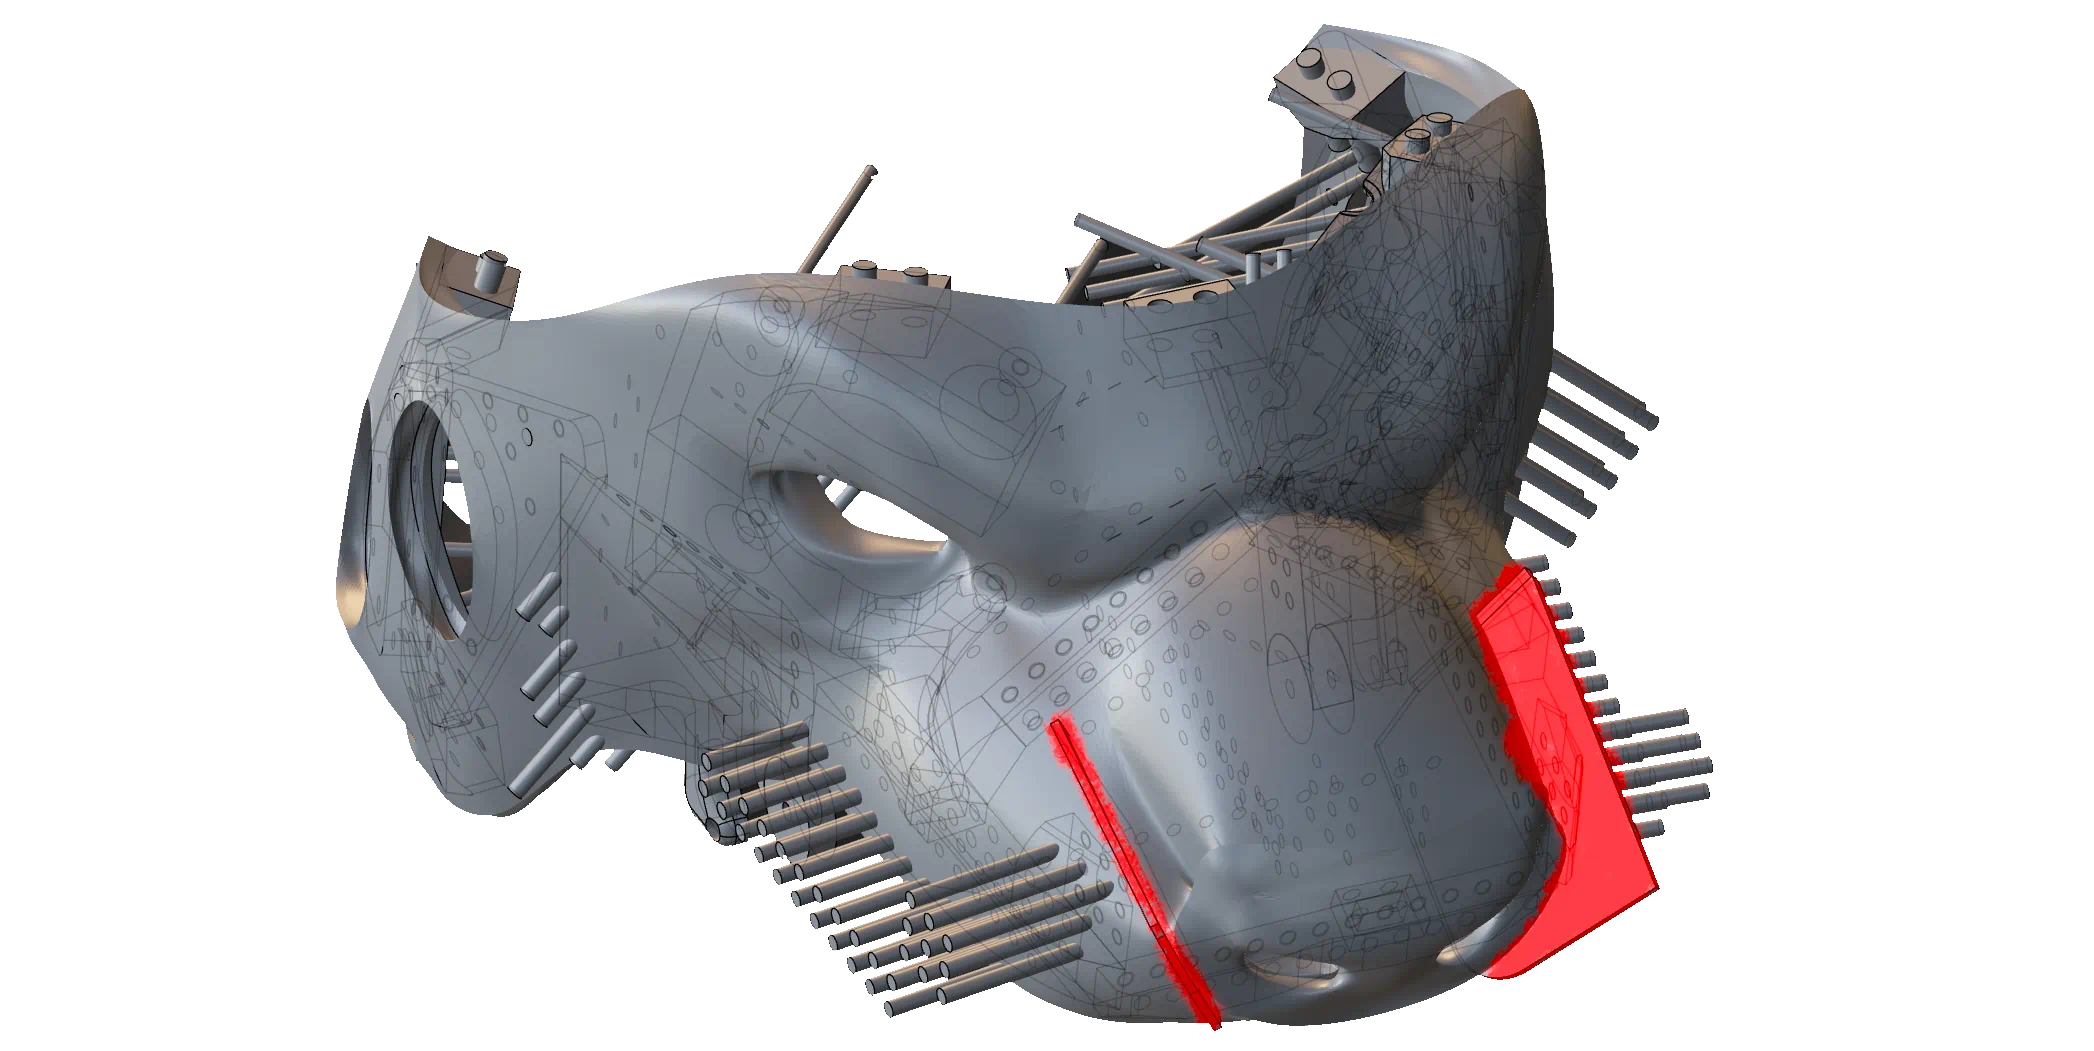
Of course, I’m oversimplifying a bit. The initial shell wasn’t the raw in-game model: holes on the nose were enlarged, and parts of the nose were extruded by about 5mm. This was necessary because the nose is one of the very few parts of the head that aren’t going to be covered by fur.
On the front end, I also also added some parts that will cut a 1-2mm wide gap by the sides of the nose. If we end up having the time to do nose animatronics, the hope is that those channels will allow us to pull on the nose with greater ease.
Neat. Time to throw everything into a slicer.
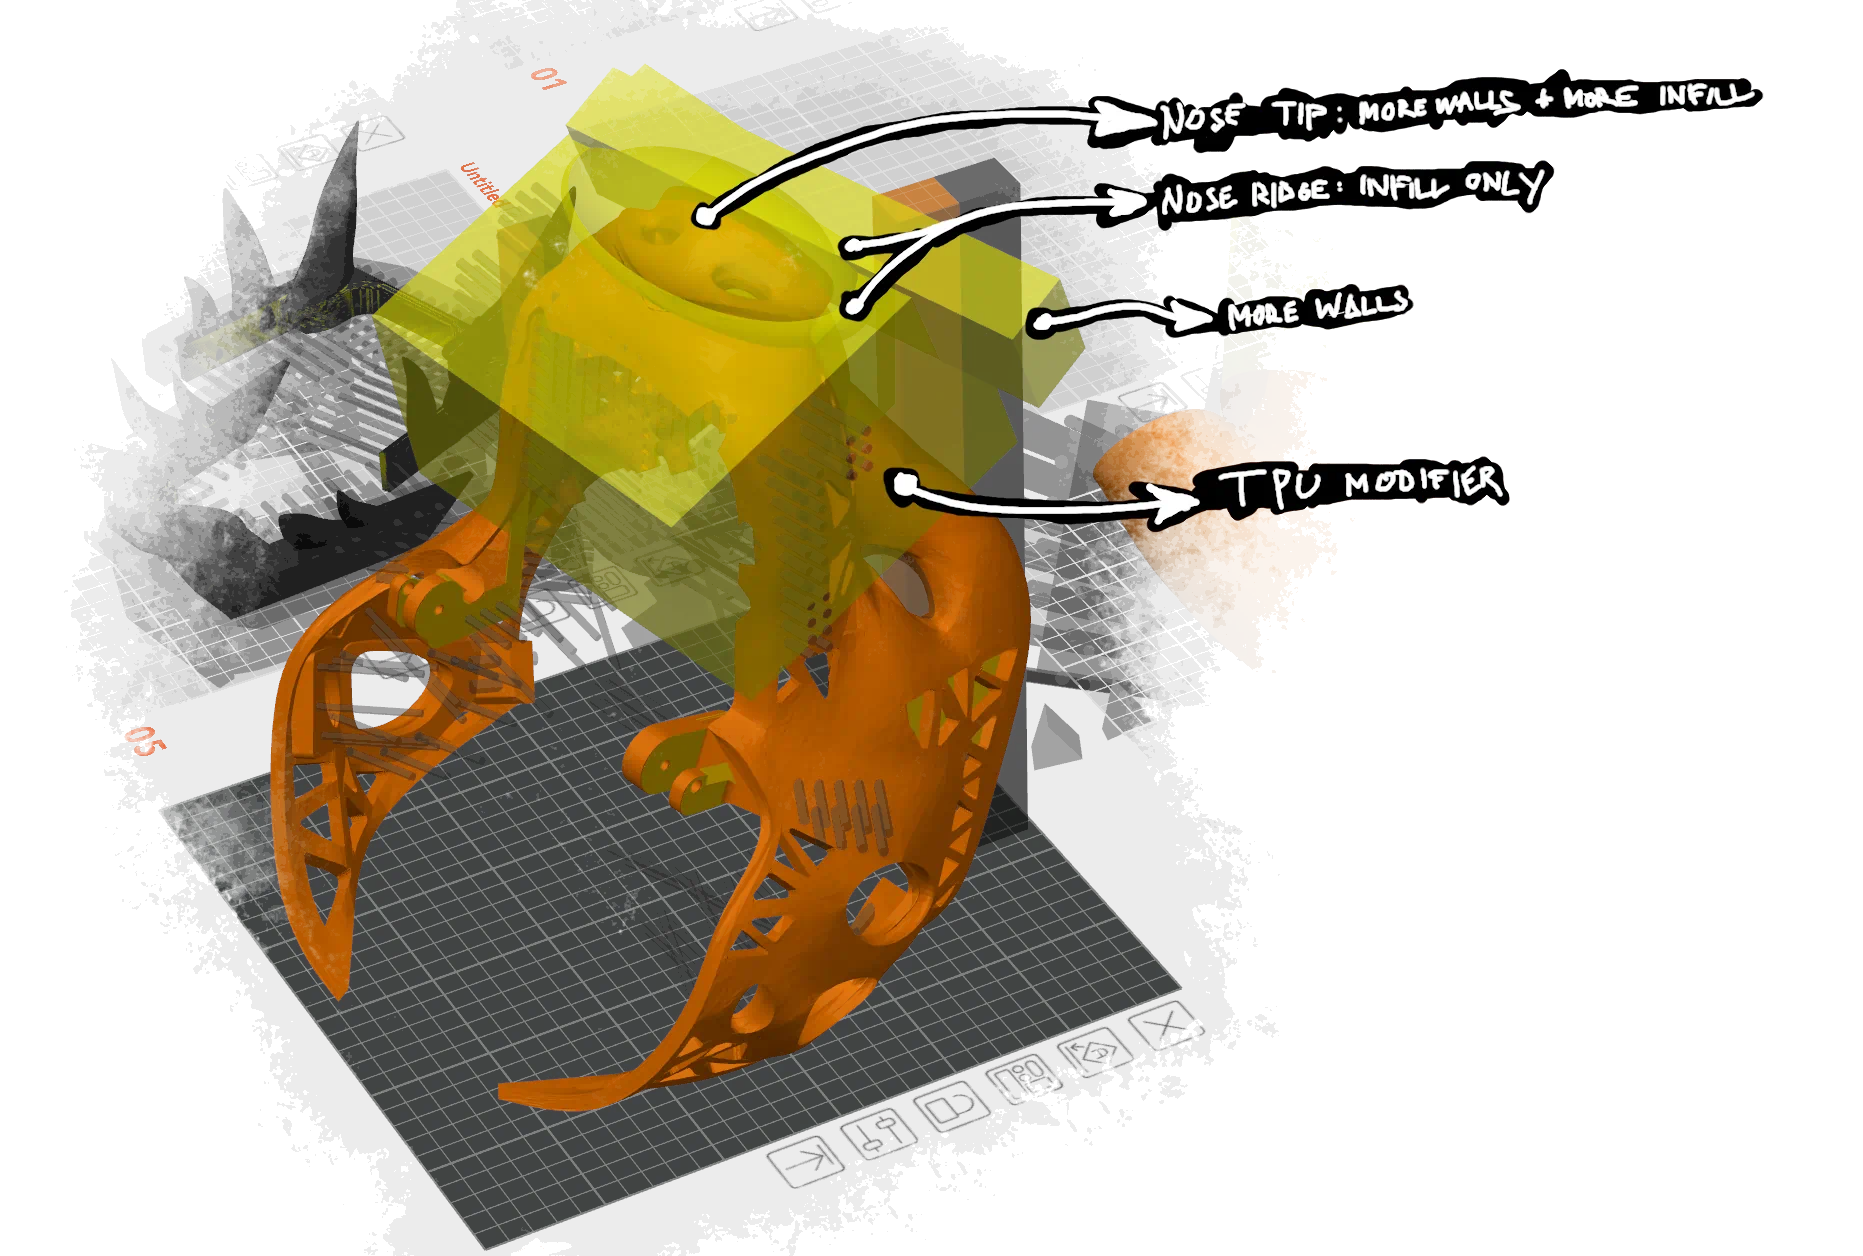
In slicer, we assemble everything together. It’s also time to add modifiers, as we want the movable parts of the nose to be mostly TPU.
Life pro tip: do as much as you you can outside of OrcaSlicer, because UX of OrcaSlicer is atrociously bad when you have more than 2 modifiers and negative parts on a model you wish to print. Want to move or rotate your model or part of it? Tough shit, you missed the arrow handles by a pixel, and now instead of rotating your model, you moved something on a different plate that you didn’t want to move.
I slice the model, don’t notice that some of supports failed to generate, walk up to my printer and hit ‘print’. So far, it looks that I’ll be assembling head in about 30 or so hours. Yeah no, the print failed. TPU parts outright failed to print.
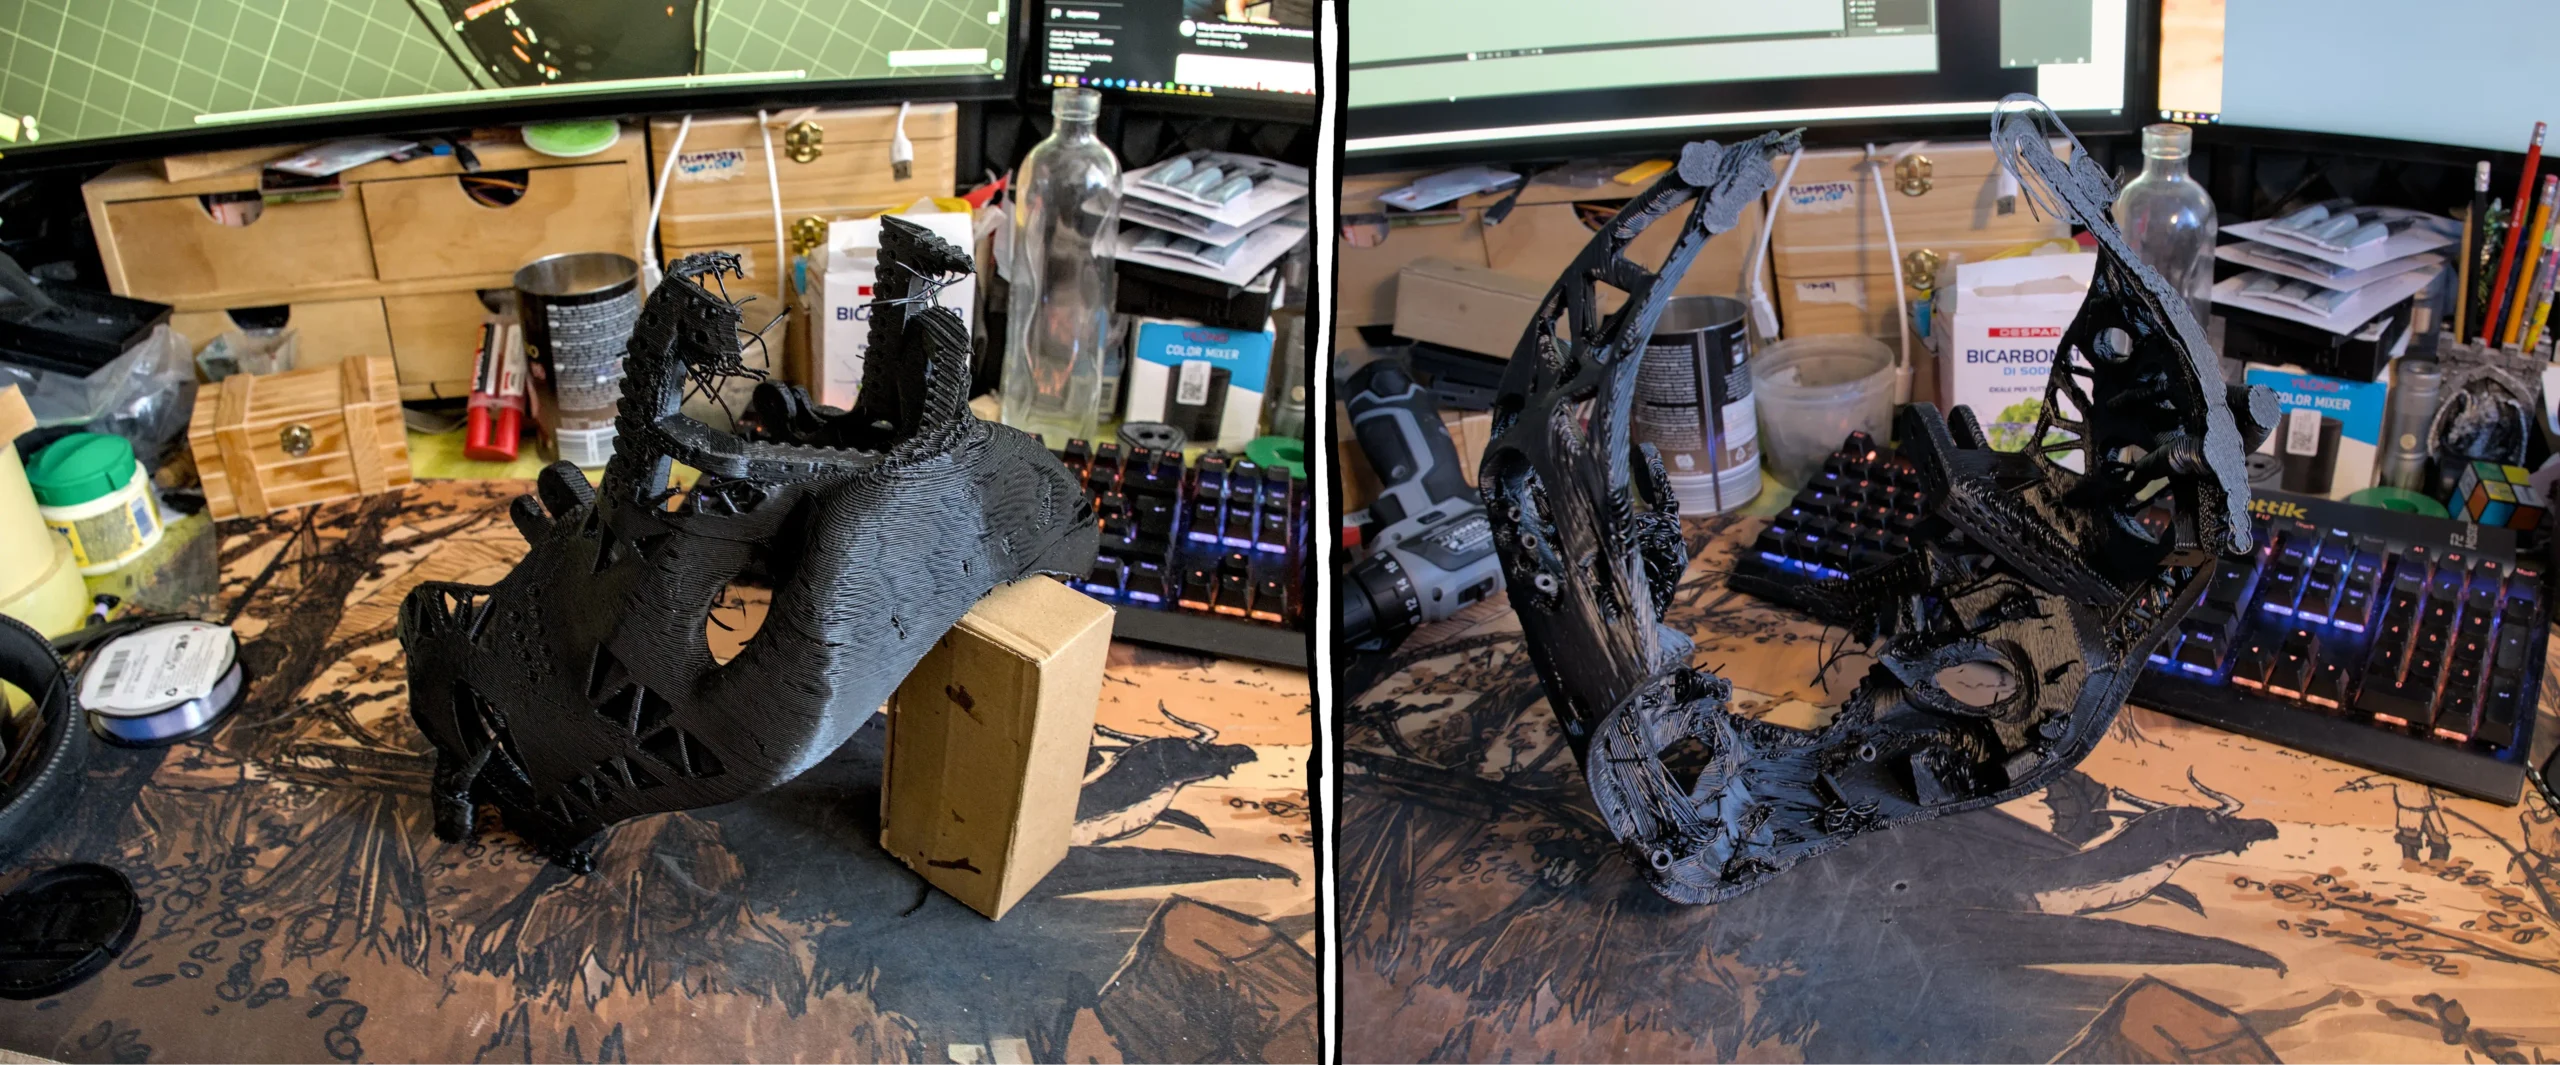
This merits a re-print, except that this time I decided to separate nose into a separate print. Good thing I did, because TPU didn’t properly print on the nose again, so that way reprints cost me 8 hours instead of 30. Why did TPU part fail? Surely it can’t be because I forgot to switch extruder 2 back to TPU after teeth were finished printing.

Subsequent reprint succeeded, but it was far too stiff, so I decided to play around with settings some more. 20% infill on the nose ridge appears to be a little bit too much, so I ended up lowering it to 10%. This improved things a wee bit, but not as much as I’d hoped: turns out that the biggest blocker to nose mobility was the fact that nose was located too close to the the “jaw bone” — the mounting bracket for fangs and other things, which is something that we cannot (afford to) fix.
But not all news is bad news. Upper set of fangs fits.
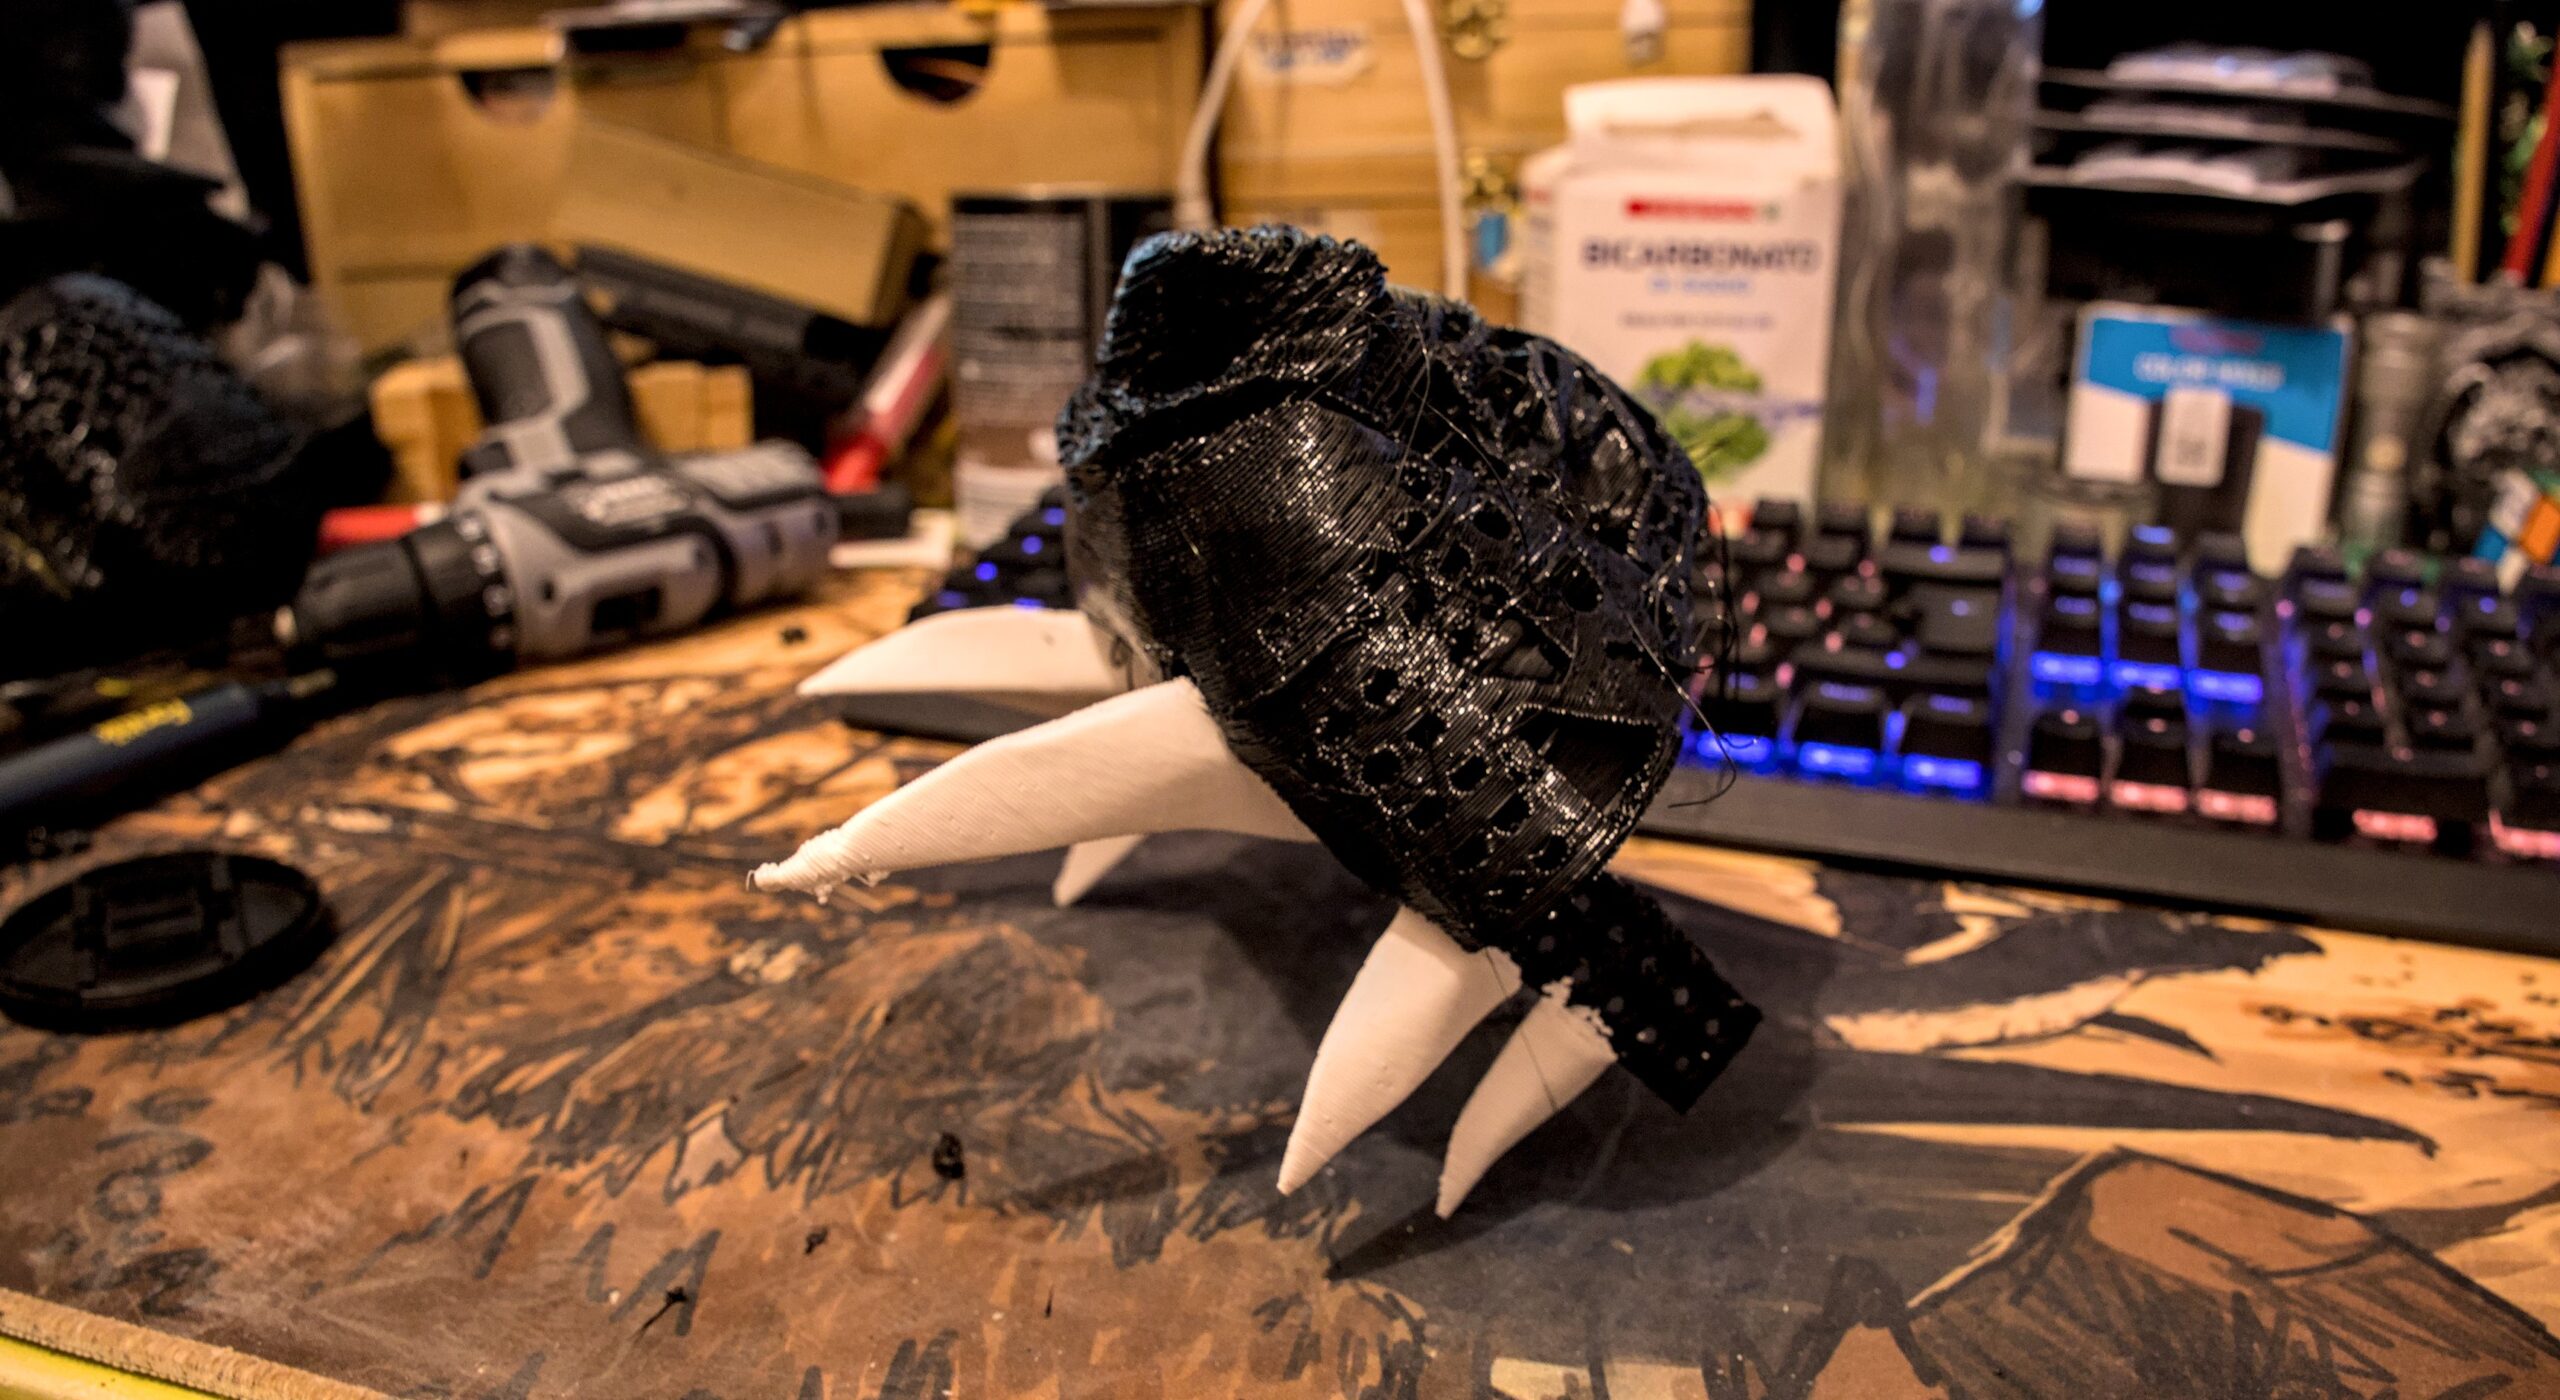
This makes the upper set of fangs the only part that doesn’t need a re-print or modifications. So let’s pop a champagne for the first thing that didn’t require us to go back to the drawing board, or retreat all the way to plan B.
Also shout out to the foreshadowing earlier in the article — it seems that printer is working just fine (or at least fine enough for our requirements) despite both cooling ducts being torn off.
At least, not yet. There’s a lot of things to do before we’re done, and a lot of opportunities for things to go wrong.
——
Next post about this project is here.