Ta zapis je na voljo tudi v slovenščini — klikni tu.
Holy hell, this project has been “on hold” for a ridiculous amount of time. But it’s not like anyone noticed, so it’s fine.
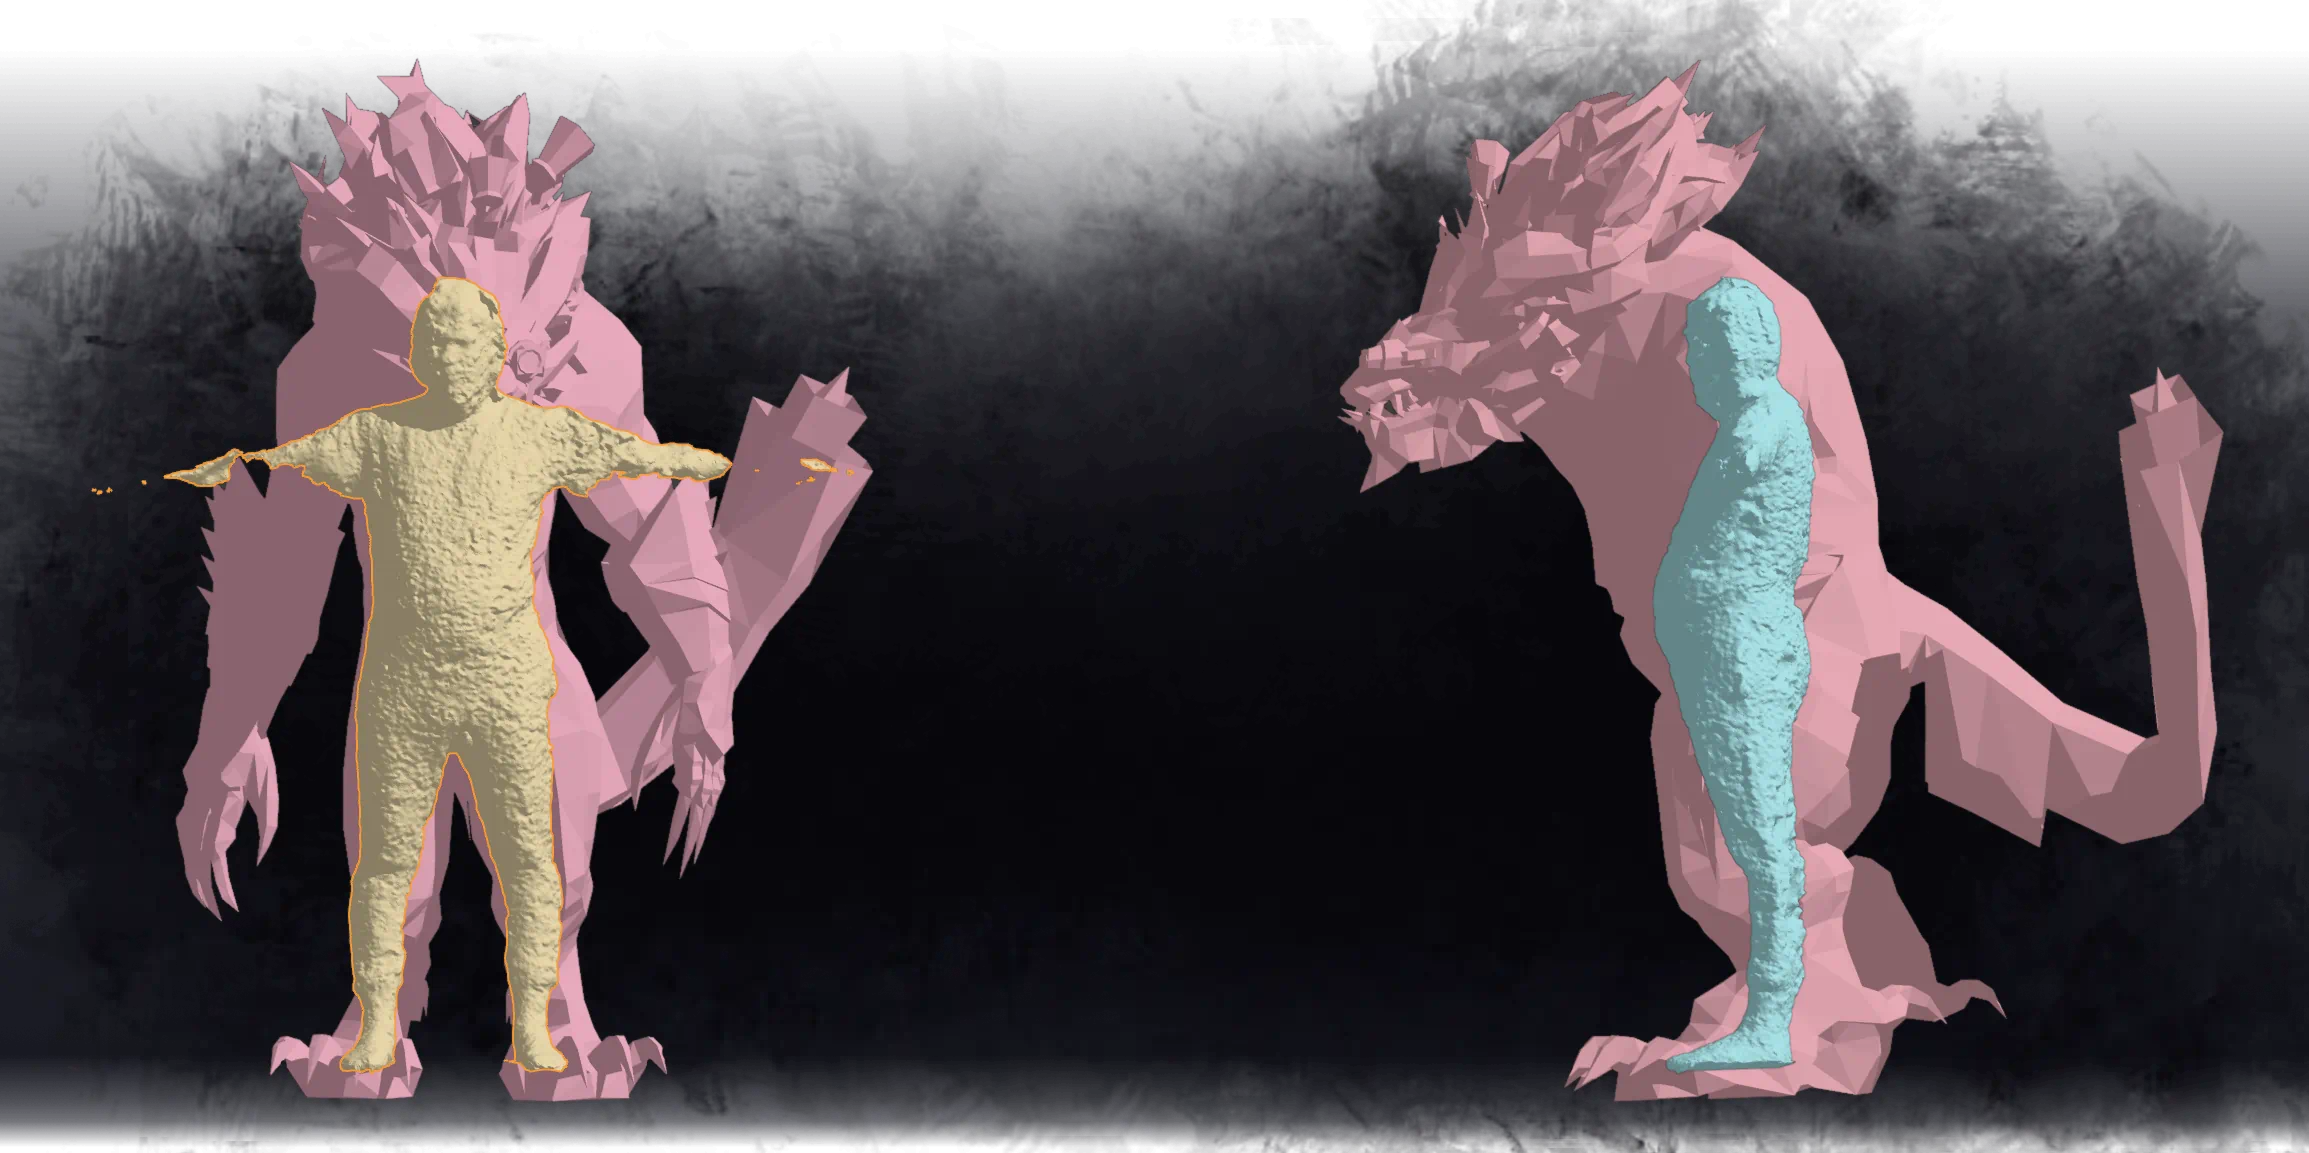
Previously, I’ve been thinking about how big the costume should be, and ended on a note about anatomical compatibilities. I’ve also been using this image for planning:

Notice any problems?
That’s right. I’m comparing against the in-game human models. I should instead be comparing against a photo of me, and that changes a few things. Most notably, this “size comparison” also ignores that charr are about twice as wide as humans. This is a problem, because if the costume would be wider than me, then my arms would fit into the costume either very poorly or not at all.
This means that we’ll need to change the aspect ratio of the costume as well.
The problem is that we’re now 6 months late, so I kinda need to start figuring this out pronto.
I started with praying to saint Billy Mitchell, and in a dream he revealed to me a shortcut to my goals. The idea of the shortcut roughly boiled down to:
- Do the thing /r/GuildWars2 knows me for and extract the model from the game
- Create a 3D scan of me
- Overlay 3D model of charr on top of a 3D model of me in blender
- lattice modifier
- throw both into plasticity and sketch costume wireframe (and clamps that will attach the costume to my body) on top of imported 3D models
- gg ezzzzz
It seemed like a good idea. Foolproof, even.
Getting a 3D model out of the game was very easy, especially now that I have the tools that automatically correct model distortions (I could also get the non-distorted model in T-pose, but for various reasons I decided to model the wireframe in the “default idle pose”). But that’s where #ez4ence ends.
STL of me
The problem with my 3D scanner is that it’s designed for scanning of small objects from a distance of 10-30 cm, which makes it absolute dogshit for scanning me.
What’s my other options?
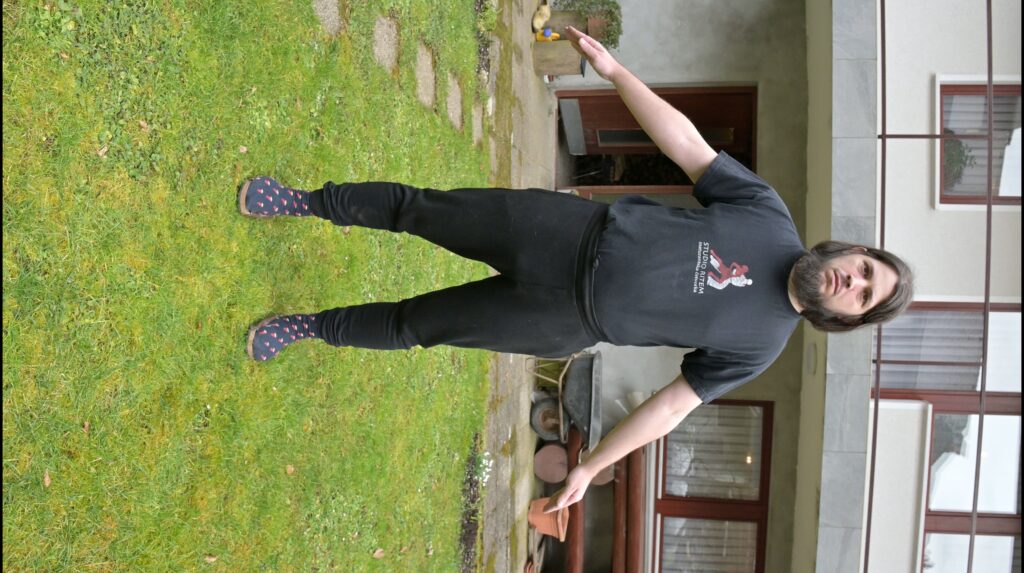
Well, photogrammetry is a thing. I could (and I did) ask my brother to take a shit ton of photos of me from a shit ton of different angles. Plan B was to record 4K video of a walk-around. Plan C was to have him do a 3D scan with his iPad. It allegedly has lidar.
On youtube, you have plenty of people saying how easy all three approaches are.
In practice: at work, I spend 8 hours a day sitting behind a computer. In my free time, I spend the rest of the day doing hobbies that also involve sitting at a desk, while also maybe eating a little bit too much. Do I look like someone who can hold a T-pose for 3 minutes, completely still, without shakes?
Not to mention that I have a serious lack of clothes that fit me tight and aren’t black, which can cause … issues. I’ve tried to mitigate some of the issues by intentionally setting camera to overexpose. The logic was that if I overexpose, I’ll bump those blacks into greys, which will increase my chances of getting something.
Meshroom — the program that takes a bunch of photos and spits out 3D models — still pulled off a valiant effort … but the model is not of the desired quality. My arms are flat out missing, because as it turns out: holding T-pose completely still for 2-3 minutes is incredibly hard.
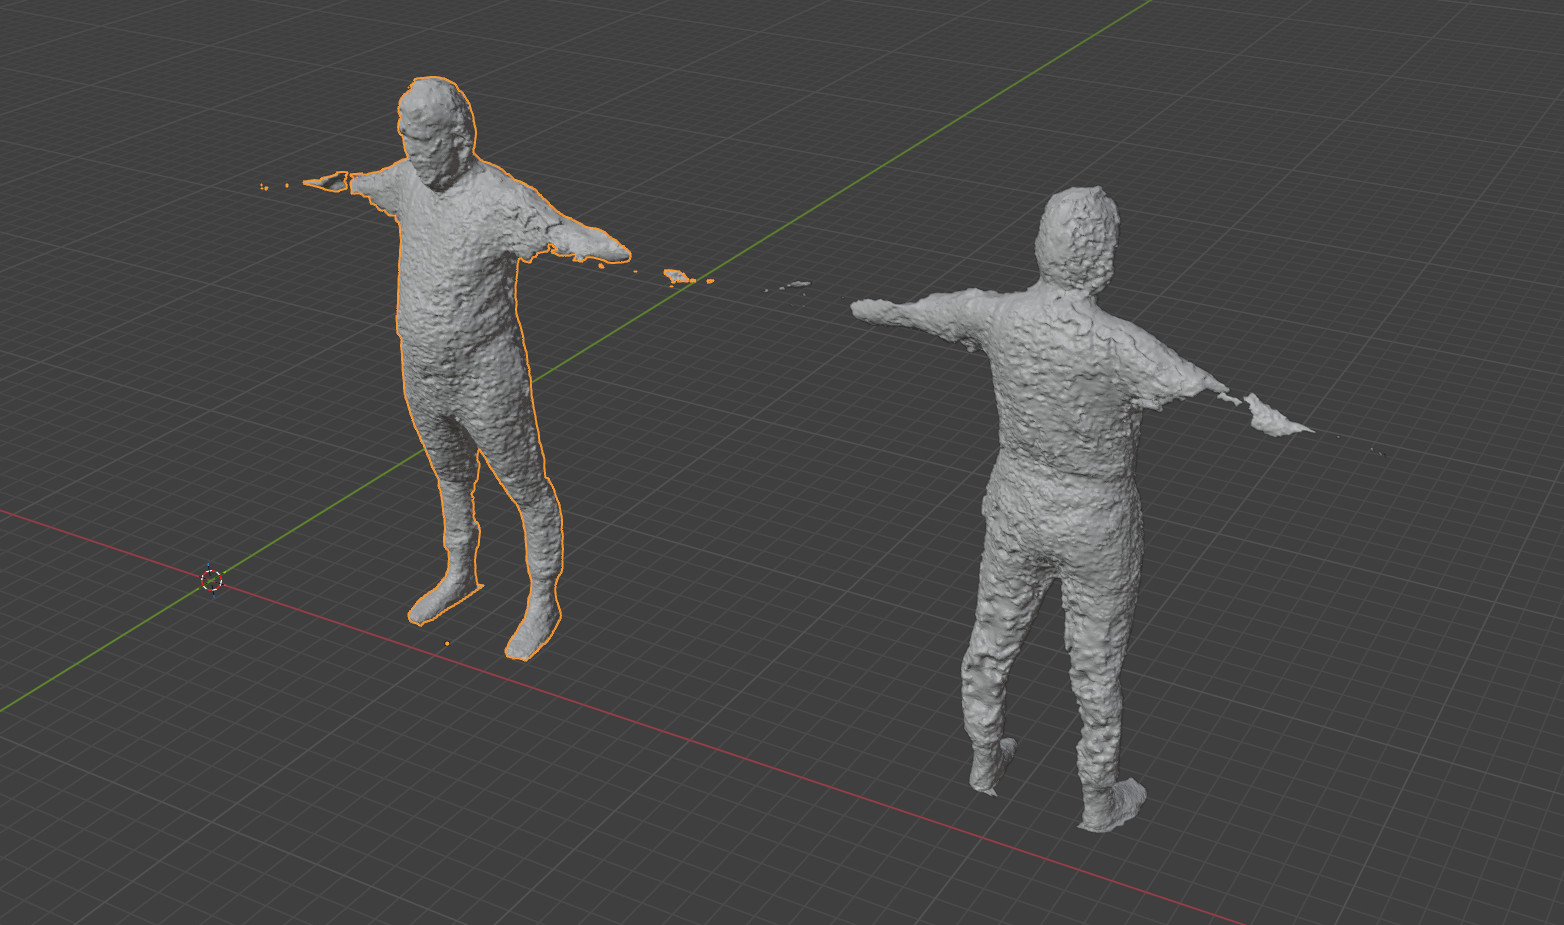
That was the result with a bunch of photos.
That’s what I got from the video:
Admittedly, the legs look pretty decent given that I was wearing black pants when taking photos/videos. It’s certainly a lot better than the iPad scan.
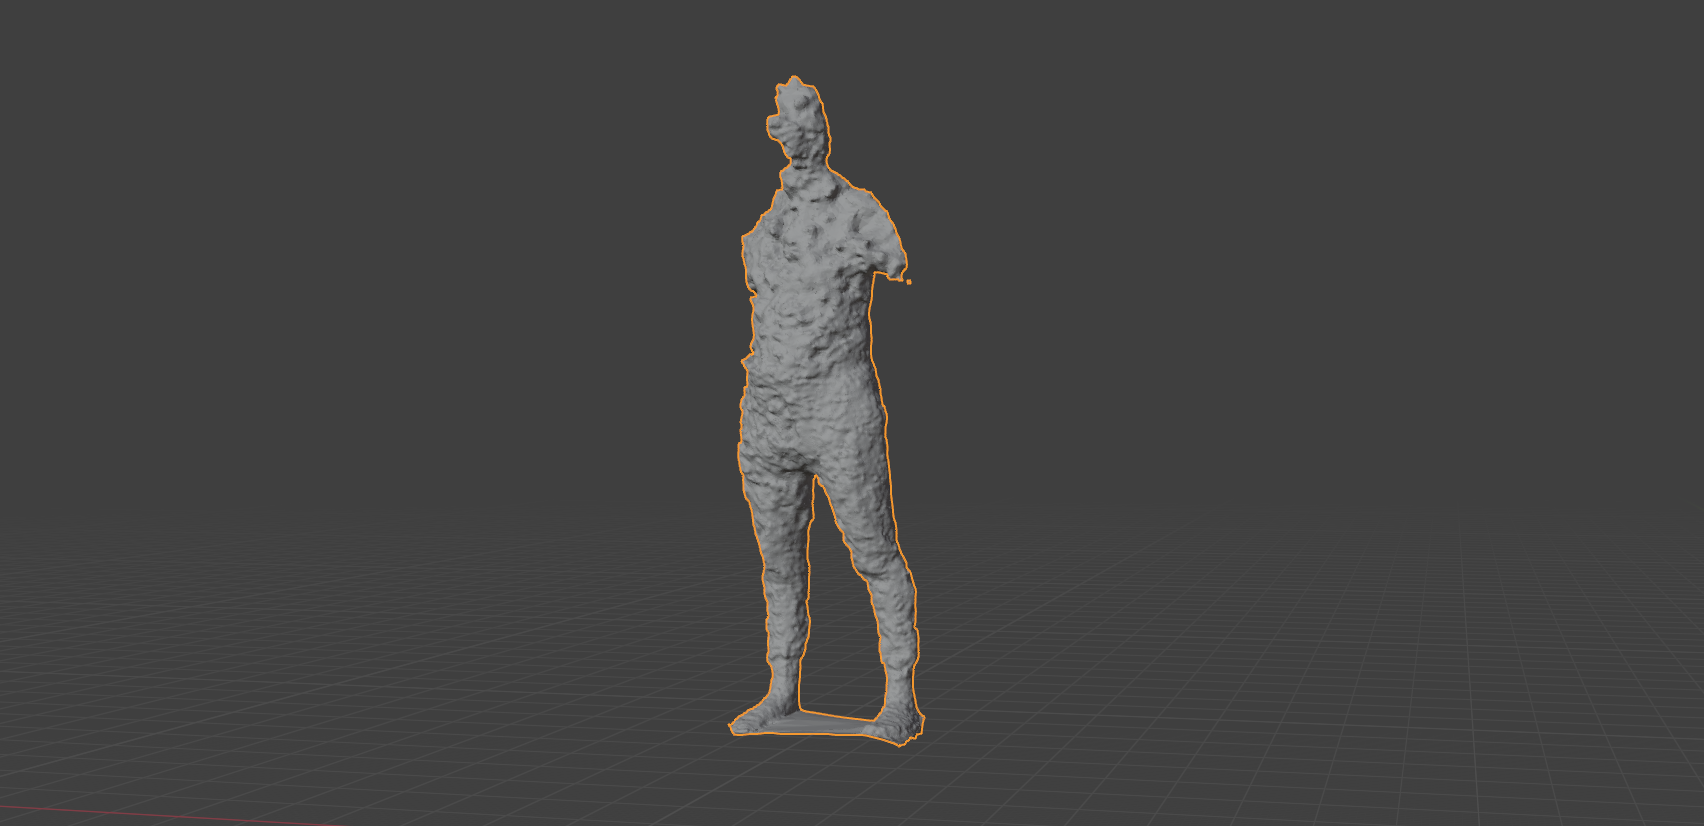
Allegedly, the iPad has lidar n stuff. However, allegedly, lidar doesn’t work in object scan mode (or so my brother tells me), so it also gets to re-construct a 3D model of me from captured images.
Unfortunately, the iPad wasn’t set to overexpose (I’m not even sure if the app allows you to do that), which means on the iPad scan, my pants were vantablack black, kinda like a black hole that sucked in all the light. This resulted in a 3D model of me that was comically inaccurate — it made my belly twice as big as it is, and it made my legs into toothpicks.
There was a second scan attempt, with me sticking a bunch of masking tape all over my clothes. My brother scanned me, but had to leave before the processing finished. I’m still waiting on that model.
Will it .blend?
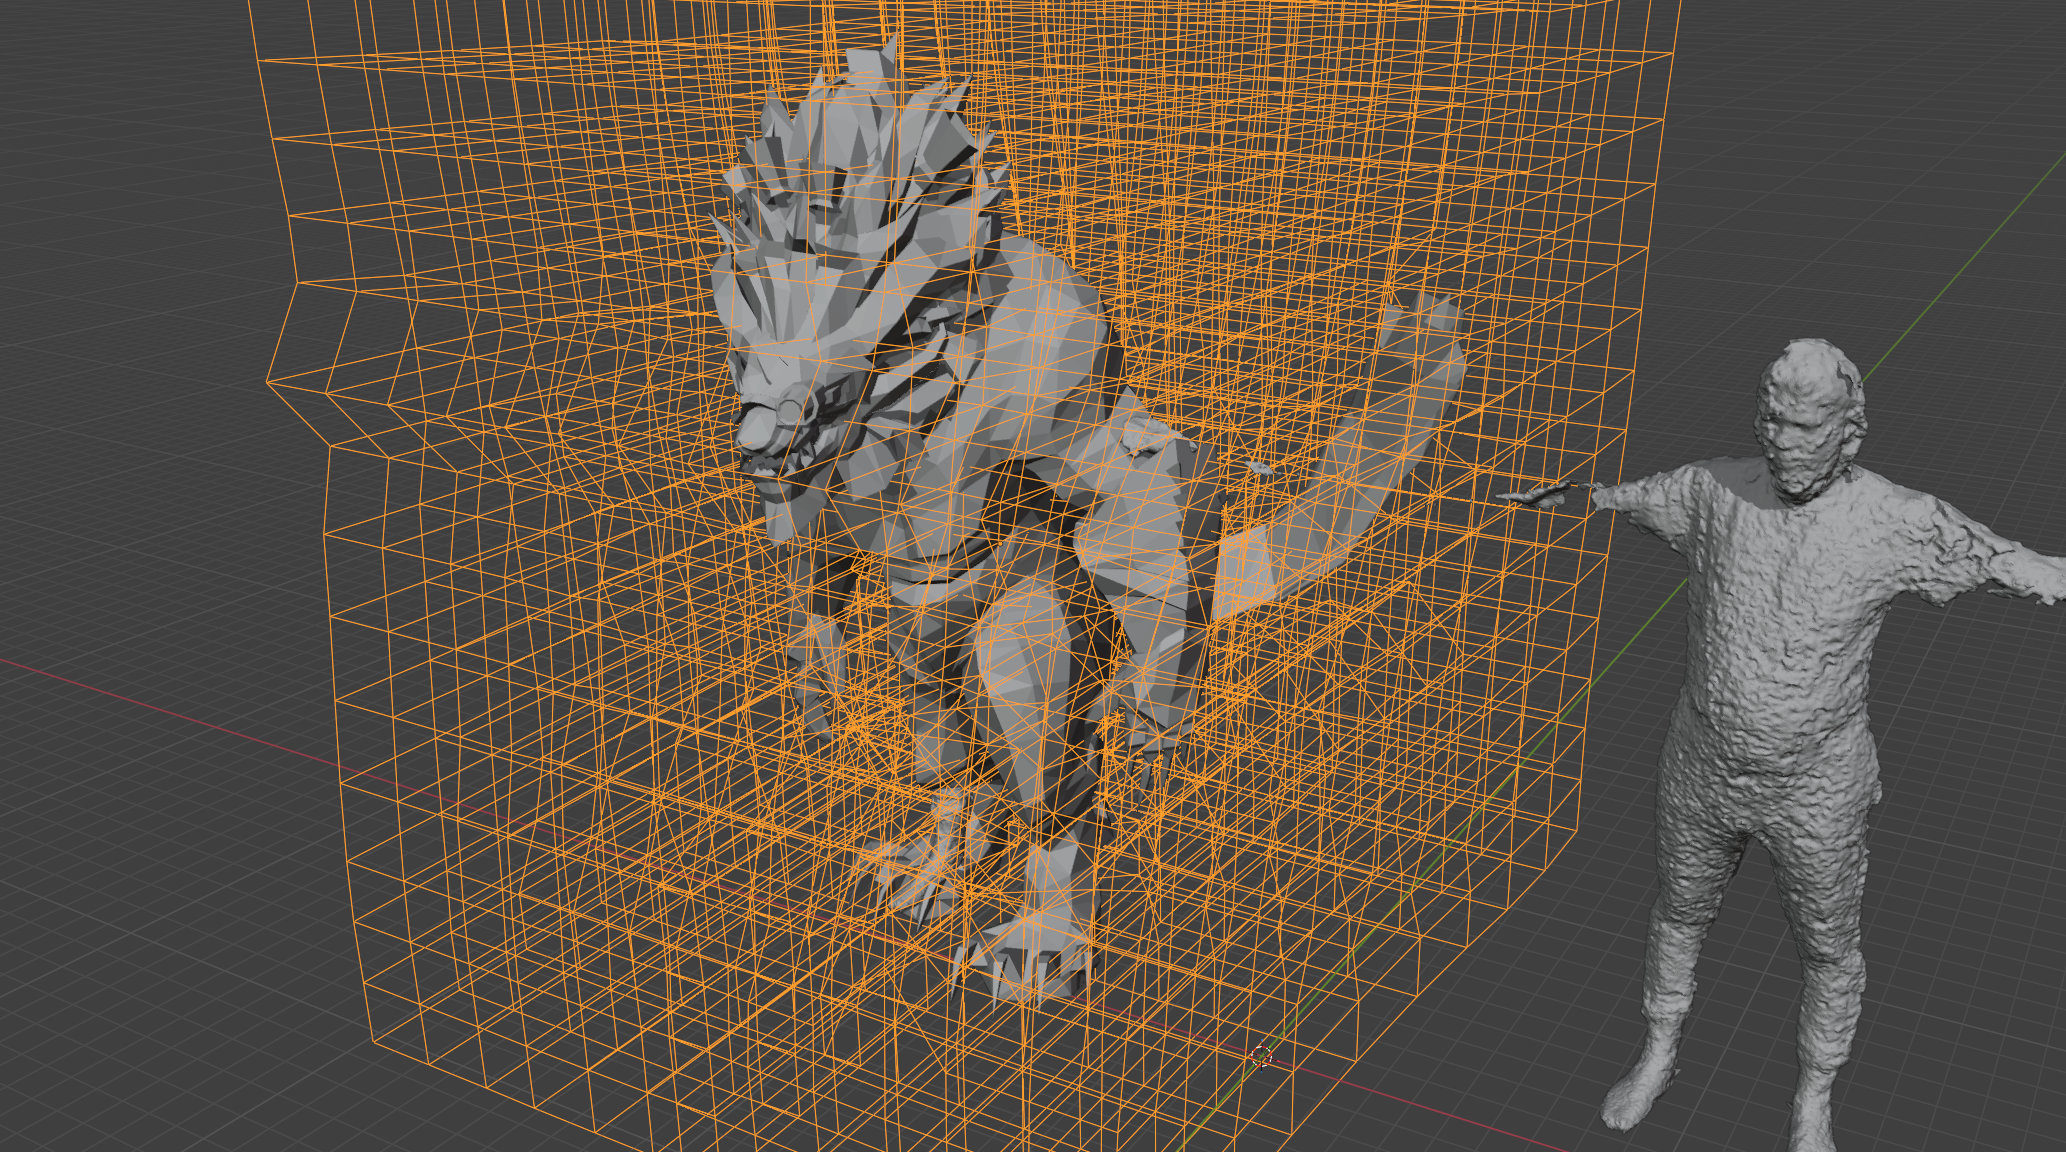
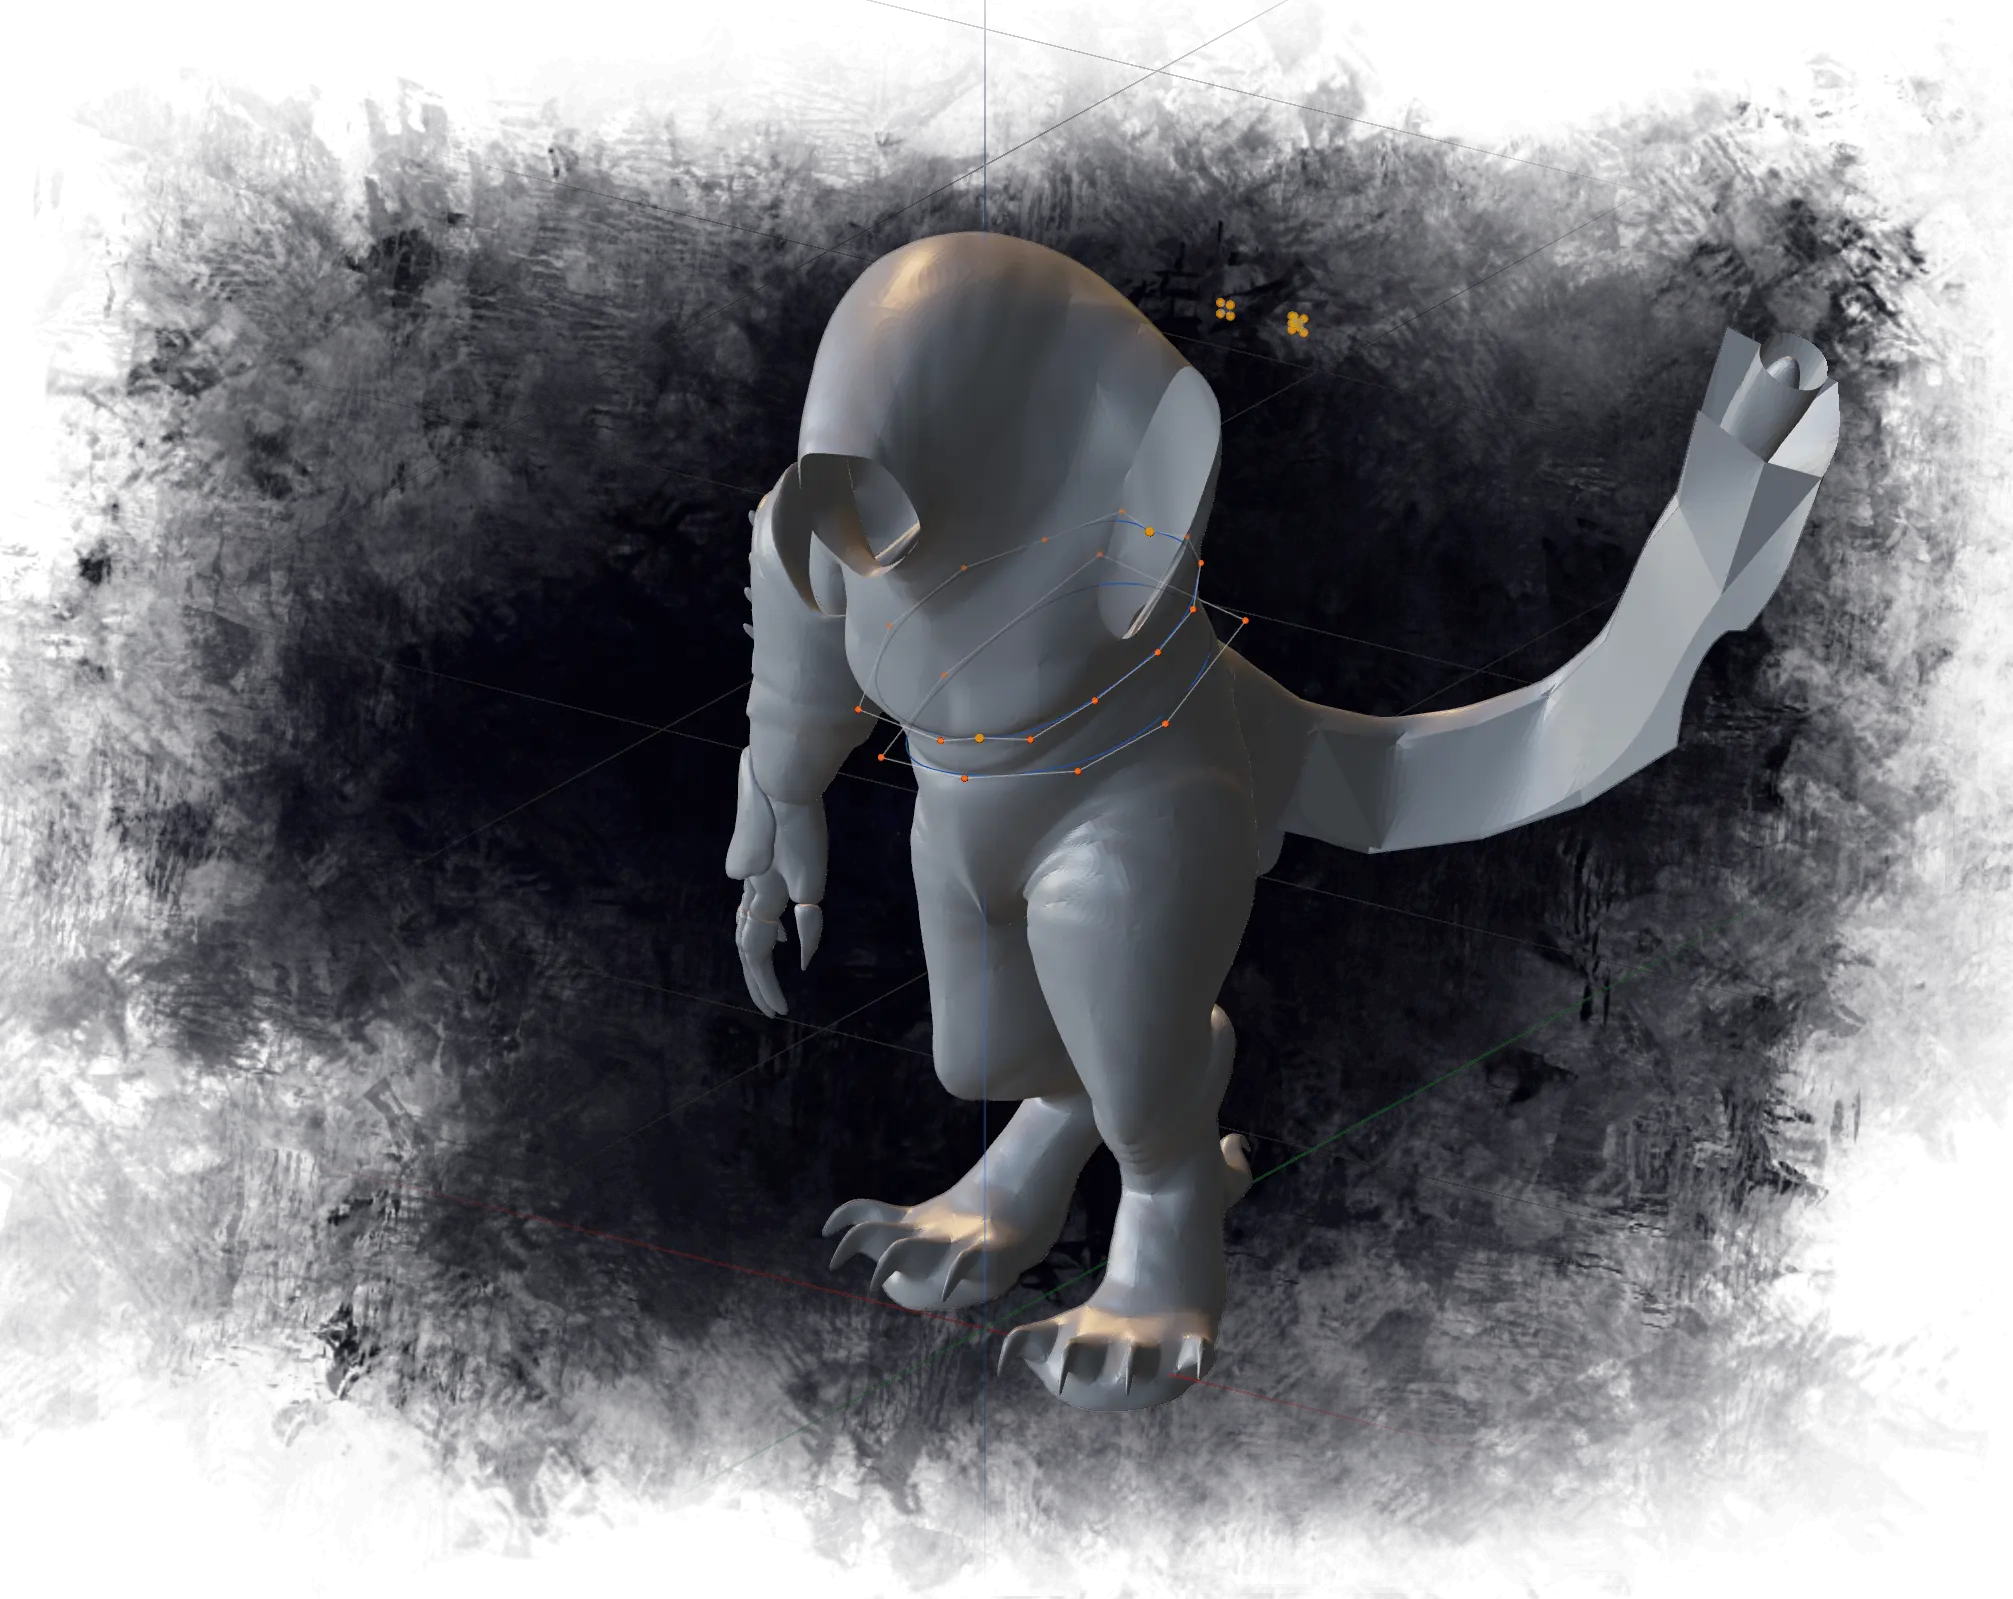
While I’m not too keen on modelling on the current model of me, it’s still gonna be decent enough for me to scale the charr to something a little bit closer to my slze. After slapping a lattice on the charr and dragging some points around, I manage to get something that manages to contain my body relatively decently.
But at what cost? Well, the lattice is a giant, hard-to-manage mess:
But the end result? It seems fine.
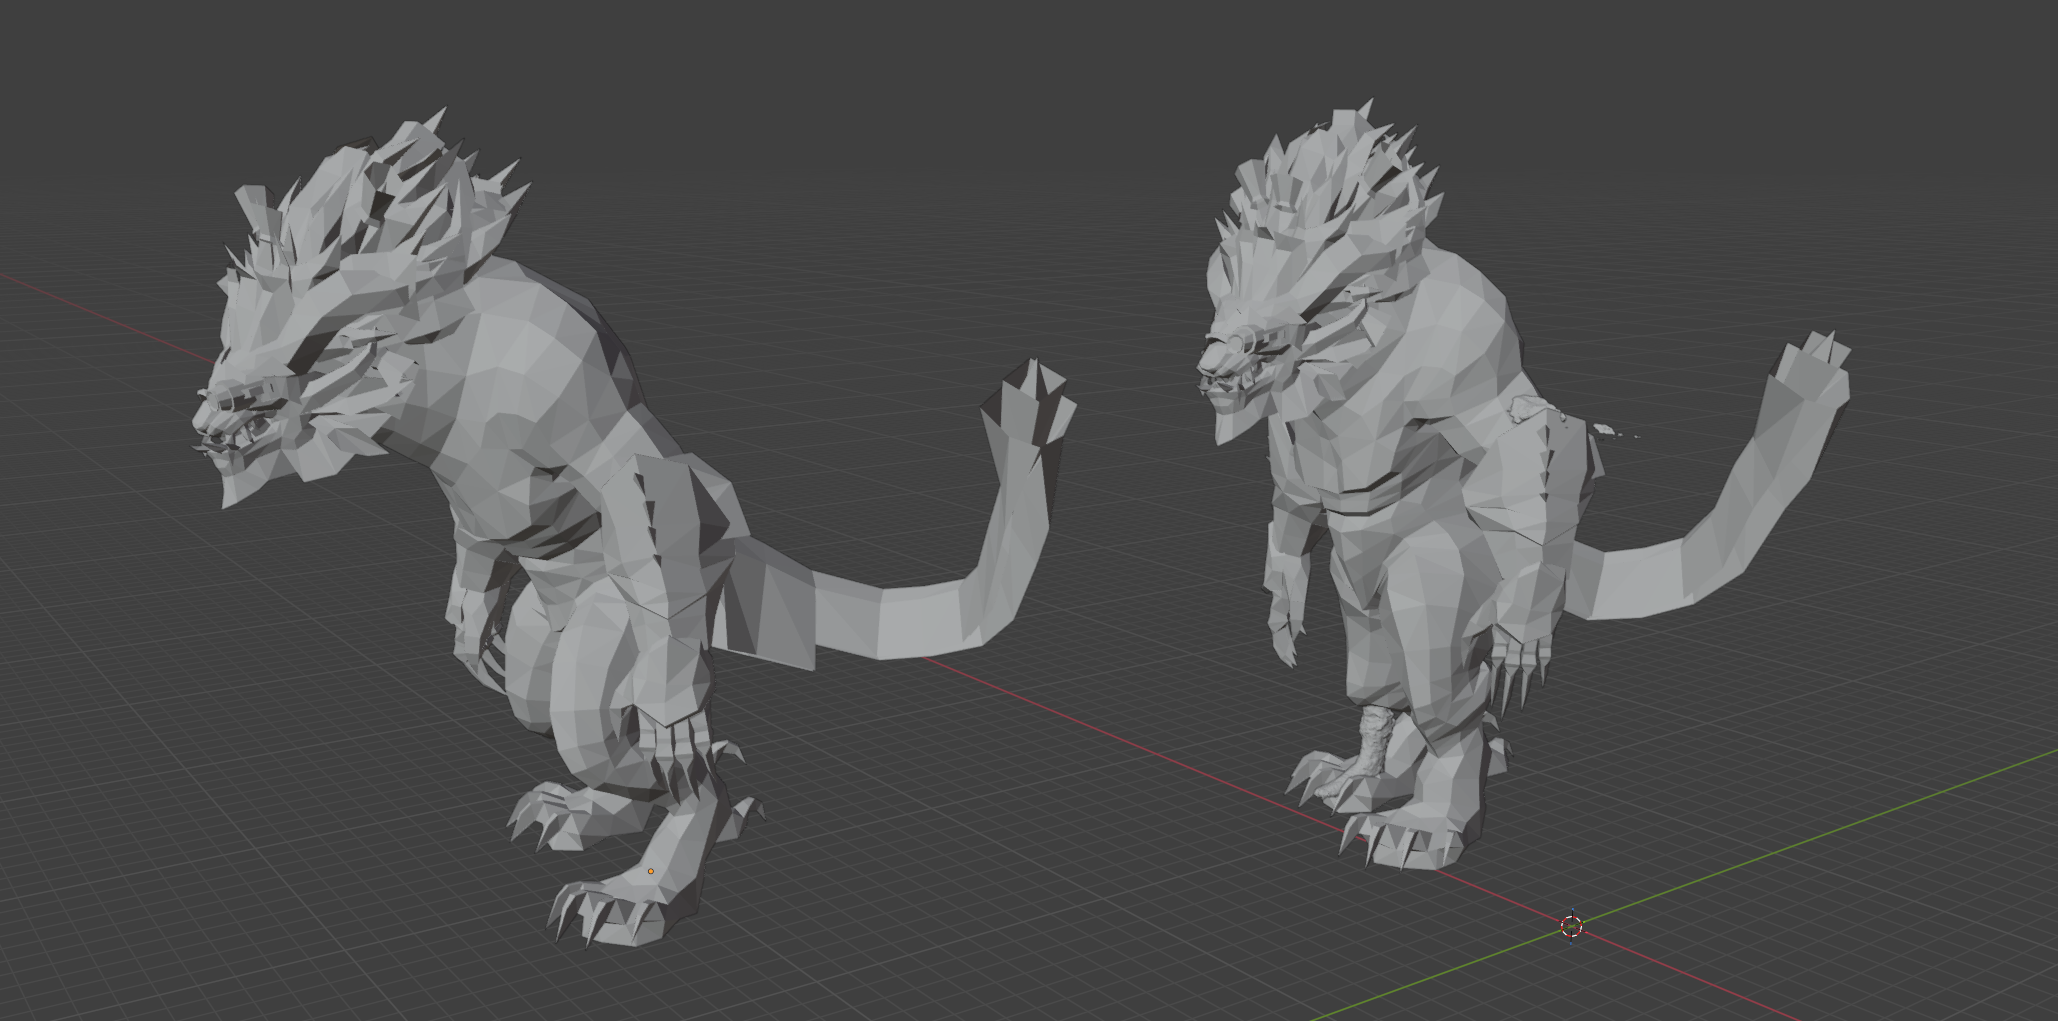
Sure, we did lose a lot of that hunch, but sometimes you have to make some sacrifices. Granted — if I were at a healthy weight, I could restore some of that hunch by pulling the belly back on the costume … probably. But it is what it is.
At this point, the fact that the 3D scan of me is missing my arms is starting to hurt a bit, so I tried to scan just my arm with my 3D scanner. How did it go?
Yeah, it made me remember how much of a piece of shit that scanner is. Scanner says it’s too close to the item. After moving it 5 mm, it’s too far, then the object I’m scanning is “out of sight” EVEN THOUGH I CAN FUCKING SEE IT THROUGH THE PREVIEW WINDOW, then the USB connector decides to be a fragile little snowflake and whoops, lost connection to the scanner. Upon restarting the scan, the scanner captures ONE (1) random frame of points in space that’s more or less a hallucination013D scanner and the software to control it do not utilize AI, btw, so it’s not a hallucination in the AI sense of the word — essentially, a garbage capture — and starts pestering you to “return to a scanned area”, even though you can’t because the “scanned area” is essentially a few random points. So you have to restart the scan a few times … and then it’s back to the “too close, too far, but never just right” game.
Eventually and through a lot of effort, I do manage to get a scan of my arm, aaand …
Yeah. I need to correct for elbow position as well.
The Wireframe
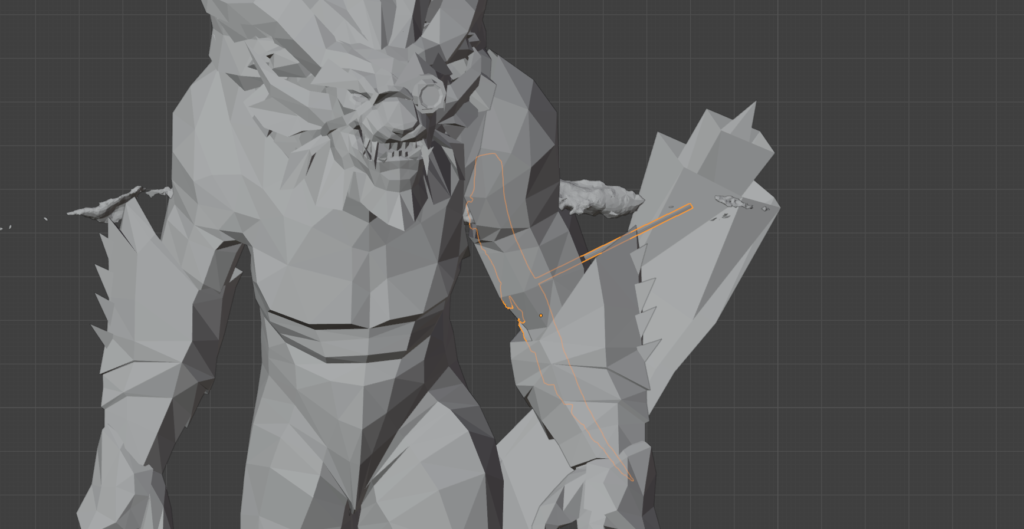
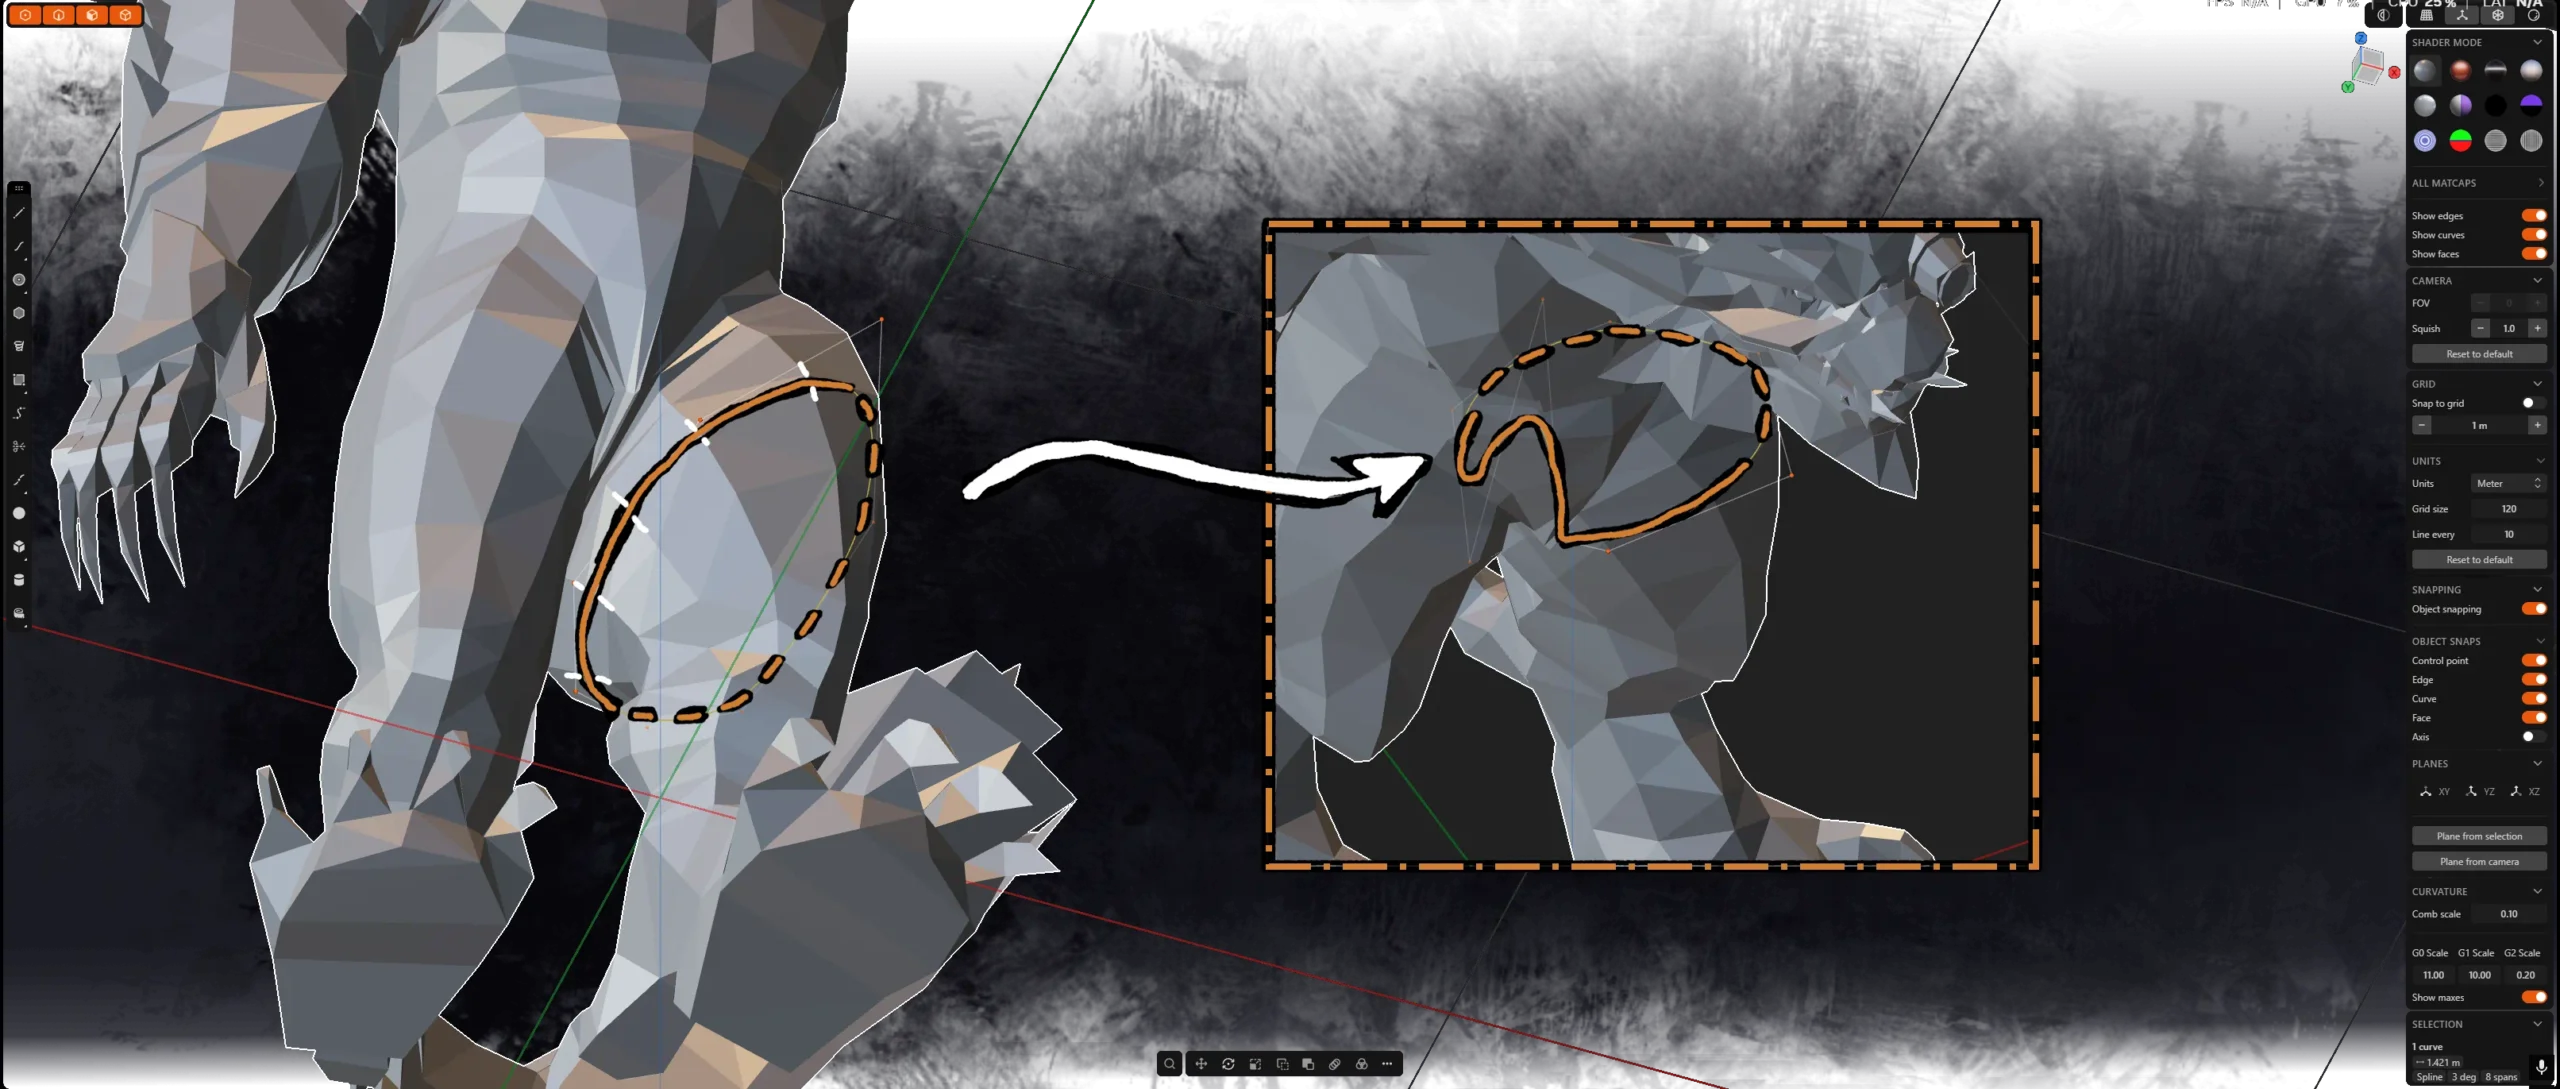
Now that we have a 3D model, we can go into a proper-ish CAD program and sketch a wireframe over the mesh we got from Blender.
With Plasticity, this is very easy: just import the mesh, and then start drawing curves on top of it. Thankfully, Plasticity will automatically snap the control points of the curve to the faces of your mesh, and it will never ever snap to some random point halfway up your mum’s fan██y that you didn’t ask for for no reason. Snapping always makes sense and never ever makes mind-bogglingly nonsensical snapping decisions that make you selectively quote a certain Mentour Pilot vide—
Yeah, snapping in Plasticity is sometimes absolute dogshit.
But before we do too much work, let’s ask ourselves a question. Few questions, actually.
- Do we really want to work on a low-poly mesh?
- Do we really want to work on a mesh that includes character’s hair and other geometry that is going to get in the way when we try to sketch in Plasticity?
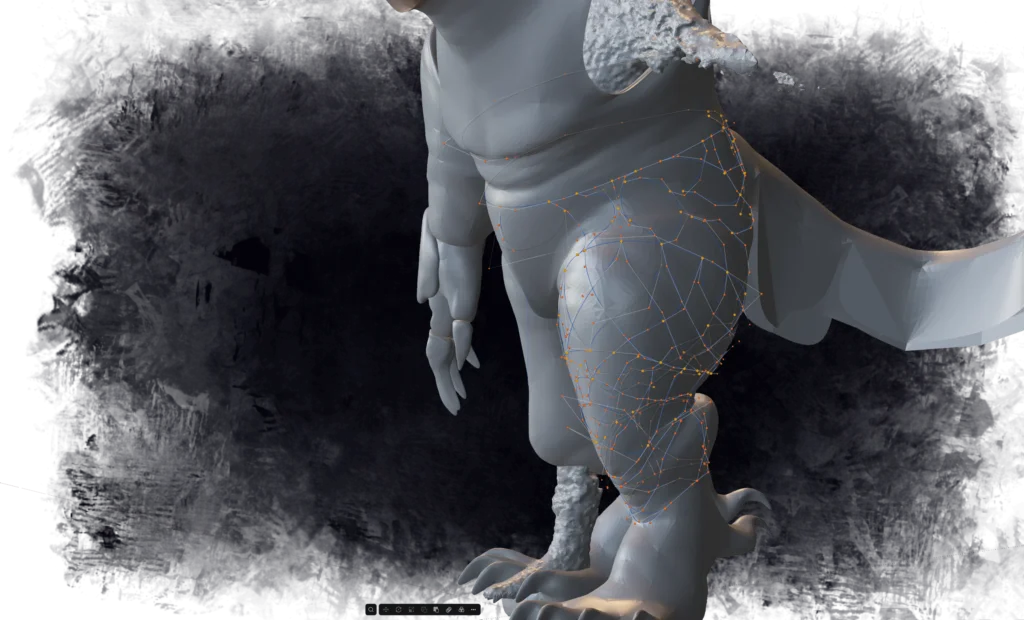
Of course not. If we sketch our wireframe on top of low-poly inaccurate mesh, the resulting wireframe will also be inaccurate and potentially uneven. So let’s clean up our model and throw a subdivision surface modifier on top of our mesh.
Much better.
Curiously, snapping also seems to work a lot better on higher-poly model: the moment I imported the high-poly model is the moment the problems with Plasticity snapping to random shit it shouldn’t decreased drastically. Eventually, the outer wireframe is done — at least for the legs.
3D printing on an FDM printer takes five-ever, so I’m doing the legs first. I’ll do the legs first and leave working on the rest for when the legs are printing.
Now — would it surprise you if I told you I wasn’t always doing the shortcut express?
I’ve already tried to solve the problem of clamps that would attach the wireframe of the costume to my legs once before. The first attempt had me trying to design parts on top of a sketch, and it was hell. The clamps took way too long to do, especially since the XY plane for them was tilted (this wasn’t the only inefficiency, but I’m gonna you a bit of complaining here). Not to mention that the fact that I was drawing on top of a very terrible 2D sketch wasn’t helping things.
But I did up printing the test leg clamps out of the TPU, and even did a test fit. They were okay, though at the same time they were also a little bit too floppy. Currently, it kinda seems like I should add a few PLA segments in the middle of the TPU part to add some rigidity, but we’ll think about that once we see the print times.

Making wireframe printable
At this point, the wireframe is a bunch of zero-width lines that we need to thicken into something that will be printable.
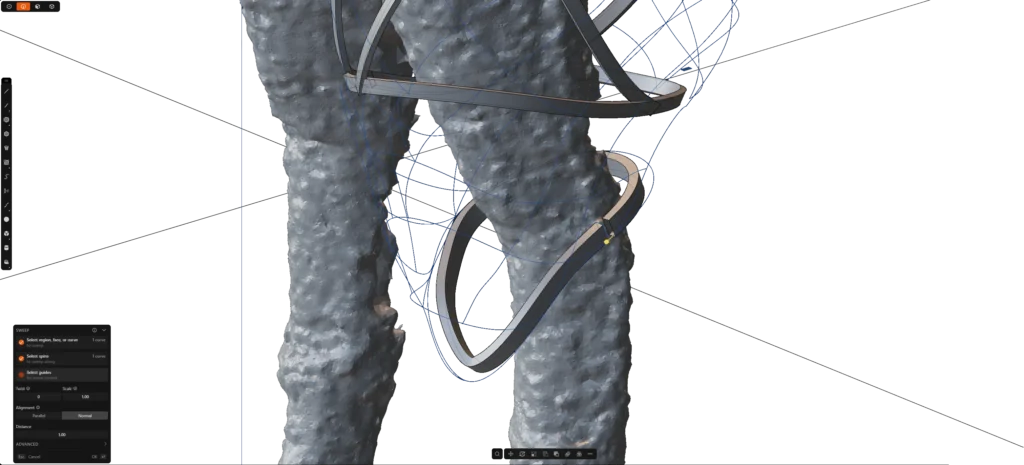
Until this point, I kinda assumed that plasticity has the ability to extrude a shape along a path, mostly because it’s a piece of software that costs half my yearly income12€170 when I’m not being hyperbolic, which is expensive but at the same time not really. AutoCAD is this much a month, while Plasticity was one-time purchase with one year of upgrades. Which is a dangerous game to play, but at the end of the day my assumption was correct. Plasticity has a sweep function.
Because I’m above reading the manual, I decided to see if I can figure out sweeping on my own. So I drew a square, and tried to sweep it along one of the wireframe curves. Results were nothing like the shape of the curve, but it appears that the shape is offset from the curve by some constant amount.
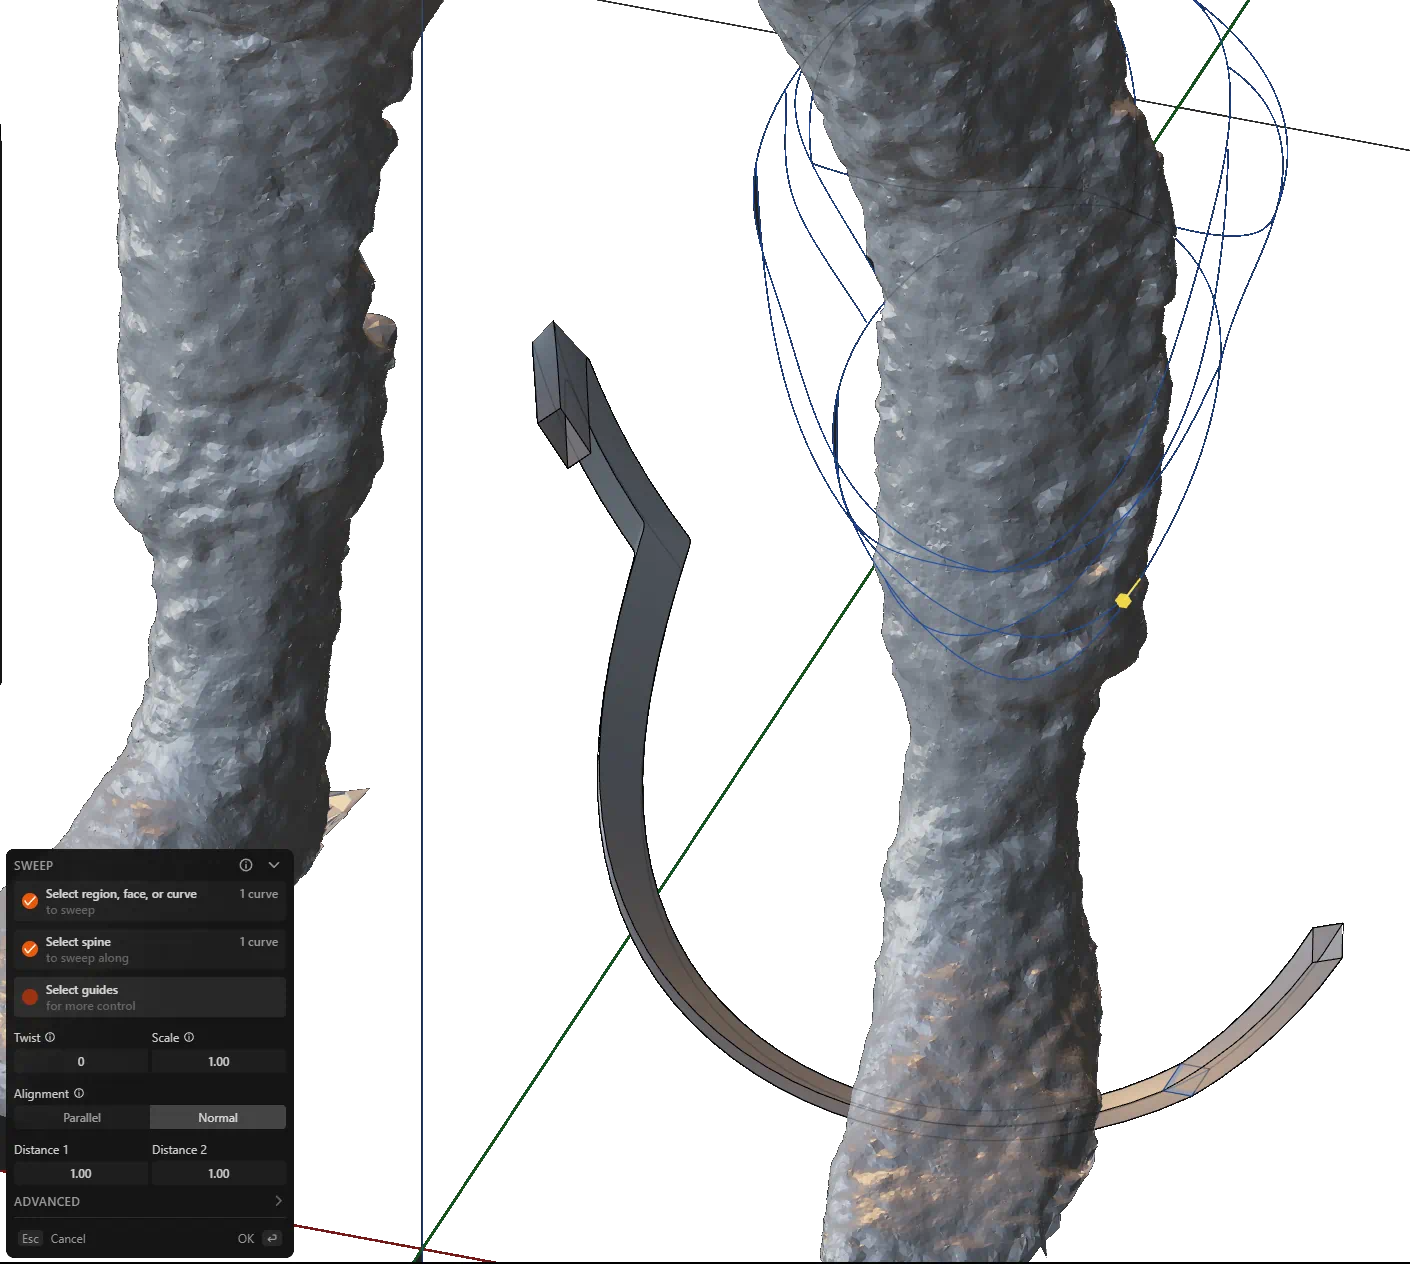
This seems to solve one of the cans I’ve been kicking down the road.
See — the wireframe was drawn on what should be the outer surface of the character. The problem with that on the “outer surface” of the character, there’s gonna be fur. Under the fur, there’s gonna be 1-2 cm of upholstery foam. The wireframe will live under the upholstery foam — which means it needs to be inset from where the curves are by about 1-2 centimeters.
So if we place our rectangle at an appropriate location and rotate it by an appropriate amount, then sweep gives us pretty much exactly what we want.
This is neat. A near-future problem was solved for free, without me having to lift a finger.
Things then continue without major issues for a bit as I continue working on the upper leg. Eventually, I end up reaching the feet, and feet … they prove to be a bit of a problem. Major problem.
Foot-ish
The problem with feet of the costume is that they’re supposed to be between me and the ground, which makes foot of the costume a glorified shoe. When it comes to shoes, it’s nice of shoes fit your foot, otherwise you’re just asking for blisters.
My way of dealing with the risk of blisters is to actually wear proper shoes while inside the costume, so that’s one issue out of the way. But then there’s the other problem.
Feet are actually quite complex, which makes creating a wireframe a bit of a challenge — not to mention that soles shouldn’t be a wireframe to begin with.
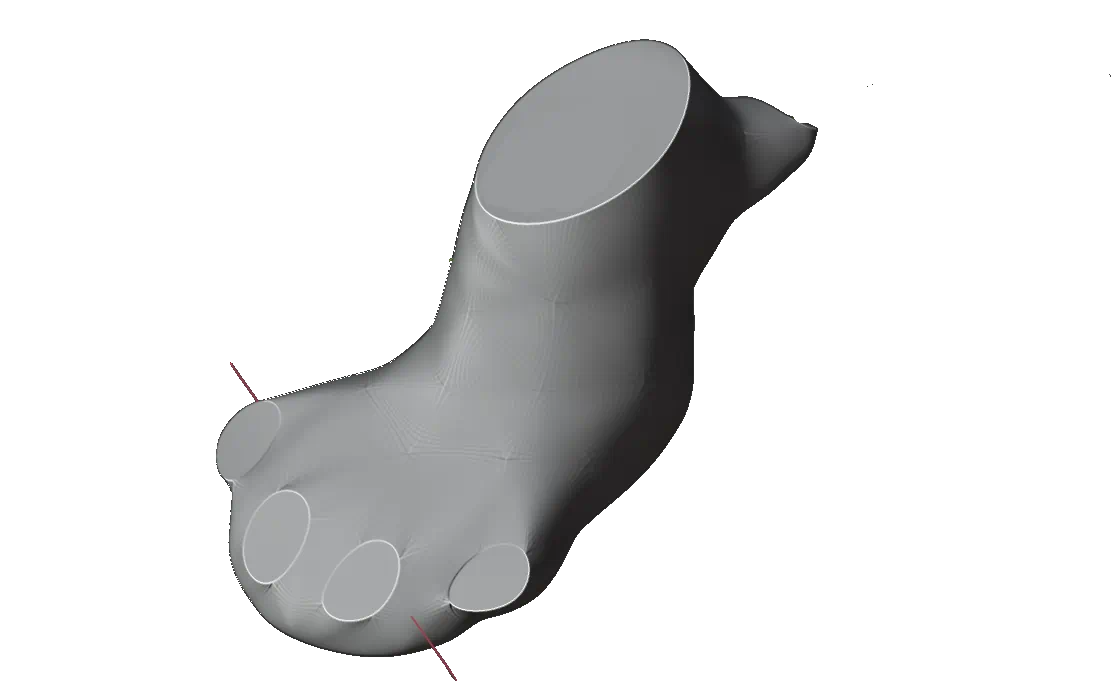
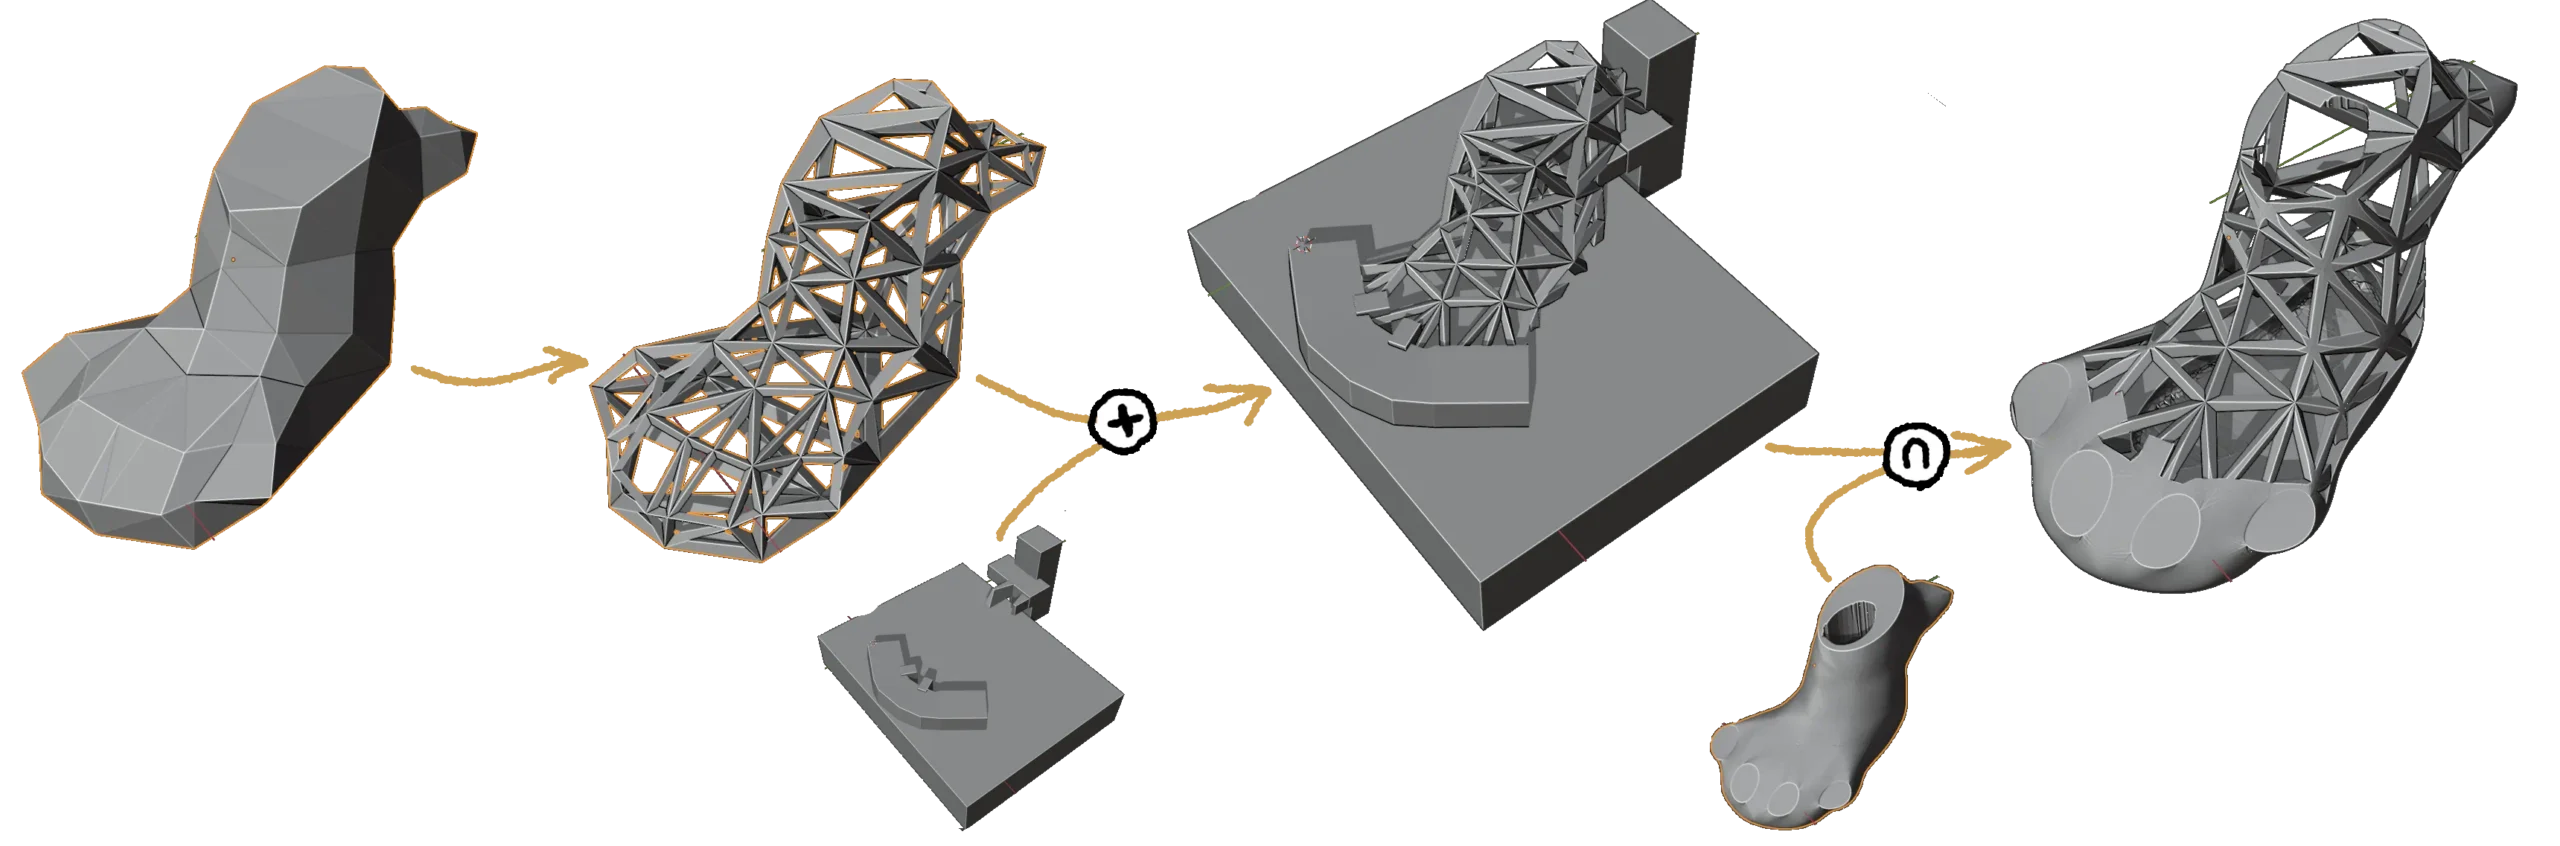
Time to abandon our patron saint Billy and ascend to the next degree of cheating — something that would give Todd Rogers a drag race for his money. Remember our high-poly smooth life-size 3D model of our character?
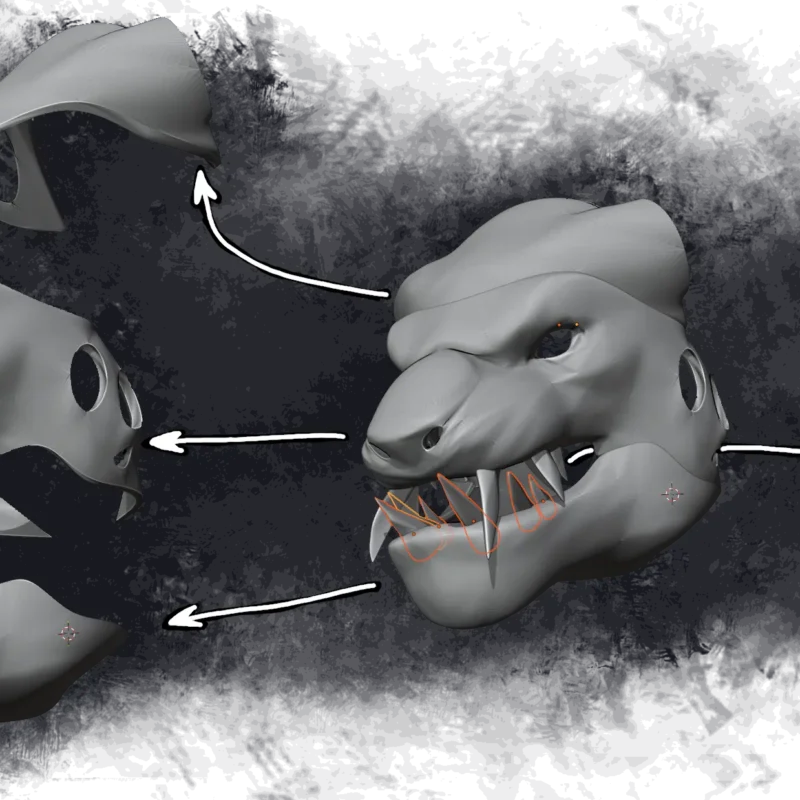
We could just … get the foot from there, remove the claws, and then create a foot-shaped hole inside of it. So here’s the foot:
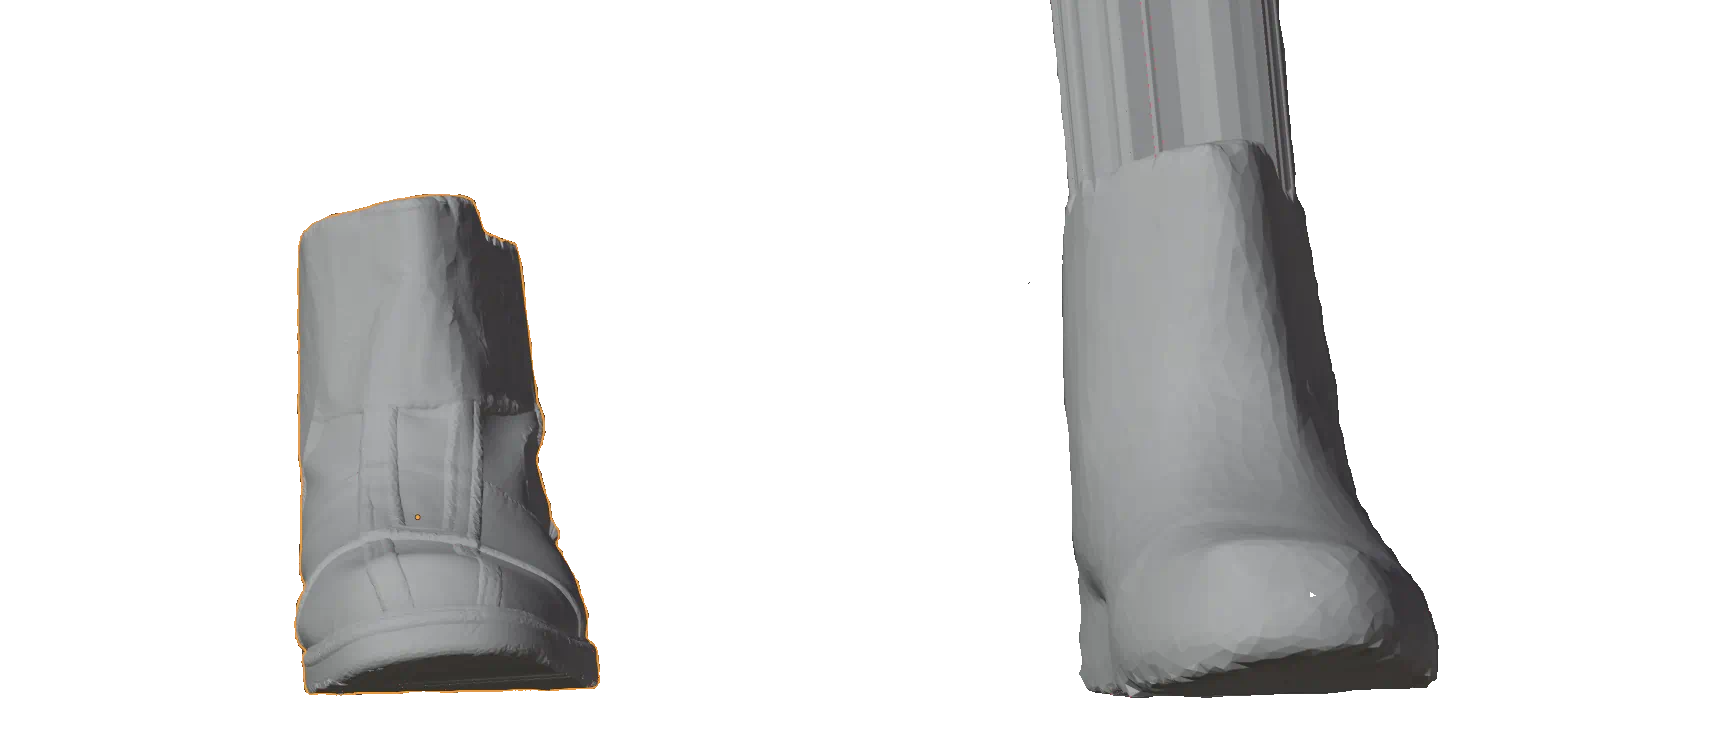
Then, I proceeded to scan the shoe and then simplified the model a bit. This was highly annoying because the floor in my room is light, the shoes are dark green, and my 3D scanner has garbage tier dynamic range. Not only that, but it’ll also happily lose connection to the computer mid-scan if you as much as look at the USB cable in a funny way. Fortunately, half my wardrobe consists of black T-shirts, so I produced one of those from the laundry bin and put them under the shoe. The scanner then finally complied with my wishes, and bam: I got my 3D model.
Because doing booleans with highly detailed models is generally a bad idea, I then proceeded to smooth the shoe model.
Now, we could boolean them together and get something out, but that would leave us with a giant print that would cost us a lot of filament, and — more importantly — a lot of time. It would be neat if foot were a wireframe mesh. Can we easily convert it to a wireframe?
Yes we can. Wireframe modifier will convert edges of a mesh into a 3D wireframe. Because we want our wireframe to be relatively sparse but thick, we need to spam wireframe on the low-poly version of the model. Once we have the wireframe, we can draw a few blocks around areas that we want to be solid, and then union the wireframe with said block. Since wireframe modifer makes the model grow a bit (and also because of the blocks that we drew), we finish things off by intersecting wireframe and blocks with the smooth model of the foot.
And that’s how the foot problem is solved.
Of course, this isn’t quite finished yet, but let’s throw this into PrusaSlicer, just so we can get our preliminary print times.
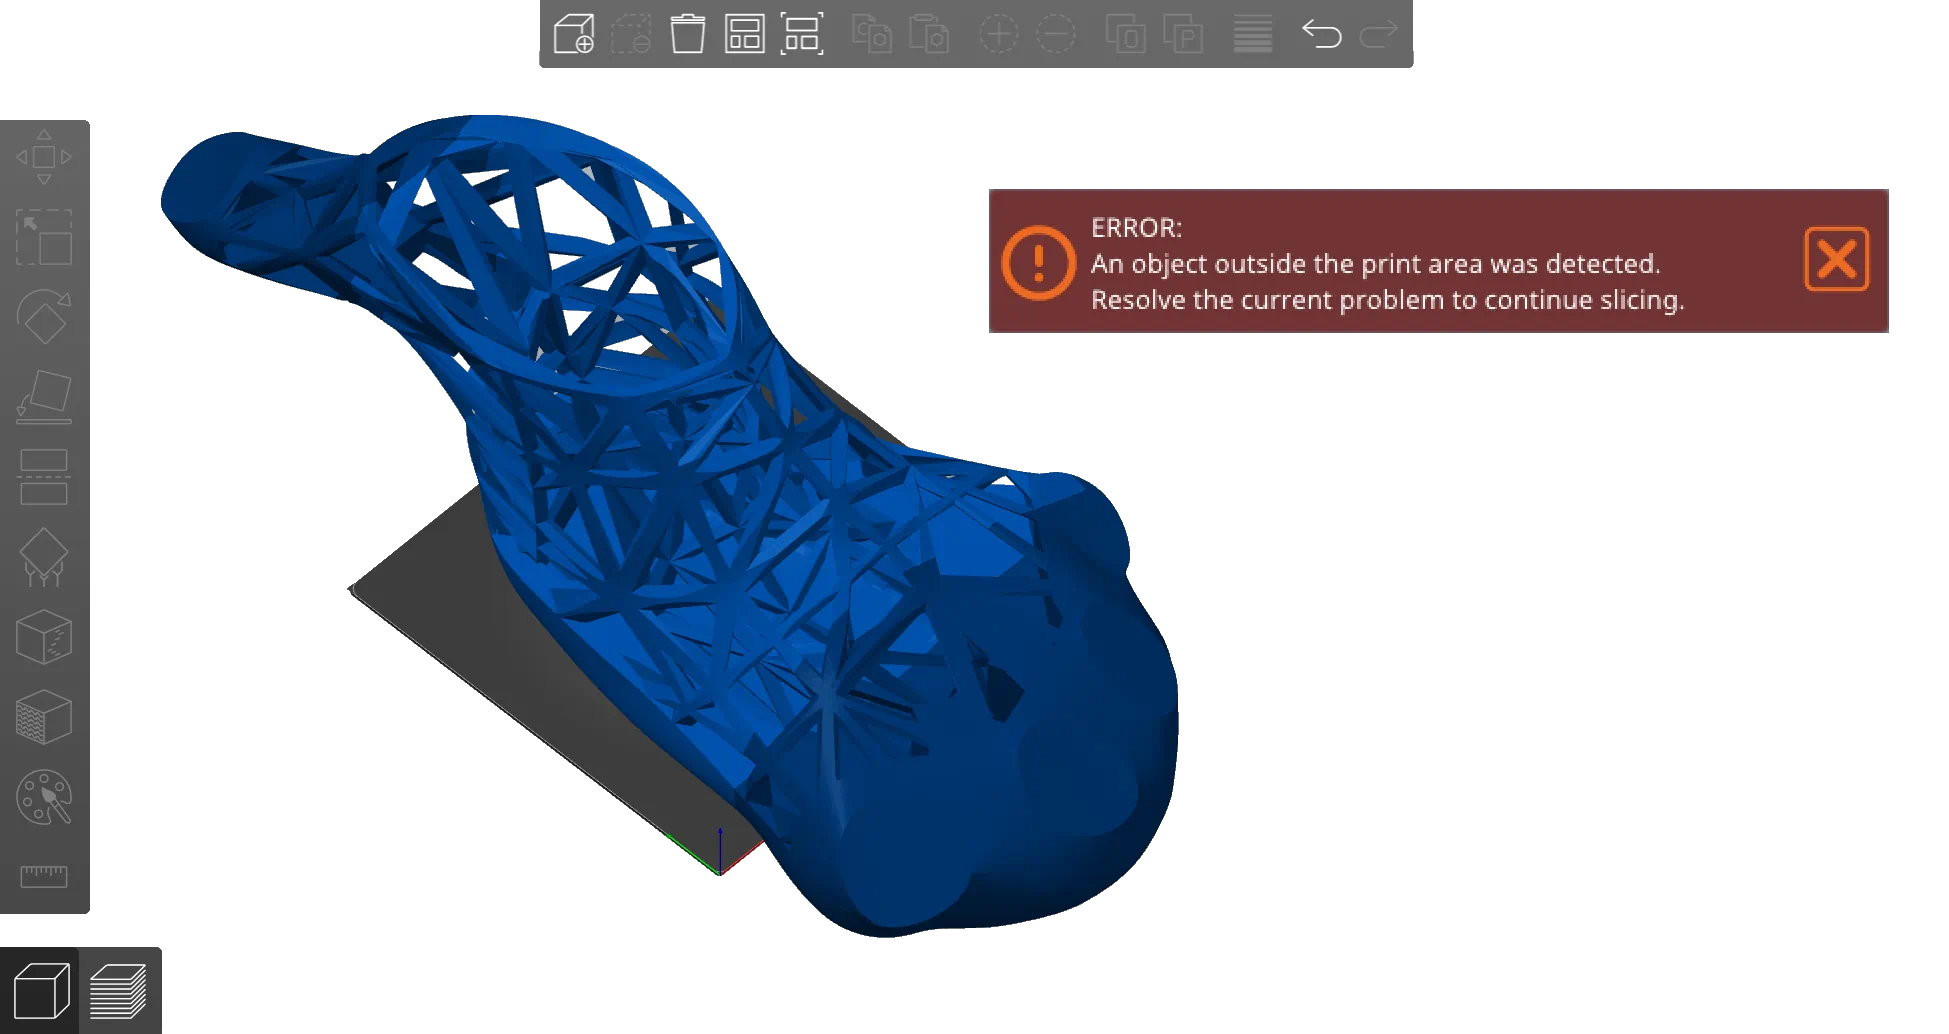
This didn’t look that big in Blender, but this indicates we might be running into issues. Let’s cut it into pieces and try again.
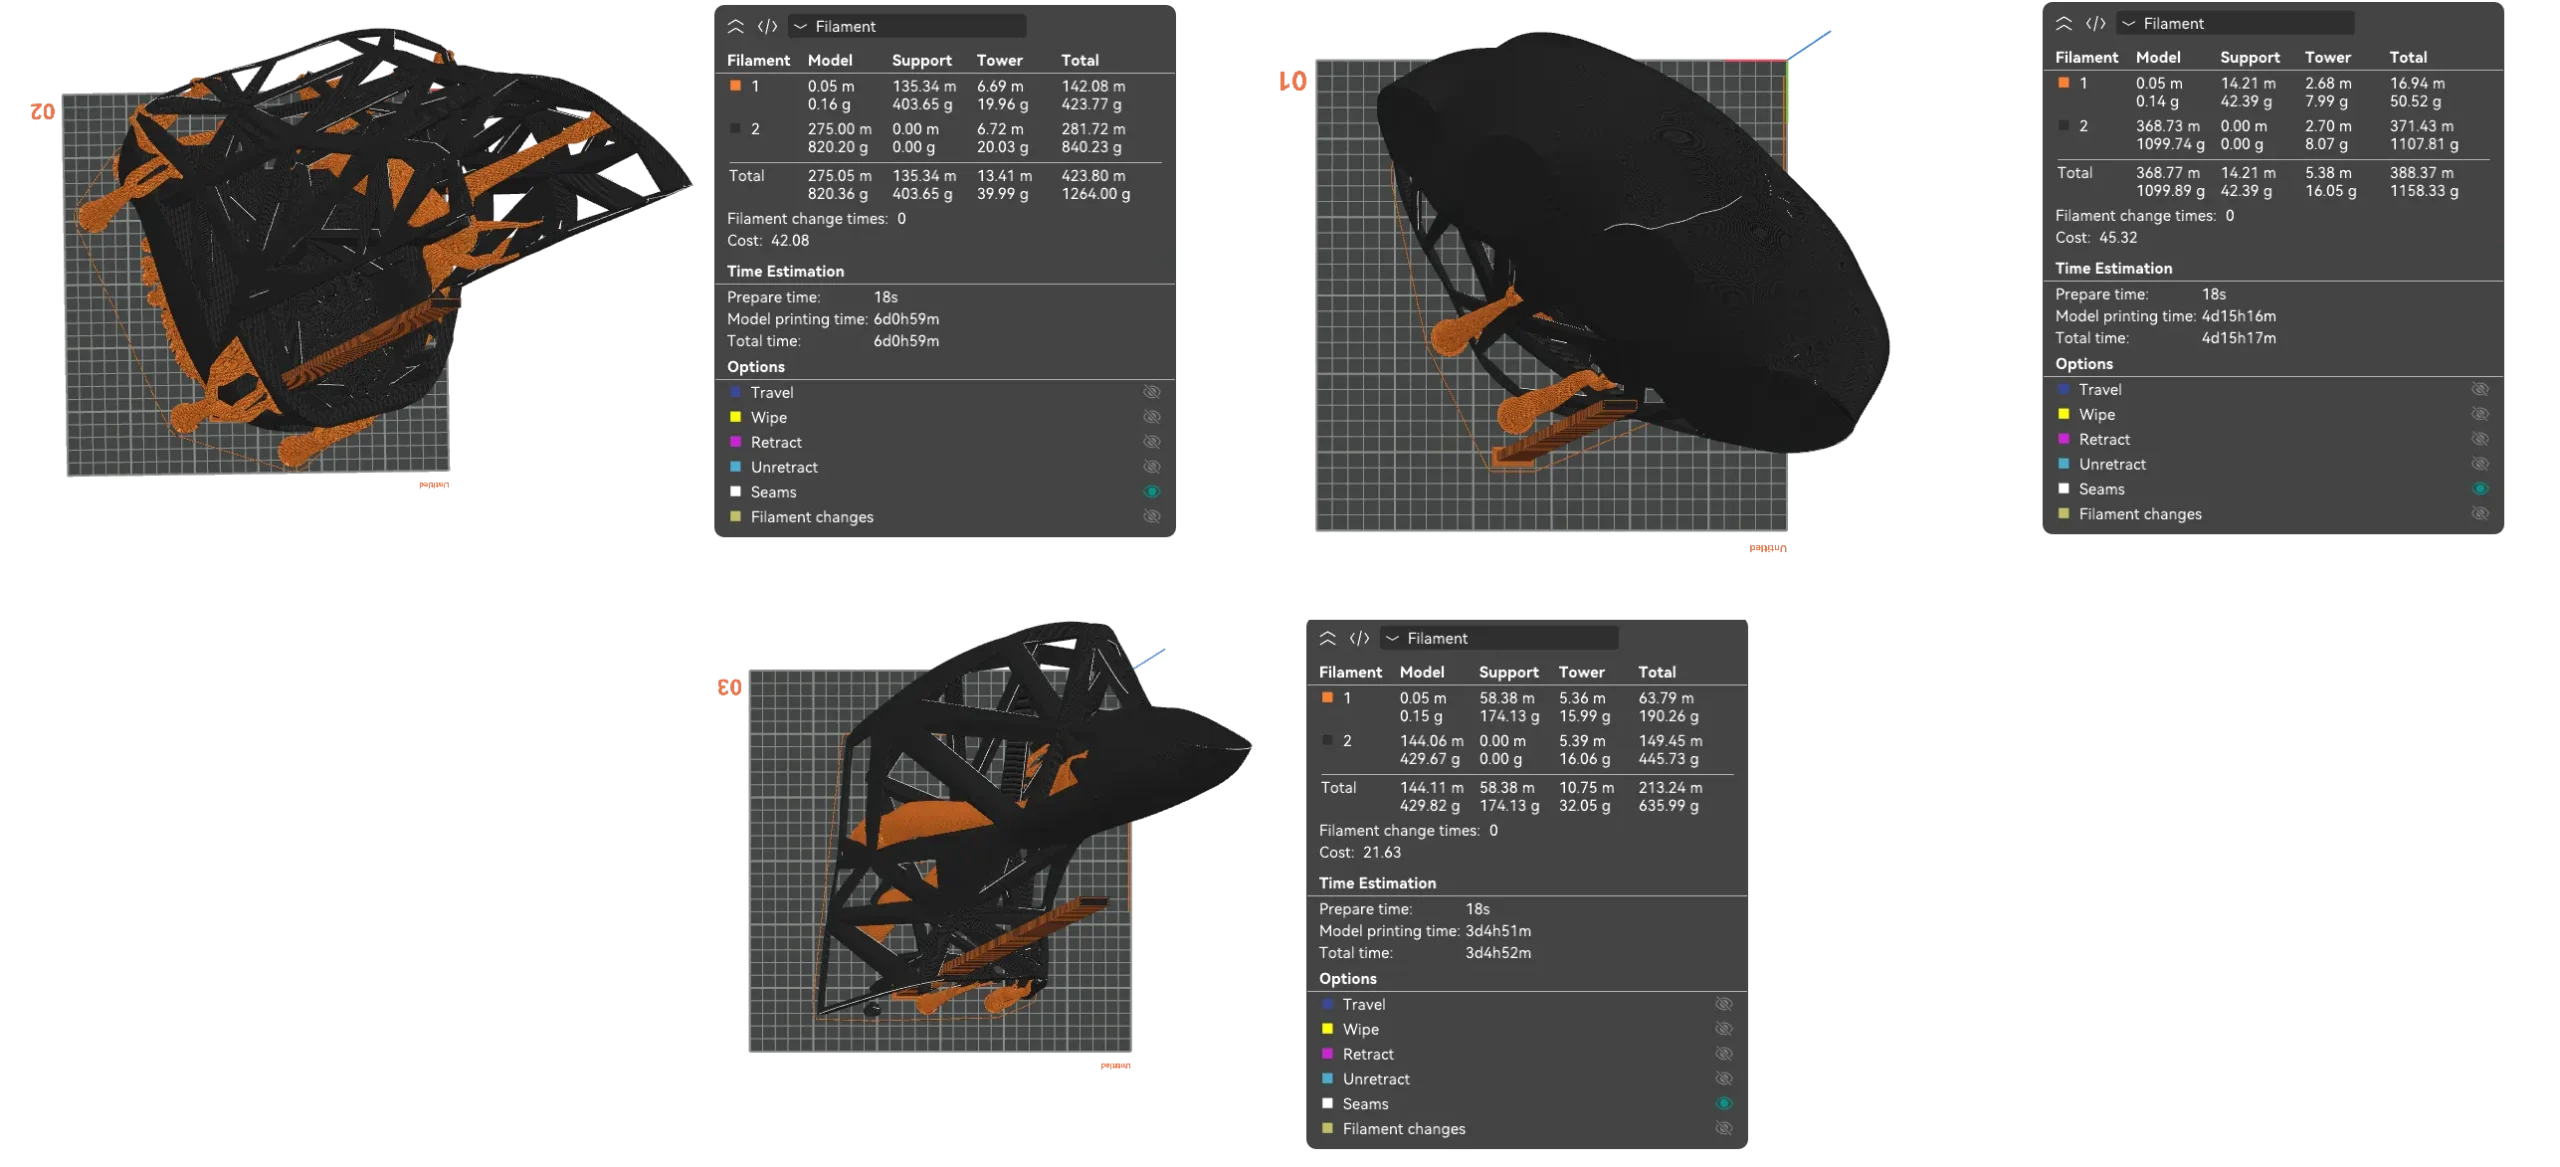
At the time of writing this particular section, I have TWO MONTHS.
So if this was the Downfall movie, we’d be at the scene where generals tell Hitler that things are getting dire, to which Hitler replies:
“Steiner’s 0.8mm nozzle will bring print times under control.”
To which Generals reply:
General 1: Mein Führer. Your hotend …
General B: Your stock MK8 hotend cannot melt plastic fast enough. It will not be able to speed up print times.
Fortunately for me, my Volcano hotends arrived last week, which should allow me to print a little bit faster. However, changing them ended up taking up almost the entire weekend, because my printer developed a wiring issue: the signal wire for the bed leveling probe broke under a zip tie, and that rendered the printer inoperable. I wonder who Sovol bought their copper from.

Nothing that a bit of soldering iron couldn’t fix (it was also revealed that copper was so shit it looked more like aluminum), but a lost weekend is a lost weekend.
With a printer that should theoretically be capable of printing with .8mm, print times drop to about four days (though the calculations DO NOT account for tool changes!)
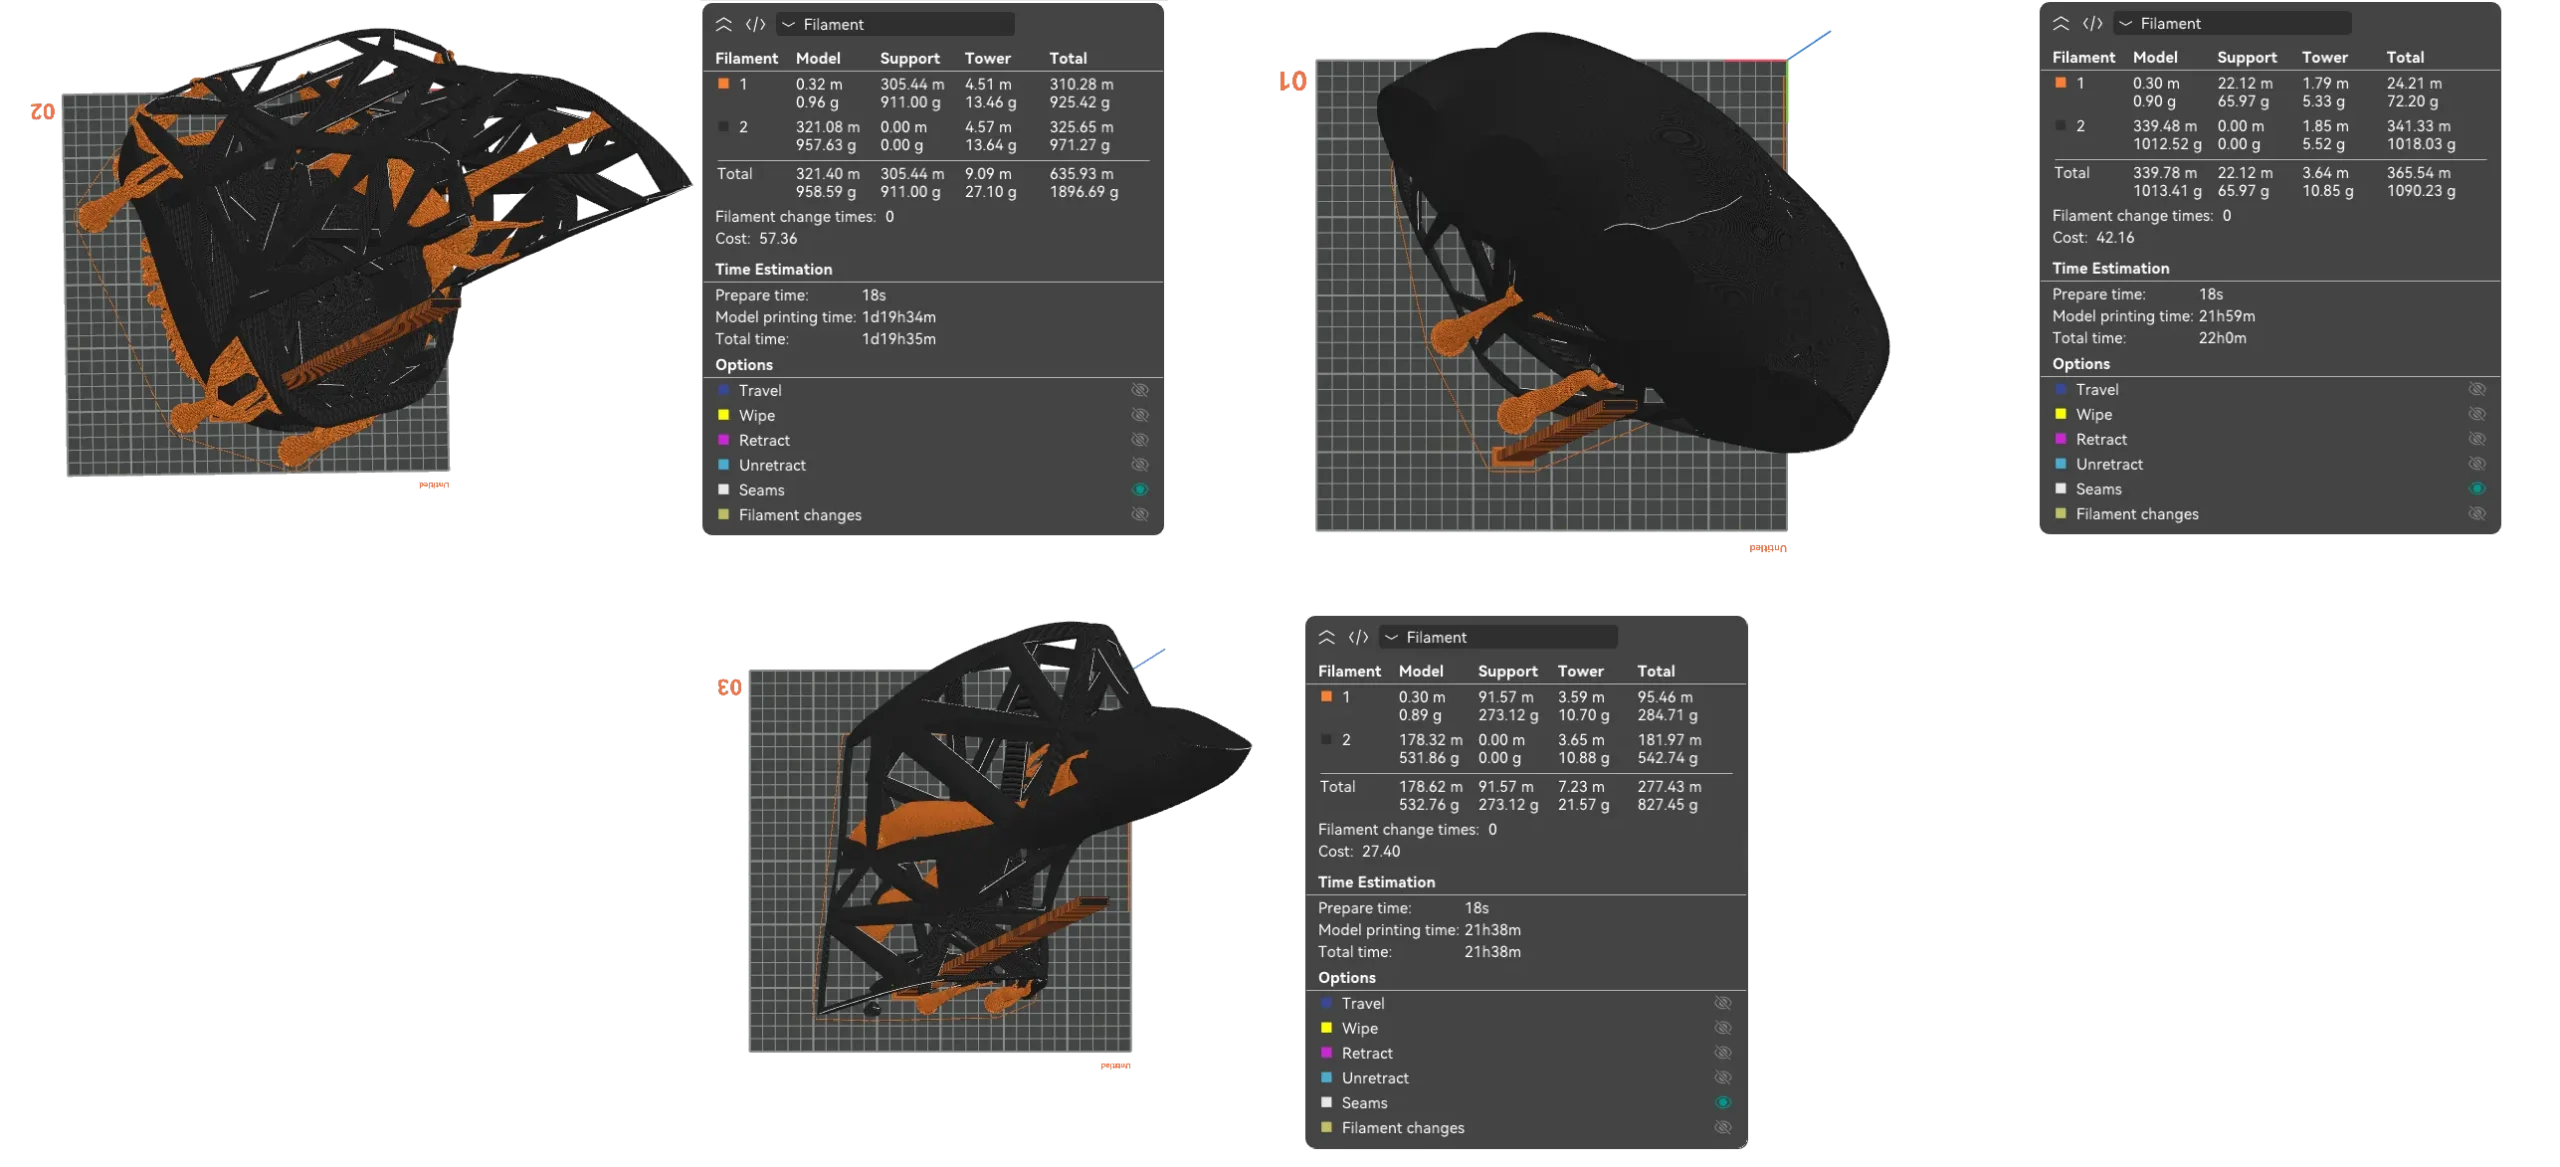
But that only solved half the problem. Print times are down, but filament usage isn’t. These three parts use about 2.5kg of TPU, which is going to bust some budgets. At 23€ per 700g, that’s a really expensive print, and at 2.5kg per foot the thing is also blowing up my weight budget.
There are additional things that we can turn down a bit, most notably:
- Usually, 2 wall loops are recommended. However, since .8 nozzle prints lines that are twice as wide as .4, we might be able to get away with wall thickness of 1 and still get reasonable amount of strength. Or, at the very least, we could do 1 + alternate extra layer. That’s gonna save us 25% of the filament on walls.
- We don’t need our prints to look nice. We can probably lower top and bottom shell thickness from the default value of 5-10 down to 2, and untick that “ensure vertical shell thickness” checkbox.
That can save us 25-40% of the filament, along with a further decrease in printing time.
Granted, this will reduce the strength of the print, but given that this isn’t going to be a particularly load-bearing structure23Other than the parts that will make contact with my feet and the ground, which still need to be reinforced, but that’s details., I can probably survive with severely weakened structure. Worst case scenario, I can go get a roll of silvertape to reinforce the wireframe.
Which basically means we’re pretty gucci … as long as it prints.
This would be a good place to insert the Padme meme.
Doing the test print
Since the prints are going to take a while, we’ll start printing the feet right away, and worry about less critical parts (like the wireframe) later — while the feet are printing. Since ensuring sufficient infill in the soles doubles the printing time, we’re looking at a week of print time per foot assuming no problems.
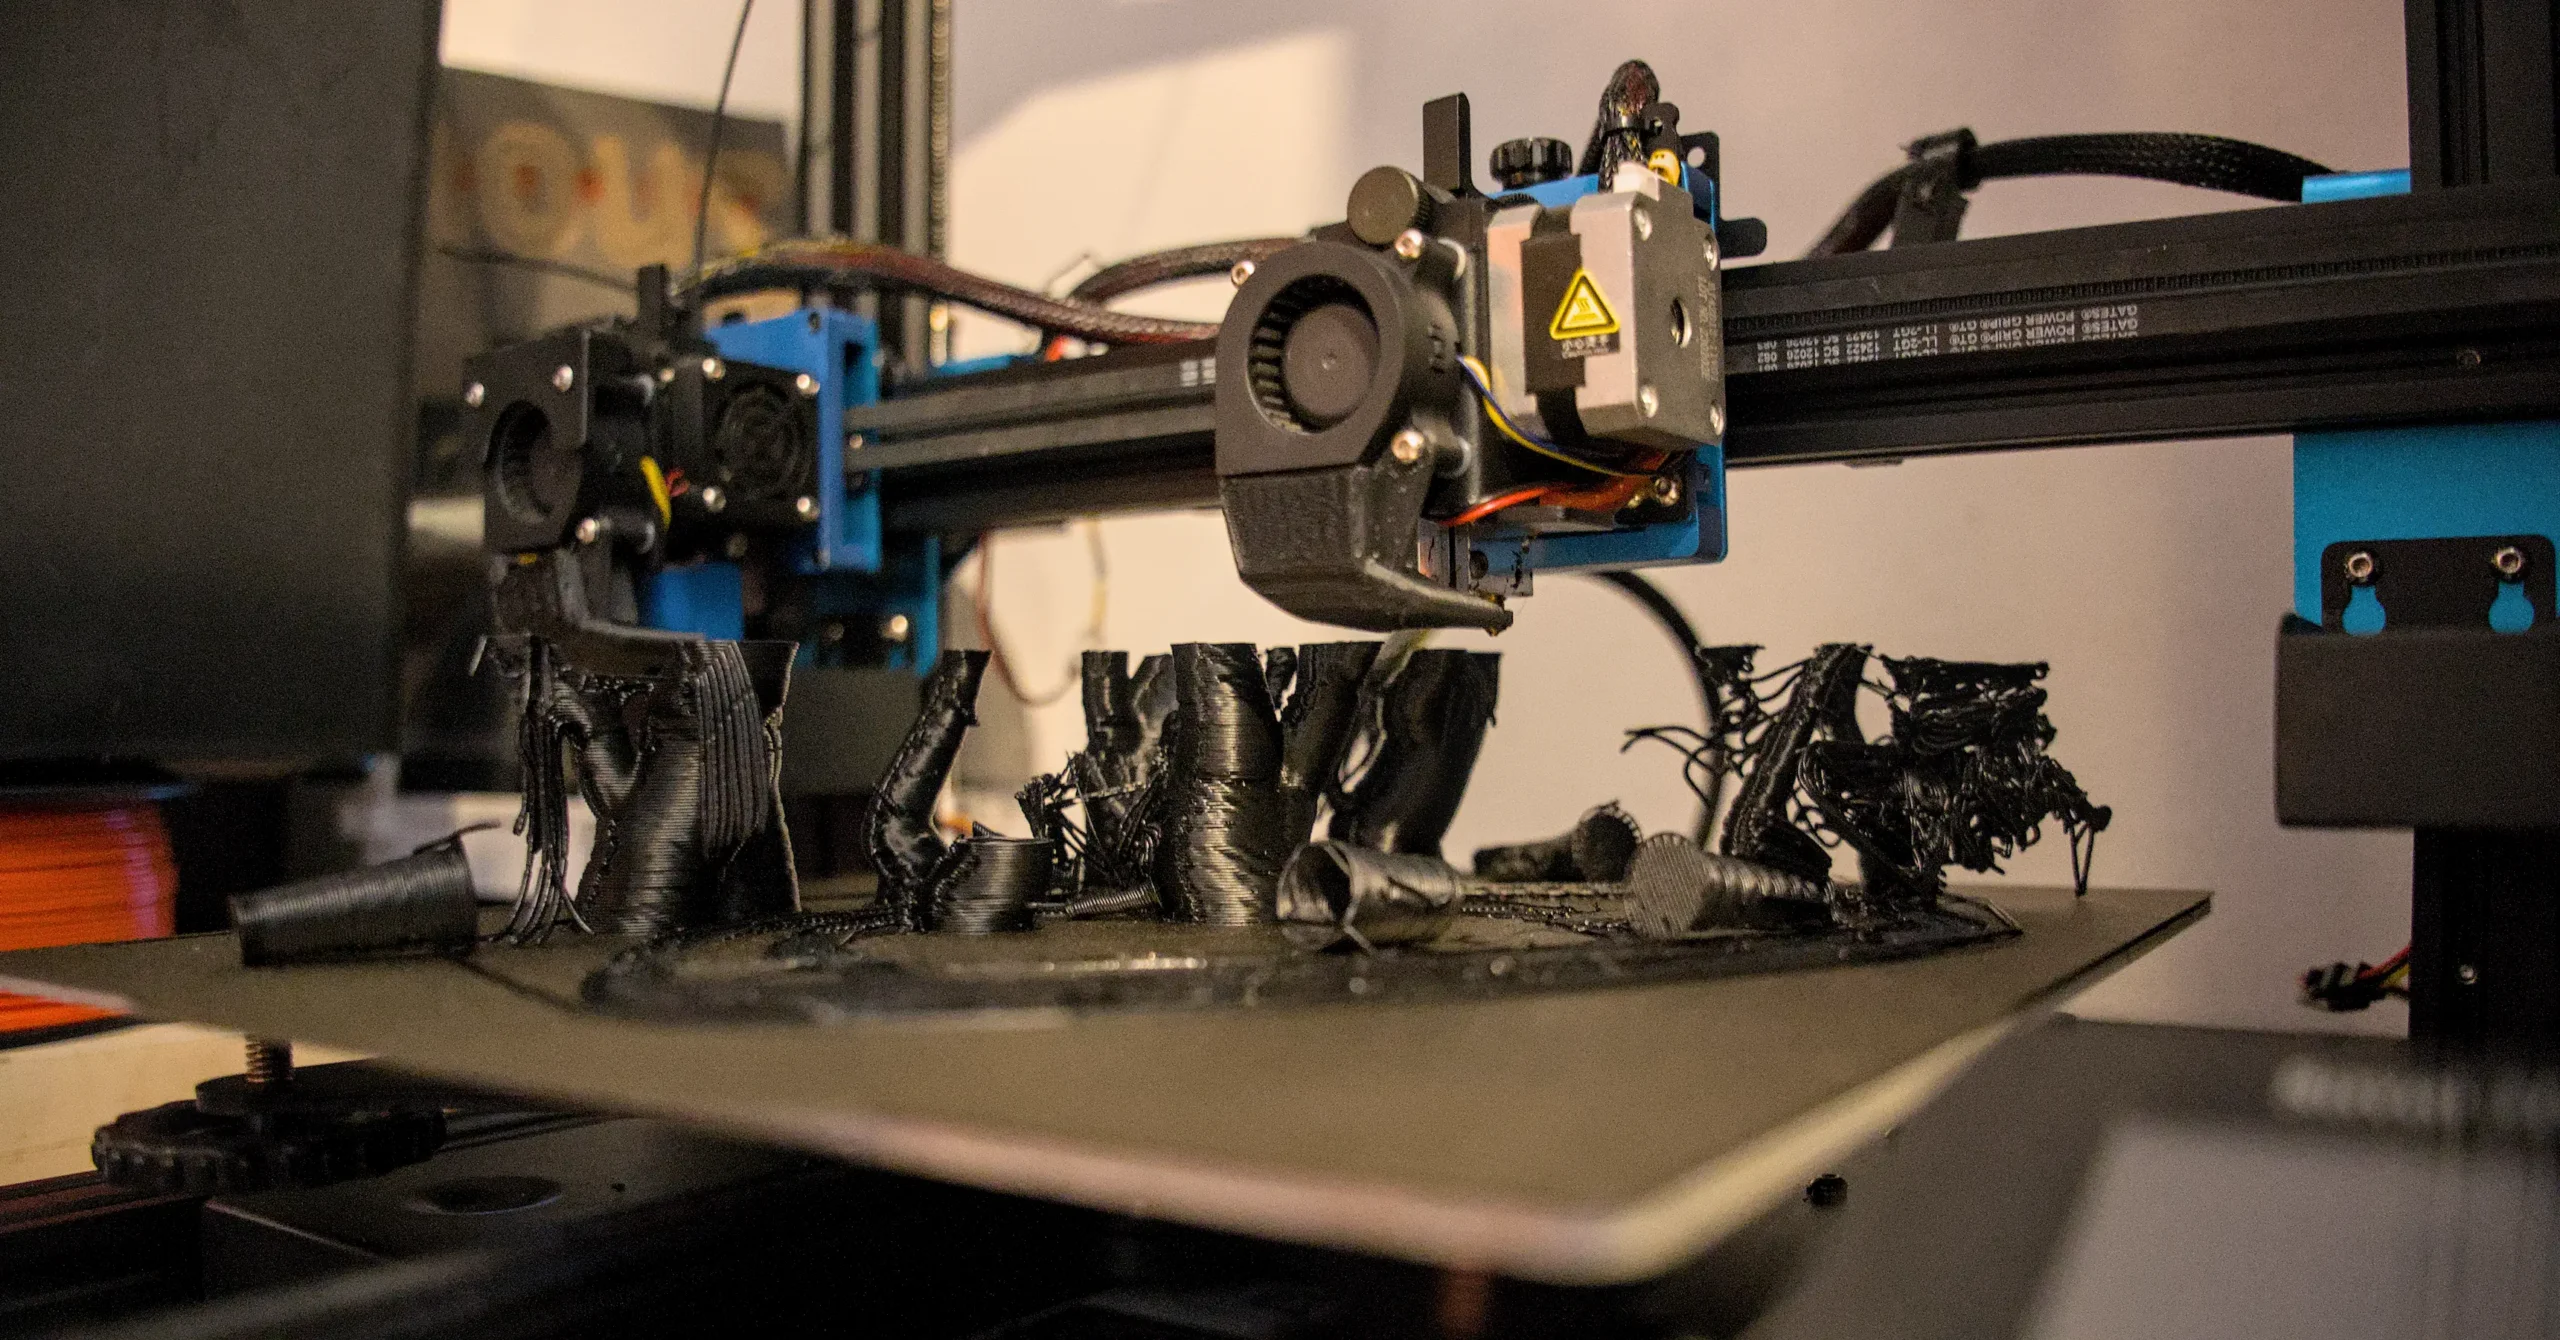
As usual, the reality differed from the theory a fair bit, and TPU absolutely didn’t want to cooperate. During the first attempt, the promised .9mm walls under-extruded by a lot. Instead of .9 lines of filament I was getting a web of thin strings (but I forgot to take a pic). Thinking this was an issue caused by oozing and retraction, I proceeded to disable retraction. The result? PLA supports printed. TPU nozzle got clogged after the first layer.
REPEATEDLY.
100% reproduction rate over 4 prints.
It turns out that once again, the answer to the question “should I 3D print this?” is the legendary quote by J Allen Brack:
You don’t want to do that. You think you do, but you don’t.
Time to walk over to the tactivators and pull the “emergency plan B” lever.
The next write-up about this project can be found here.