And you can have it, too. Cults3D, thingiverse.
I do pretty much all my photography with a single lens: Tamron SP 24-70mm F/2.8 Di VC USD G2. For people unfamiliar with photography, long story short: it’s a heavy hunk of glass and metal (just shy of 1kg).
This is a problem when using tripod. When using a tripod, center of gravity of your camera should be roughly on top of the head of the tripod. However, large and heavy lenses have the tendency to move center of gravity away from the head of the tripod — and this is very problematic: not only is it harder to aim your camera, but the tripod head is under a lot of unnecessary strain. Same goes for the lens mount on the camera.


This problem can be solved by a lens collar. Lens collars allow you to attach your lens to the tripod closer to the lenses’ center of gravity. As a result, the camera setup is better balanced, the tripod head sees less strain, camera is much easier to aim, and — just as a bonus — switching between landscape and portrait orientation is also often much easier with a collar mount.
Despite the very obvious upsides, there’s a major downside to lens collars. They may not exist for your lens.
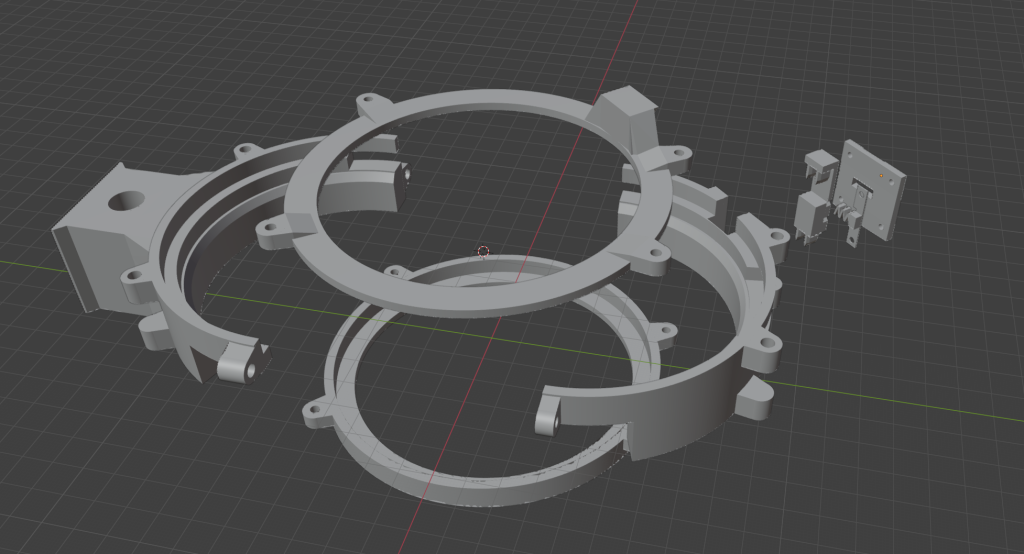
Judging by Amazon and Aliexpress, nobody makes a lens collar for my 24-70mm f/2.8. Now I could try and find a “universal” lens collar — in theory, anything 84mm should work for me — but in practice, the Tamron in question is a bit of a special snowflake. AF/MF and VR switches are where the most optimal place for the lens collar would be. The second most optimal place for a lens collar would be between focus and zoom rings — however, the band between two rings is narrow and curves slightly outward. This would make getting an universal lens collar a bit of a dangerous bet.
But fortunately, I have a 3D scanner, Blender, and a 3D printer.
Designing a custom collar mount
I started by scanning the lens, importing it in Blender, and re-creating its basic shape out of cylinders.

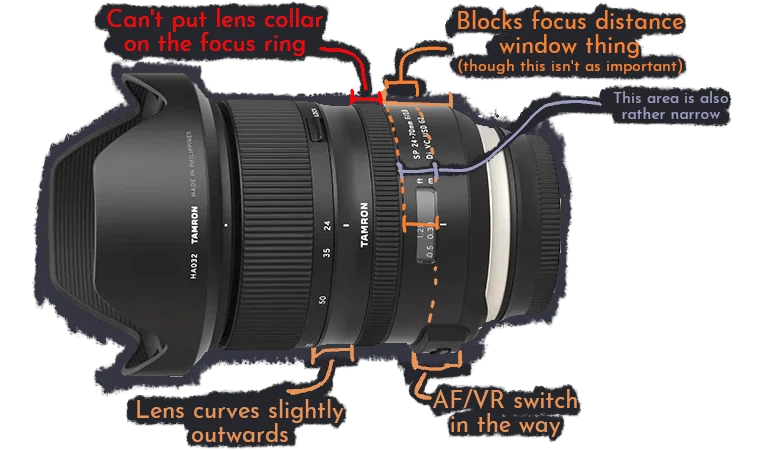
Then, I created a lens collar around it. I decided very early on that I don’t trust moving parts and thumb screws made out of 3D printed plastics, so I instead designed the collar mount in a way that requires me to pop the lens off the camera, slide it through the bracket, and then re-attach it to the camera.
The basic version of the lens collar thus looks something like this:
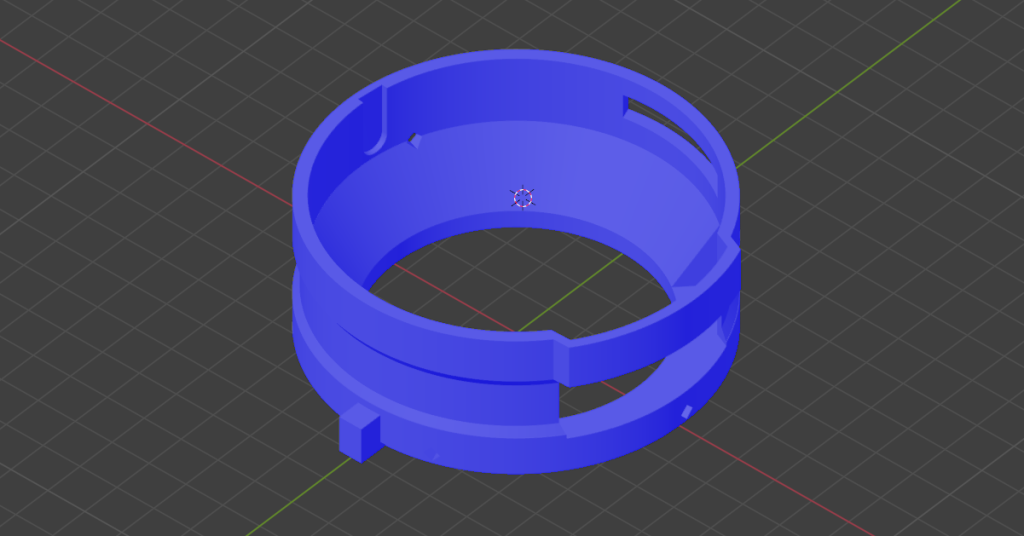
But I also want the ability to rotate the camera without having to fiddle with the tripod head, as well as the ability to lock the lens rotation. I decided that the easiest way to achieve that is to create a lens collar for my lens collar.
Step #1 was to beef up the existing collar I had. This will be a lens adapter from now on. If I want to rotate the lens, the rotating part needs to be radially symmetrical along the axis of rotation. The problem is that the lens isn’t radially symmetrical (at least, not with AF/MF and VR switches sticking out of it), so we need the outer dimensions of lens adapter to correct for that.
Step #2 was to add something that allows us to lock rotation. This one was easy: we add a cogwheel on the lens adapter, and a lock on the collar that goes around it.
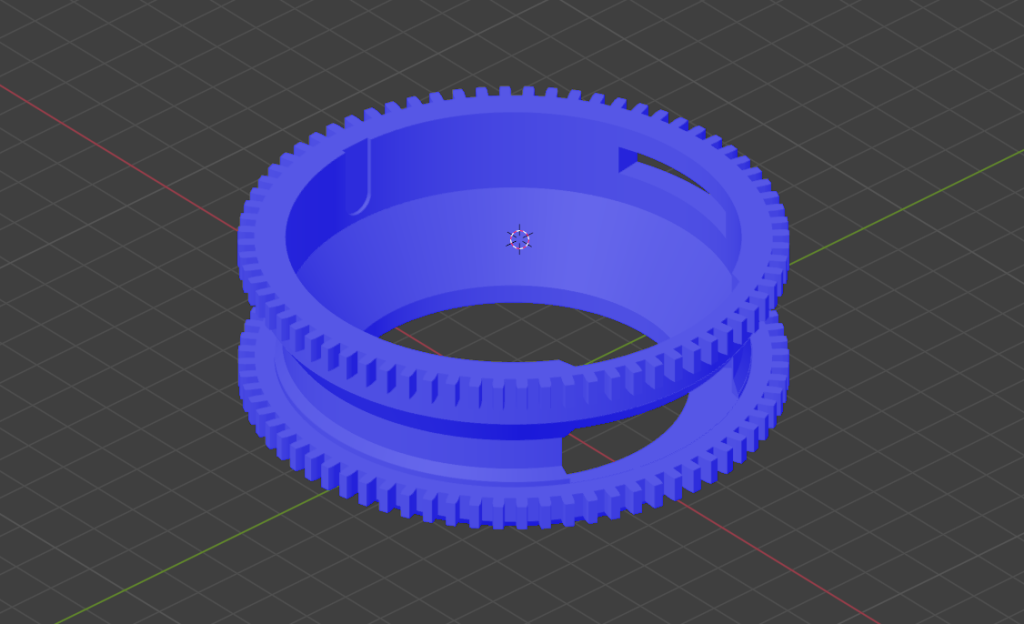
I also made it so the adapter can be printed with multiple materials. Because I don’t want to scratch the paint off my lens, I decided to print the innermost millimeter of the lens adapter with the TPU. How well that will prevent lens housing from the scratches is yet to be seen.
For the collar, there really was no other way but to print it in multiple parts, as lens adapter is designed to be wholly inside of the collar — but I generally trust threaded inserts to not break. Print orientation was also considered — since prints tend to break along layer lines, the print is is laid flat. That way, every layer goes around the lens, and thus keeping the lens on the tripod even if you get a split between the layer lines.
Printing
Printing took about two days, without too many problems. The assembly was also pretty boring, so let’s skip to the final results.
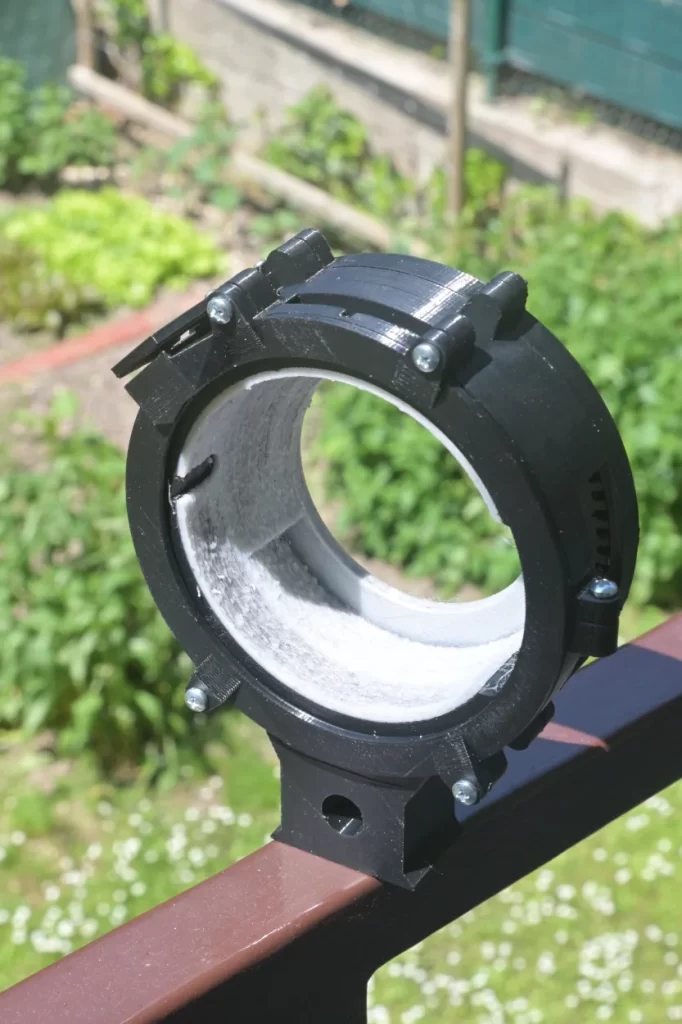
Here’s the finished lens collar:
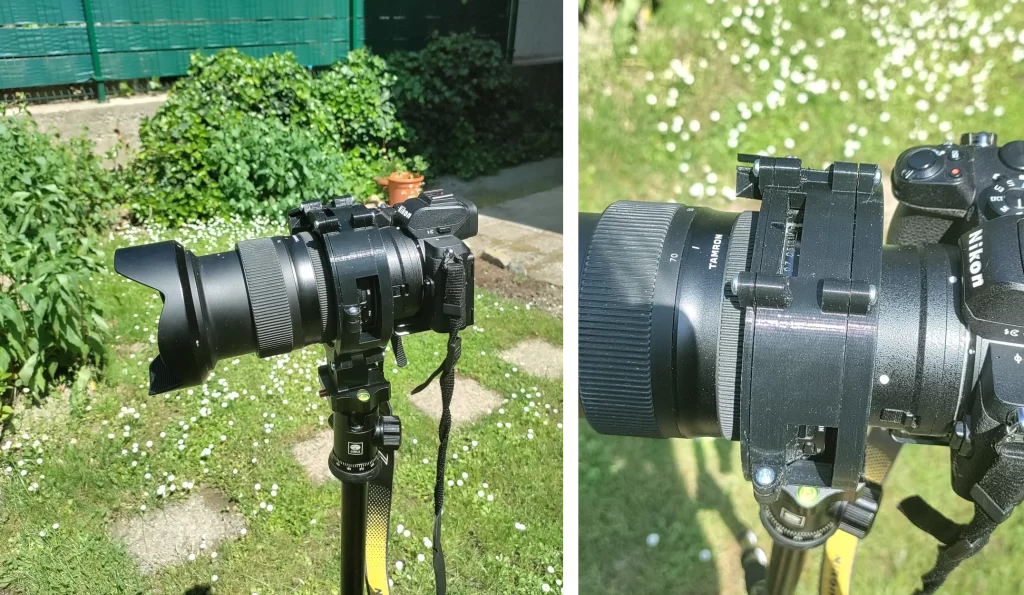
And here’s how it looks when it holds the lens:
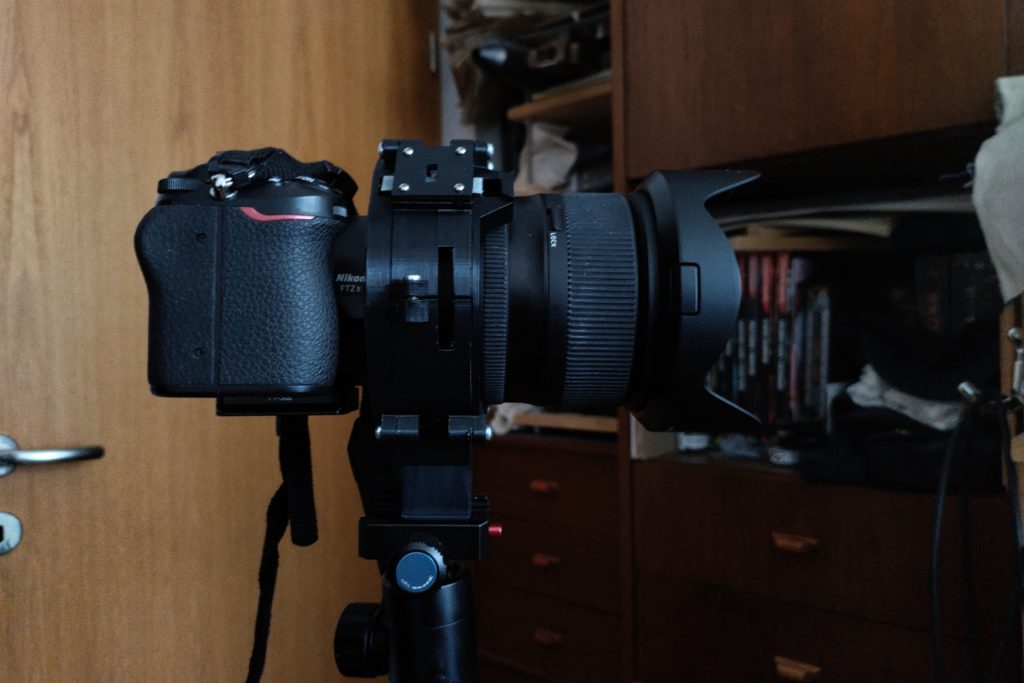
On the opposite end, there’s also the rotation lock switch:
Though in the present form, getting the switch from ‘locked’ to freely rotating is a bit of a pain. But hey — I’ve spent over a week on this, and it doesn’t bother me enough to re-design it from scratch.